Although I covered the basics that you need to know about Boons, I wanted to take the time to delve into the many Boons that each god has access to especially because there are going to be Boons that players will always want and Boons that are seemingly ineffective when trying to escape Tartarus.
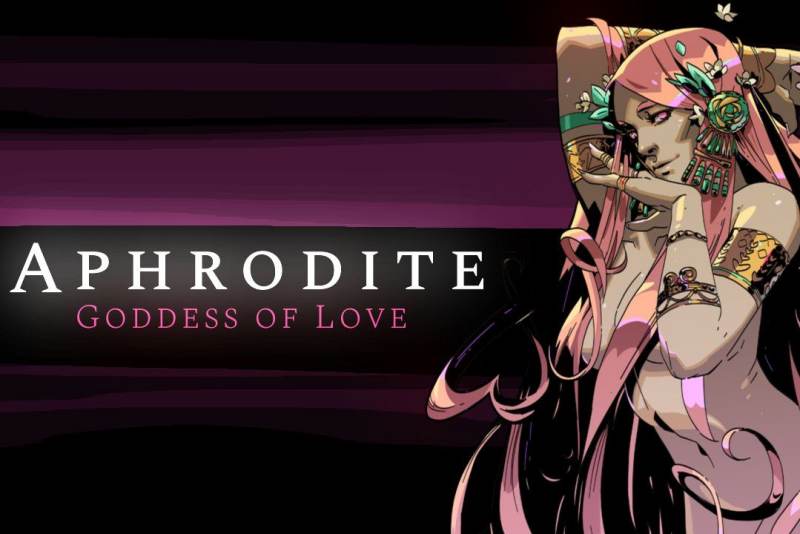
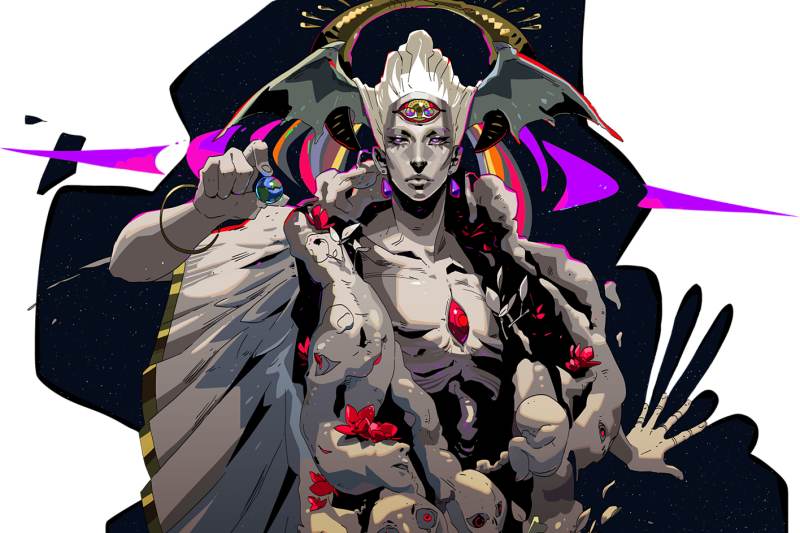
Aphrodite is one of the first gods that players locate and admittedly, while everything is RNG, she is a god that has refused to leave me alone in many escapes.
As mentioned in a previous article, Aphrodite is actually a god that I tend to ignore as I don’t actually find her passives to be the most useful for players.
Aphrodite can be good when stacking Status Curses, especially due to her Status Curses’ uptime, though simply from a DPS perspective, Aphrodite isn’t the most impactful god to select.
Essentially, Aphrodite is a bit of a Athena adjacent as she will help provide a bit more survivability to players, versus providing them with a lot more damage.
Note: Watch me play Hades and similar games on Twitch! Always happy to answer questions there!
WHAT ARE APRODITE’S STATUS CURSES?
Although I cover it more in depth in my Boons post, a short way to describe Athena is by stating she has two Status Curses being Weak and Charmed.
Weak essentially lowers the amount of damage that mobs do when they are affected by 30% and Charmed will cause enemies to fight for you.
Both for me, are fairly weak, though depending on what Weapon you are running with such as the Heart-Seeking Bow or Adamant Rail, players may actually benefit from these, especially in the early game.
OLYMPIAN AFFINITY
Aphrodite may be an Olympian god who can gain affinity, however, she will be very elusive in a first escape of Hades.
Aphrodite will only begin appear when a player completes their first run and will be important for players to gain Affinity with.
Players should always provide Nectar to Aphrodite as soon as they see her as she will provide players with the Eternal Rose Keepsake.
Although players can leave Aphrodite hanging after the first Nectar provided, players will have a gauge with her that can accept up to 7 offerings. 6 of these offerings will be Nectar and 1 will be Ambrosia.
Players will have to max out their relationships with Dusa, Thanatos and Megaera in order to complete their Favour with Aphrodite as she is the goddess of love, meaning that players will unlock 1 unique dialoge for each bond they force with them up to a maximum of 4, when they will unlock full Favour.
A BIT ABOUT APHRODITE’S BOONS
As mentioned, Aphrodite’s Boons will provide players with one of two Status Curses, being Weak or Charmed.
Weak typically will last 3 seconds, while Charmed will last longer depending on how they acquire the Status Curse.
As is with all gods, Aphrodite has different tiers of Boons, not only in regards to Common, Rare, Epic and Heroic, but will also need to unlock certain Boons prior in order to get specific upgrades. If players are interested in collecting these higher tiers, it’s going to be a good idea to focus on collecting multiple Aphrodite Boons as it can be very difficult to collect them late in a run if they haven’t been obtained early.
APHRODITE’S TIER 1 BOONS
As is with all gods, some Boons will require players to unlock other Boons in order to unlock other Boons.
Tier 1 Boons will always be available to players. That being said, since Tier 1 Boons are always available, they may plague a player who is trying to acquire a Tier 2 Boon.
Tier 2 Boons are not always stronger than Tier 1 Boons, though often they do come with better skills or resources and will be one of the ways players can acquire Duo Boons.
HEARTBREAK STRIKE
Heartbreak Strike is a Tier 1 Boon, meaning that players will be able to unlock it at any point.
With Heartbreak Strike players will be able to inflict enemies with Weak for 3 seconds while using their Attack and will be able to deal extra damage.
I’m actually a pretty big fan of the Heartbreak Strike as it provides players with a good amount of damage at the same time as making sure players are a bit more protected while in close range.
I find Heartbreak Strike is the best for Melee Weapons or Weapons that can Attack quickly, simply because of the damage debuff it provides on enemies.
While this is a Boon that increases damage, I really recommend using Boons that have damage over time with your ranged Weapons because this will help make them more useful when dealing damage, especially from far off or if there isn’t a whole lot of attack speed on the Weapon.
Players will be able to deal extra damage based on the Level of the Boon as well as the rarity, the following are the damage modifiers:
COMMON
The Common Heartbreaking Strike will help players deal 50% more Attack damage.
RARE
The Rare Heartbreaking Strike will help players deal 1.3-1.5x more Attack damage.
EPIC
The Epic Heartbreaking Strike will help players deal 1.8x-2.0 more Attack damage.
HEROIC
The Heroic Heartbreaking Strike will help players deal 2.3-2.5x more Attack damage.
HEARTBREAK FLOURISH
Heartbreak Flourish is a bit of a less useful Boon to have as it is bonded with a player’s Special.
The Heartbreak Flourish is a fairly common Boon to get as it is is a Tier 1 Boon that requires no other Boons to obtain.
Although the Heartbreak Flourish will provide players with extra damage on their Special, having their Special bound to Weak tends to be trickier to use unless it has a good amount of AoE or distance.
Admittedly, as I type that, I do note that all Specials have AoE, however, some have a smaller area than others.
Essentially with Heartbreak Flourish you’re going to want to make sure that you can hit all mobs who are coming close to you as if you miss any, the benefit of Weak is greatly reduced.
The nice thing about Heartbreak Flourish is that it will raise the damage of the player’s Special quite a bit, so if players are holding a Weapon that already has a good amount of damage on their Special, this is a good choice.
I would recommend it on the Stygian Blade or Twin Fists, however, it can also be good in general if players are struggling with taking damage on a Weapon.
The Heartbreaking Flourish, as mentioned, applies Weak on enemies while using a Special and the Weak Status Curse lasts for 3 seconds.
The amount of damage increase to the Special depends on the rarity of the Boon, being:
COMMON
The Common Heartbreak Flourish will help players deal 80% more Special damage.
RARE
The Rare Heartbreak Flourish will help players deal 1.3-1.5x more Special damage.
EPIC
The Epic Heartbreak Flourish will help players deal 1.8x-2.0 more Special damage.
HEROIC
The Heroic Heartbreak Flourish will help players deal 2.3-2.5x more Special damage.
CRUSH SHOT
Crush Shot is an absolute must avoid Boon for me. I… hate… it.
While admittedly there are many Boons associated with a player’s Cast that I don’t really care for, there aren’t many Boons that I absolutely despise like I despise Crush Shot.
Being a Tier 1 Boon, players will will see the Crush Shot quite a bit if they get Aphrodite, but I strongly recommend avoiding it because of it’s lack off range and the fact that it doesn’t actually deal much more damage than a regular Cast.
Essentially with Crush Shot a player’s Cast will reduce in range, only being 300 now and will become Wider.
I’ll be honest, the Cast’s width doesn’t really make sense to me and I simply cannot get over the Crush Shot’s range.
Admittedly, the place where I can find use for Crush Shot is when players are up against bosses, especially for the damage that Crush Shot can deal and how close ranged players will be to bosses.
Crush Shot is going to be a hit and miss for players who are on ranged Weapons as in these situations players are most likely going to want to stay away from enemies as much as possible and will not have very many opportunities to get Crush Shot off, however the option is going to be based on a player’s play style.
As Crush Shot has the ability to inflict Weak on a single enemy for 3 seconds, players are going to want to make sure that it is used on the toughest enemy, often being a boss. In situations where a player is up against trash mobs they can still use the Crush Shot in order to inflict Weak, however, the amount of damage Crush Shot deals is going to be the focus simply because it can often burst an enemy down to half.
Players running Crush Shot are going to want to make sure they can obtain the Cast as rapidly as possible as that’s the main way to cause as much DPS as possible.
It should be noted that players will not be able to combine the Crush Shot with the Aspect of Beowulf.
The amount of damage increase to the Cast depends on the rarity of the Boon, being:
COMMON
The Common Crush Shot will help players deal 90 Cast damage.
RARE
The Rare Crush Shot will help players deal 100 Cast damage.
EPIC
The Epic Crush Shot will help players deal 110 Cast damage.
HEROIC
The Heroic Crush Shot will help players deal 120 Cast damage.
PASSION FLARE
Passion Flare is honestly the better choice for Aphrodite’s Boons when it comes to Casts, though this comes with my playstyle.
The major reason I prefer Passion Flare is due to the fact that it does not decrease the range of the Cast, making it possible for players to target enemies that are further away.
The only issue with Passion Flare is the fact that players will not be able to acquire it unless they are running the Aspect of Beowulf.
As this is a terribly niche Boon to obtain, simply because there’s only one Aspect that can run it, most people will avoid choosing it because they are not used to the name, don’t let this be you.
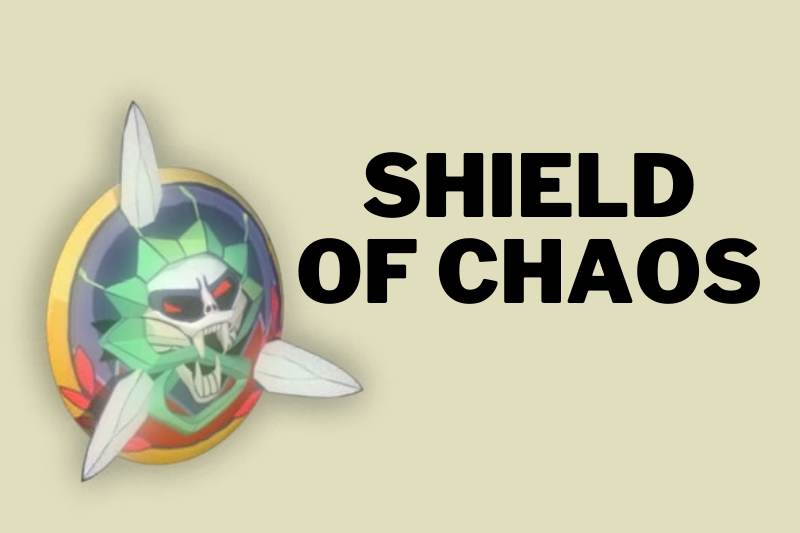
Essentially with Passion Flare players will deal damage to all foes around you and will inflict Weak, which is extremely useful for players running the Shield of Chaos.
Players will deal more damage with their Cast depending on the rarity of Passion Flare being:
COMMON
The Common Passion Flare will help players deal 80 Cast damage.
RARE
The Rare Passion Flare will help players deal 96 Cast damage.
EPIC
The Epic Passion Flare will help players deal 112 Cast damage.
HEROIC
The Heroic Passion Flare will help players deal 128 Cast damage.
PASSION DASH
Passion Dash is by far one of the fastest ways for players to apply Weak on as many enemies as possible.
While I typically ignore Passion Dash, as I would rather have a Dash that provides me with damage over time, I can’t deny how useful it can be to provide players with some protection whenever they do not have an Athena Boon to provide them with proper protection.
Passion Dash also makes it so a player can deal a bit of extra damage to enemies as the Passion Dash will deal damage to enemies in a 180 radius.
The damage will not be substantial, however, it can help assist players and in my opinion should never be used as a player’s first hit of damage if players are running a power up that deals more damage to an enemy when it is first hit.
After all enemies have been hit once it would be a good idea to rush around the field to impact all enemies with Weak as this will last for 3 seconds.
Weak is placed where a player lands after a Dash and will deal the following damage:
COMMON
The Common Passion Dash will help players deal 20 Dash damage.
RARE
The Rare Passion Dash will help players deal 24 Dash damage.
EPIC
The Epic Passion Dash will help players deal 28 Dash damage.
HEROIC
The Heroic Passion Dash will help players deal 32 Dash damage.
APHRODITE’S AID
While Aphrodite’s Aid isn’t my favourite god call in the game, the reality is that I commonly choose it whenever it’s available to me.
Aphrodite’s Aid requires players to charge up their god gauge to deal some impactful damage to enemies, however, unlike many other god calls Aphrodite’s Aid’s upgrades will be focused on lengthening the duration of the Charm it inflicts rather than the damage it deals.
Aphrodite’s Aid isn’t really useful when players have a bit of their god gauge full and really should be avoided unless players are struggling with enemies and need to inflict them with Charm, however, players will want to use it when the god gauge is full so they can deal 2,500 damage to enemies.
If players are struggling in a lesser chamber and need assistance they can essentially use a charge of their god gauge to cause an enemy to fight for them. Players will want to make sure that they don’t kill the Charmed enemy as this will essentially waste the use of Aphrodite’s Aid.
I’m personally not a huge fan of the Charm mechanic, I tend to avoid it, which is why I would never upgrade Aphrodite’s Aid with Poms.
Aphrodite’s Aid is most useful when against Bosses as it will help players lower them by a health state, which is why I will commonly take it as long as I don’t have another god’s god call active.
Admittedly, I’m a massive fan of god gauges which are able to take down a boss by a full health state as it makes it much easier to complete boss battles and complete Artifact farming runs faster.
The different tiers of Aphrodite’s Aid will extend the length of the Charm duration being:
COMMON
The Common Aphrodite’s Aid will Charm a mob for 5 seconds.
RARE
The Rare Aphrodite’s Aid will Charm a mob for 5.5 seconds.
EPIC
The Epic Aphrodite’s Aid will Charm a mob for 6 seconds.
HEROIC
The Heroic Aphrodite’s Aid will Charm a mob for 6.5 seconds.
DYING LAMENT
Dying Lament is a very interesting Boon to carry as it will essentially deal damage in a 200 damage radius when an enemy is killed.
While Dying Lament doesn’t deal a whole lot of damage at it’s base, it can be extremely useful when against hoards of mobs, especially if they have low health.
I find Dying Lament is unbelievably useful when in the area with mice right before fighting Hades as setting off a single Dying Lament can often trigger more of them, essentially wiping everything off the screen.
When enemies die, not only will they deal damage to nearby enemies, but they will also impact them with Weak.
The rarity of Dying Lament will raise the damage dealt with Death Blast being:
COMMON
The Common Dying Lament will help players deal 40 Death Blast damage.
RARE
The Rare Dying Lament will help players deal 1.3-1.5x Death Blast damage.
EPIC
The Epic Dying Lament will help players deal 1.8-2.0x Death Blast damage.
HEROIC
The Heroic Dying Lament will help players deal 2.3-2.5x Death Blast damage.
WAVE OF DESPAIR
I really never choose to use Wave of Despair as I’m simply not a fan of it’s mechanics.
Wave of Despair is going to be your defense Boon that will also deal some damage to enemies, though it will require players to get hit first.
Whenever a player gets hit when wielding Wave of Despair they will deal damage and inflict weak on all mobs within 700 spaces near them.
The different rarities of Wave of Despair will deal more damage being:
COMMON
The Common Wave of Despair will help players deal 50 Death Blast damage.
RARE
The Rare Wave of Despair will help players deal 1.3-1.5x Death Blast damage.
EPIC
The Epic Wave of Despair will help players deal 1.8-2.0x Death Blast damage.
HEROIC
The Heroic Wave of Despair will help players deal 2.3-2.5x Death Blast damage.
DIFFERENT LEAGUE
Different League is a pretty great Boon to have, especially if players are playing with god mode activated.
Although most players will not be utilizing god mode, which provides players with some extra defense anytime they fail an escape attempt, it can still be useful for players who are struggling with being damaged.
Essentially with Different League, players will have a set amount of damage resistance from all foes, though the lower rarities should be completely avoided in my opinion.
The following are the resist amounts players will have access to while running Different League:
COMMON
The Common Different League will provide players with 10% reduced damage from foes.
RARE
The Rare Different League will provide players with 13% reduced damage from foes.
EPIC
The Epic Different League will provide players with 15% reduced damage from foes.
HEROIC
The Heroic Different League will provide players with 18% reduced damage from foes.
LIFE AFFIRMATION
Life Affirmation is a very interesting Boon to get, though admittedly, not one that I require or want to use often.
Essentially Life Affirmation will allow players to get more Health whenever they pick it up any Health drops.
Admittedly, I don’t really rely on Health drops to make my way through escapes, though for newer players or players who are struggling in later Heats, this might actually be a good solution for you.
Life Affirmation cannot be upgraded using Poms and will not affect any items that are purchased from Charon’s Shop or collected from Thanatos.
Players will receive the following bonuses based on the rarity of the Boon:
COMMON
The Common Life Affirmation will provide players with 30% Health reward value.
RARE
The Rare Life Affirmation will provide players with 36% Health reward value.
EPIC
The Epic Life Affirmation will provide players with 42% Health reward value.
HEROIC
The Heroic Life Affirmation will provide players with 48% Health reward value.
APHRODITE’S TIER 2 BOONS
Tier 2 Boons Aphrodite Boons will require players to unlock at least one other Boon in order to acquire. Many of these Boons require any of the Tier 1 Boons though some will require a specific Boon in order to obtain.
The following is all the information you need to know about the Tier 2 Aphrodite Boons.
EMPTY INSIDE
Empty Inside will require players to have Heartbreak Strike, Heartbreak Flourish, Crush Shot or Passion Dash.
In my opinion, Empty Inside is actually worth having as it will increase the amount of time Weak is active for when a mob is affected by it.
My reason for liking Empty Inside is that it makes getting your Privileged Status modifier from the Mirror of Night activated and keeping it’s uptime while you apply other Status Curses up.
Empty Inside can actually extend the time of Weak quite a bit, making the Privileged Status modifier much more powerful or simply regularly obtainable for players.
Without Privileged Status, I’m not the biggest fan of Empty Inside as I do not rely on Weak to survive.
The following are the durations of Weak with Empty Inside:
COMMON
The Common Empty Inside will provide players with +5 seconds of Weak Duration.
RARE
The Rare Empty Inside will provide players with +7.5 seconds of Weak Duration.
EPIC
The Epic Empty Inside will provide players with +10 seconds of Weak Duration.
HEROIC
The Heroic Empty Inside will provide players with +12.5 seconds of Weak Duration.
SWEET SURRENDER
With Sweet Surrender players are able to deal more damage to enemies that have the Weak Status Curse on them.
Admittedly, I wish Sweet Surrender was more powerful as the bonus damage it allows players to deal to enemies is actually not that substantial, making it a bit of an “eh” choice for Boons.
Players will need Heartbreak Strike, Heartbreak Flourish, Crush Shot or Passion Death to obtain Sweet Surrender and will not be able to receive an increase when in unison with Broken Resolve.
Players will be able to deal the following extra damage with the different rarities of Sweet Surrender:
COMMON
The Common Sweet Surrender will provide players with 10% bonus damage to Weak enemies.
RARE
The Rare Sweet Surrender will provide players with 1.3-1.5x bonus damage to Weak enemies.
EPIC
The Epic Sweet Surrender will provide players with 2.0-2.5x bonus damage to Weak enemies.
HEROIC
The Heroic Sweet Surrender will provide players with 2.5-2.7x bonus damage to Weak enemies.
BROKEN RESOLVE
Broken Resolve makes all Weak effects more potent, essentially making it so that a mob hits you for less damage than before. This damage is stacked on the already 30% damage reduction that is already applied on enemies.
As Broken Resolve is an extremely defensive stat, players will be able to stack this with god mode, which provides you with some static bonus resistance whenever you die, and can actually make it so a player is never damaged by mobs who are Weak.
If you’re a player who is really struggling or simply just wants to get through the game’s story, this isn’t actually a bad idea to do especially if you’re running god mode, however, if you are not running god mode, Broken Resolve isn’t the most powerful.
Unfortunately, Broken Resolve cannot actually be upgraded by using Poms, however, it is easily acquirable as you will only need one of the following Boons to unlock it: Heartbreak Strike, Heartbreak Flourish, Crush Shot or Passion Dash.
The following is the amount of Weak Damage Reduction players will receive for each rarity of Broken Resolve:
COMMON
The Common Broken Resolve will provide players with 10% Weak Damage Reduction.
RARE
The Rare Broken Resolve will provide players with 12.5% Weak Damage Reduction.
EPIC
The Epic Broken Resolve will provide players with 15% Weak Damage Reduction.
HEROIC
The Heroic Broken Resolve will provide players with 17.5% Weak Damage Reduction.
BLOWN KISS
Blown Kiss is is by far the better upgrade for players to get for their Cast, though players are going to have to gamble on whether or not they will get it as players will need Crush Shot first, which in my opinion is one of the worst Casts to have.
The Blown Kiss works much better than Crush Shot, especially because it has a great deal more range, being double and will actually be 30% wider than it’s alternate form.
Similar to some other Aphrodite Boons, players will not be able to upgrade Blown Kiss with any Poms, however, this isn’t much of a problem as the damage is already high on Blown Kiss and realistically it does not need much more.
It should be noted that the passive for Blown Kiss will actually make it most powerful against undamaged foes, meaning players will want to stack this damage on other passives that deal more damage to undamaged foes.
If players are trying to maximize their damage, the y will want to ensure that they always begin a chamber by attacking enemies with your Cast.
While players will deal the most damage to undamaged foes, players will still deal a good amount of damage to foes that have been damaged, especially due to it’s range.
The following is the bonus damage dealt to undamaged foes using Blown Kiss for it’s rarity:
COMMON
The Common Blown Kiss will provide players with 50% bonus damage to undamaged foes.
RARE
The Rare Blown Kiss will provide players with 1.5x bonus damage to undamaged foes.
EPIC
The Epic Blown Kiss will provide players with 2.0x bonus damage to undamaged foes.
HEROIC
The Heroic Blown Kiss will provide players with 2.5x bonus damage to undamaged foes.
APHRODITE’S TIER 3 BOONS
Aphrodite’s Tier 3 Boons are fairly rare to acquire and will only come in a Legendary State.
By far the Tier 3 Boon is going to be the best Boon to acquire for a god, though admittedly Aphrodite’s doesn’t really impress me.
In order to acquire the Tier 3 Boon players will need two separate Boons and then must rely on RNG to receive the availability of the Legendary Boon.
The following are the Boons required to unlock the Tier 3 Boon:
Heartbreak Strike, Heartbreak Flourish, Crush Shoot or Passion Dash
as well as
Empty Inside, Sweet Surrender or Broken Resolve
UNHEALTHY FIXATION
The tier 3 Boon players can obtain is called Unhealthy Fixation and actually has quite a bit of utility as long as players like the passive of Charm.
Unhealthy Fixation has a 15% chance to trigger Charm on any enemy that is inflicted with Weak, causing enemies to fight for you for 4 seconds.
Charm can be great for players who are in Chambers as it will help players shred through mobs faster, however, up against Bosses, Unhealthy Fixation isn’t as useful as it can only technically stun the boss for 15%.
I admittedly don’t really try to acquire Unhealthy Fixation.
DUO BOONS
As I’ve already written a Duo Boons guide, I’m not going to go too deep into this.
Essentially players will want to obtain either Dionysus, Poseidon, Zeus, Demeter, Athena, Artemis or Ares Boons in order to acquire a Duo Boon, though I strongly recommend selecting only one or two of these god’s Boons in order to raise your chances of gaining access to a Duo Boon.
For me, the synergy between Ares, Zeus and Dionysus are the best. I like Ares the most due to Doom being so powerful, though Zeus will provide a good amount of use for your God Call and Dionysus for the amount of Hangover damage you can cause.
At the end of the day, I’m still not a huge fan of Aphrodite, but I can see how useful she can be for some players.
Leave a Reply