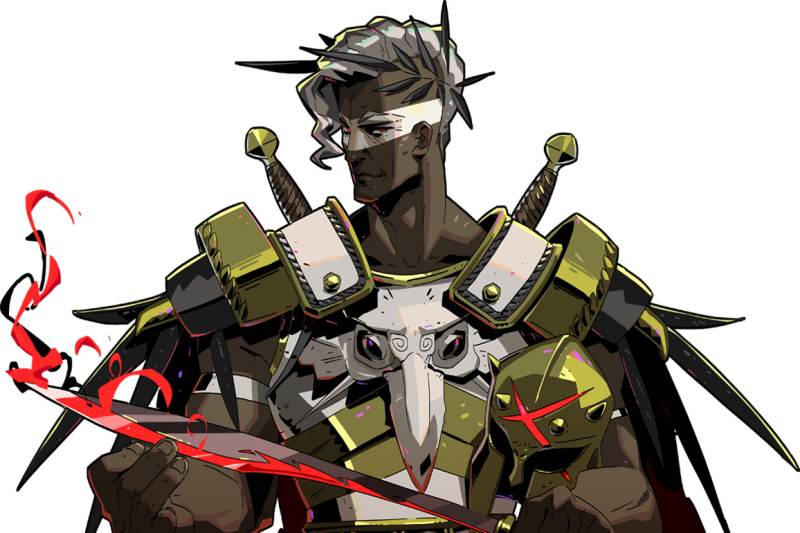
Ares is by far one of my favourite gods to form a bond with as I love his passives. While I’m not a huge fan of all the passives that Ares provides, it doesn’t mean that I ever avoid choosing to use him as his positives outweigh his negatives in most situations.
Ares comes with a new passive that deals a good portion of damage called Doom. Essentially Doom is a marker that players can place on a mob, dealing a high amount of damage after a few seconds, being one of the best ways to passively deal damage to enemies.
While Doom can only be placed on an enemy at once at a time, players will still deal a substantial amount of damage this way.
The mechanic I’m not a huge fan of when it comes to Ares is his Blade Rifts and this is simply due to play style.
While admittedly Blade Rifts are powerful, the reality is that they are quite difficult to control and any time they are placed on your Cast they are at risk of causing you DPS loss, meaning that I will almost always choose a different Boon for this as I tend to prefer them. The choice is yours though and if you have a good handle on your Blade Rifts, then more power to you for selecting them.
Ares is overall great due to his uncanny ability to provide players with more base damage and works really well in tandem with most gods.
Note: Watch me play Hades and similar games on Twitch! Always happy to answer questions there!
OLYMPIAN AFFINITY
Ares, being one of the many Olympian gods will have the ability to gain Affinity with a player.
Players can gain affinity by trading in Nectar to him and upon providing the first gift, he will provide a player with his Keepsake the Blood-Filled Vial.
At first players will want to hold off on providing Ares too much Nectar as he will not provide players with any further rewards and players are recommended to farm for Companions, though when a player has enough Artifacts to waste, they can do so, being able to max him out at 7 Hearts.
Ares has a hidden prophecy in order to get favour called the War-God’s Bloodlust which will require players to kill at least 10,000 enemies. Players will not be able to redeem this prophecy immediately and will need to continue talking to Ares a few encounters later.
ARES TIER 1 BOONS
Ares’ Tier 1 Boons do not require players to have any other Boons and always have the ability to show up regardless of how many Boons a player has access to.
Players should be cautious of taking too many Tier 1 Boons, especially if they are on the hunt for Legendary Boons, so making yourself aware of which Boons you will need to get the Tier 2 Boons you want is going to be very important, otherwise players may lock themselves out of the Boons they require.
CURSE OF AGONY
Curse of Agony is one of the most basic Boons players can obtain while trying to upgrade using Ares.
While not the most powerful Boon to acquire, it is a Boon that I typically always take simply because of how easy it is for players to impact enemies with Doom.
With Curse of Agony, players will be able to cause Doom on an enemy any time they use their Attack. Although players will only be able to inflict an enemy once with Doom only being able to replace it when Doom has expired, players will deal a good amount of damage to mobs while having the ability to run away in between.
In my opinion, Curse of Agony is the best on ranged Weapons as players will be able to hit multiple targets with Doom so they don’t have to focus on a single enemy, using the opportunities to dodge in between.
Although it’s not going to deal the most DPS if a player is struggling to hold their ground with a ranged Weapon they can essentially only use Doom to kill enemies, at least until they get a hold of their ranged Weapons.
Doom will always take 1.1 seconds before it hits the enemy, though it will deal more damage based on the rarity of the Boon being:
COMMON
The Common Curse of Agony will help players deal 50 damage with Doom.
RARE
The Rare Curse of Agony will help players deal 75 damage with Doom damage.
EPIC
The Epic Curse of Agony will help players deal 100 damage with Doom.
HEROIC
The Heroic Curse of Agony will help players deal 125 damage with Doom.
CURSE OF PAIN
Curse of Pain is a bit less useful for a way to apply Doom, though it can be impactful if a player is running the Heart-Seeking Bow.
Instead of being able to apply Doom using a player’s Attack, players will now be able to do so using their Special.
Players may want to choose the Curse of Pain if they want a Boon that raises the player’s Attack damage, though having Doom on a player’s Special can often feel tedious due to how slow a Special usually is.
I personally like having it on the Heart-Seeking Bow as it deals some of the lowest damage out of all Specials and I don’t like to upgrades it’s Special damage.
Another typical Weapon I do this for is the Shield of Chaos because it similarly does not deal a great deal of damage using it’s Special and is a good way to get Doom off on your Special.
Similar to Curse of Agony, players will have to wait 1.1 second before Doom inflicts an enemy and the damage will depend on the rarity of the Boon.
Although a bit less than Curse of Agony, on Specials that deal very little damage or can target multiple mobs easily, it’s a great choice.
The following is the damage Curse of Pain will inflict using Doom:
COMMON
The Common Curse of Pain will help players deal 60 damage with Doom.
RARE
The Rare Curse of Pain will help players deal 80 damage with Doom damage.
EPIC
The Epic Curse of Pain will help players deal 100 damage with Doom.
HEROIC
The Heroic Curse of Pain will help players deal 120 damage with Doom.
SLICING SHOT
Now for one of my least favourite Boons in the game, Slicing Shot.
While I talk about Slicing Shot I have to state that this comes down to play style over anything else, as Slicing Shot can actually be useful for players who use it correctly. I am not one of these players and I’ll admit, I’ve made my build so it’s actually a hinderance to my play style.
Effectively with Slicing Shot players will no longer be able to lodge their Cast inside of enemies and instead will summon Blade Rifts onto the ground, which will slowly move towards an enemy.
Blade Rifts spawned from Slicing Shot will last 4 seconds and will deal damage every 0.2 seconds, making them quite impactful.
Blade Rifts have 150 Radius and will move at 250 Speed, meaning that while players have a good amount of area when using Blade Rifts, sometimes they move too quickly for a player and will essentially miss mobs.
Due to the way that Slicing Shot works, players will not be able to combine it with the Aspect of Beowulf.
When upgrading the Slicing Shot players will be able to raise the amount of damage dealt every 0.2 seconds. The following is how the rarity affects the player’s damage using Blade rifts:
COMMON
The Common Slicing Shot will help players deal 20 damage with per hit of the Blade Rift.
RARE
The Rare Slicing Shot will help players deal 22 damage with per hit of the Blade Rift.
EPIC
The Epic Slicing Shot will help players deal 26 damage with per hit of the Blade Rift.
HEROIC
The Heroic Slicing Shot will help players deal 20 damage with per hit of the Blade Rift.
SLICING FLARE
As the Aspect of Beowulf does not allow players to use Slicing Shot, players will have access to an alternative Boon that actually deals more damage using the same concept.
Slicing Flare allows players to send forth Blade Rifts while using their Casts, though dealing more damage than with Slicing Shot.
The mechanics of these Blade Rifts is the same, so I’m not going to cover them again, however, the following is the amount of damage players will be able to deal for each rarity of Slicing Flare:
COMMON
The Common Slicing Flare will help players deal 30 damage with per hit of the Blade Rift.
RARE
The Rare Slicing Flare will help players deal 36 damage with per hit of the Blade Rift.
EPIC
The Epic Slicing Flare will help players deal 42 damage with per hit of the Blade Rift.
HEROIC
The Heroic Slicing Flare will help players deal 46 damage with per hit of the Blade Rift.
BLADE DASH
Blade Dash, while not powerful, is my most common choice when trying to use Blade Rifts, especially with melee weapons.
As a player who utilizes his Dash fairly regularly, I find it really simple to apply Blade Rifts on enemies, especially when I’m running the Twin Fists.
The Blade Dash works a bit differently in regards to Blade Rifts, applying the Blade Rifts for a shorter period of time, but allowing them to deal more rapid damage than other versions of them.
Blade Rifts from the Blade Dash will only last 0.7 seconds, however, will deal every 0.1 second damage, meaning players are going to want to make sure that they weave in and out of enemies regularly in order to deal the most damage.
Blade Rifts caused by the Blade Dash are fairly large, coming in at 150 radius and players will be able to place multiple Blade Rifts on the ground as long as they have enough Dashes.
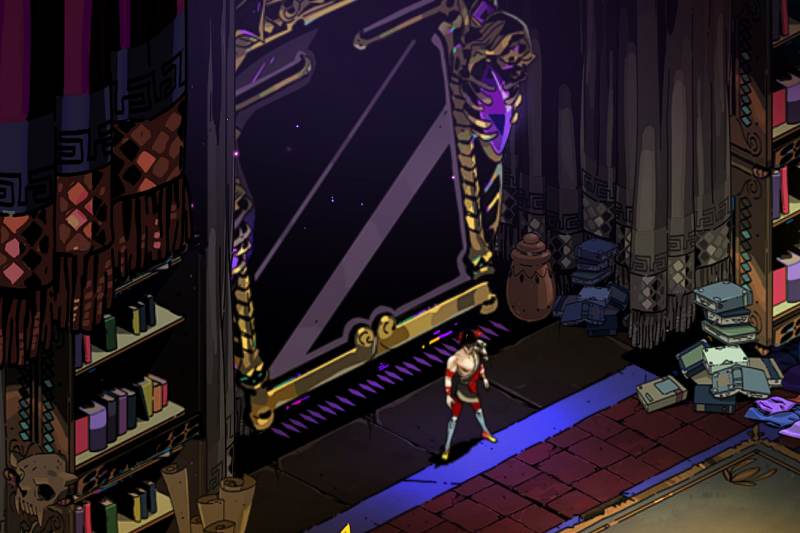
While not always the best choice, it is typically recommended that players run an escape with as many Dashes as they can obtain from the Mirror of Night as this will greatly improve the players damage and capability to damage as many enemies as possible.
The following is the amount of damage players will deal using their Blade Rifts depending on the rarity of Blade Dash:
COMMON
The Common Blade Dash will help players deal 10 damage with per hit of the Blade Rift.
RARE
The Rare Blade Dash will help players deal 12 damage with per hit of the Blade Rift.
EPIC
The Epic Blade Dash will help players deal 14 damage with per hit of the Blade Rift.
HEROIC
The Heroic Blade Dash will help players deal 16 damage with per hit of the Blade Rift.
ARES’ AID
Although still not my favourite god call in the game, Ares’ Aid is one of the most useful god calls to have, especially if players are struggling to keep alive.
I personally use Ares’ Aid whenever I’m struggling in later Heats as both deals damage and protects a player from being damaged.
Ares’ Aid can be used in most if not all situations and is one of the few god calls I will regularly use on trash mobs, especially if I’m being overwhelmed.
Although I would strongly recommend that players save up their God Gauge until it is maxed out as this will provide players with a bonus of 6 seconds in the Impervious Blade Rift state.
If players are feeling overwhelmed by mobs, I strongly recommend using a lesser cost to stay safe and deal some decent damage.
The different Rarities of Ares’ Aid will raise the damage players deal using the Blade Rift, being:
COMMON
The Common Ares’ Aid will help players deal 30 damage with per hit of the Blade Rift.
RARE
The Rare Ares’ Aid will help players deal 38 damage with per hit of the Blade Rift.
EPIC
The Epic Ares’ Aid will help players deal 45 damage with per hit of the Blade Rift.
HEROIC
The Heroic Ares’ Aid will help players deal 53 damage with per hit of the Blade Rift.
CURSE OF VENGEANCE
Curse of Vengeance is another one of those Boons that I typically avoid, sine for me I’m not a huge fan of dealing damage to enemies once I get damaged.
While admittedly, Curse of Vengeance will deal a good amount of damage, I tend to run with Athena protect Boons, so I significantly reduce the effectiveness of Curse of Vengeance.
The way that Curse of Vengeance works is that players will have to get damaged by an enemy and will impact all surrounding enemies in a 450 radius with Doom.
Doom will take place after 1.1 seconds and will deal a shocking amount of damage for such a passive Boon.
Quite honestly, Curse of Vengeance can be very useful for players, especially those who are always actively taking damage against hoards of mobs.
The different rarities of Curse of Vengeance will impact how much damage a player deals using their Doom, being the following:
COMMON
The Common Curse of Vengeance will help players deal 100 revenge damage with Doom.
RARE
The Rare Curse of Vengeance will help players deal 120 revenge damage with Doom.
EPIC
The Epic Curse of Vengeance will help players deal 140 revenge damage with Doom.
HEROIC
The Heroic Curse of Vengeance will help players deal 160 revenge damage with Doom.
URGE TO KILL
Urge to Kill begins the journey of why I am so in love with Ares as he is able to provide players with extra damage on all of their damage.
Although Urge to Kill does not provide an immense boost in damage, it will power up a player’s Attack, Special and Cast, making it especially useful for players who are running Weapons that have a stricter rotation or already have a decent amount of damage on all of their attacks.
The best Weapon candidates include the Stygian Blade and Twin Fists, simply because they will encourage players to continue focusing on their rotation rather than sticking to a specific attack the majority of the time.
The different tiers of Urge to Kill heavily impact the amount of damage a player deals with their Attack, Special and Cast. The following are the damage increases:
COMMON
The Common Urge to Kill will help players deal 10% more damage with their Attack, Special and Cast.
RARE
The Rare Urge to Kill will help players deal 13% more damage with their Attack, Special and Cast.
EPIC
The Epic Urge to Kill will help players deal 16% more damage with their Attack, Special and Cast.
HEROIC
The Heroic Urge to Kill will help players deal 19% more damage with their Attack, Special and Cast.
BATTLE RAGE
Battle Rage is a strong Boon to have, though players will have a good amount of down time with it.
With Battle Rage, players will essentially want to focus on bursting down single enemies at a time as with it players will essentially need to kill an enemy in order to gain a bonus in damage.
Players will only see this damage increase when they kill an enemy and it will only impact their next Attack or Special.
In most cases, players will want to use Battle Rage on their Attack rather than their Special as their Attack deals more damage, however, if a player has a Special that has a good amount of AoE and damage they may want to use it on their Special to be able to successfully burst down enemies faster.
In my opinion, the best Weapon to run Battle Rage on is the Heart-Seeking Bow, especially because it’s Empowered Shot deal so much damage and can be tricky to get off. I strongly recommend that players only use Battle Rage on an Empowered Shot as it will help players successfully obtain Battle Rage multiple times in a row.
The following is the bonus damage players will deliver after they kill an enemy using their Attack or Special when using Battle Rage:
COMMON
The Common Battle Rage will help players deal 100% more damage with their Attack or Special after they kill an enemy.
RARE
The Rare Battle Rage will help players deal 150% more damage with their Attack or Special after they kill an enemy.
EPIC
The Epic Battle Rage will help players deal 200% more damage with their Attack or Special after they kill an enemy.
HEROIC
The Heroic Battle Rage will help players deal 250% more damage with their Attack or Special after they kill an enemy.
BLOOD FRENZY
Blood Frenzy is admittedly one of those Boons that I always ignore because I don’t like the way that it functions.
My honest opinion is that the utility of Blood Frenzy is pretty shit given that a player will have to die and use Death Defiance to use it.
As players will only have a maximum of 3 charges of Death Defiance players will not have a good amount of opportunity to use Blood Frenzy, though I can understand the utility of it, especially if players are in later Heats and expect to die in a Boss Battle.
The nice thing about Blood Frenzy is that players will receive bonus damage on all of their forms of attacks for the remainder of the time in that Encounter, meaning that players can technically deal an immense amount of damage, even with their God Call against Hades himself.
I would strongly recommend if players are hoping to run Blood Frenzy they try to refill their lost Death Defiance before the final battle to ensure that you will have a way to boost your damage.
It should be noted that players will not be able to use Poms to upgrade their Blood Frenzy, but this isn’t a huge issue as players will still have a great damage output depending on the rarity of their Blood Frenzy.
The different rarities of Blood Frenzy will simply increase the amount of damage players will deal for the rest of the encounter after they use Death Defiance, being:
COMMON
The Common Blood Frenzy will help players deal 15% more damage for the rest of an Encounter after they use Death Defiance.
RARE
The Rare Blood Frenzy will help players deal 22% more damage for the rest of an Encounter after they use Death Defiance.
EPIC
The Epic Blood Frenzy will help players deal 30% more damage for the rest of an Encounter after they use Death Defiance.
HEROIC
The Heroic Blood Frenzy will help players deal 37% more damage for the rest of an Encounter after they use Death Defiance.
ARES TIER 2 BOONS
Tier 2 Boons Ares Boons will require players to unlock at least one other Boon in order to acquire. Many of these Boons require any of the Tier 1 Boons though some will require a specific Boon in order to obtain.
The following is all the information you need to know about the Tier 2 Ares Boons.
BLACK METAL
Black Metal is a really great Boon to have, especially if players are using their Blade Rifts regularly.
As Black Metal will require players to have Blade Rifts, players will need to have Slicing Flare or Slicing Shot, Blade Dash or Ares’ Aid.
The Black Metal upgrade works best on the first three Boons, though can also be useful for Ares’ Aid, though feels a bit unnecessary.
Unfortunately, Black Metal doesn’t increase the amount of damage players output using their Blade Rifts, though it will increase the amount of are the Blade Rifts take, making it better for targeting more enemies.
The following are the amounts of Bonus Area Effect players will receive for their Blade Rifts using Black Metal:
COMMON
The Common Black Metal will increase the Area of Effect of Blade Rifts by 20%.
RARE
The Rare Black Metal will increase the Area of Effect of Blade Rifts by 22%.
EPIC
The Epic Black Metal will increase the Area of Effect of Blade Rifts by 24%.
HEROIC
The Heroic Black Metal will increase the Area of Effect of Blade Rifts by 26%.
ENGULFING VORTEX
The Engulfing Vortex is another great Boon to have to empower your Rift Blades, though not always the most useful.
Engulfing Vortex is most useful when players need to bring enemies together to hit them all together with an Attack or Special.
Engulfing Vortex requires players to have Boons that provide them with Blade Rifts, being Slicing Flare or Slicing Shot, Blade Dash or Ares’ Aid.
I strongly recommend getting the Engulfing Vortex on Weapons with Pierce, specifically the Heart-Seeking Bow. Having all enemies in one place while running with the Heart-Seeking Bow is a must and Engulfing Vortex really helps.
Unfortunately, players will not be able to upgrade Engulfing Vortex using Poms, however, this isn’t really a problem as players will mostly be using it for it’s pull in power.
The different Rarities of Engulfing Vortex will extend the amount of time Blade Rifts last, though not by much. The are the following:
COMMON
The Common Engulfing Vortex will increase the duration of the Blade Rifts by 0.2 seconds.
RARE
The Rare Black Metal will increase the duration of the Blade Rifts by 0.3 seconds.
EPIC
The Epic Black Metal will increase the duration of the Blade Rifts by 0.4 seconds.
HEROIC
The Heroic Black Metal will increase the duration of the Blade Rifts by 0.5 seconds.
DIRE MISFORTUNE
Dire Misfortune is a very interesting Boon to have and is actually very useful for players who are running Curse of Agony or Curse of Pain.
Essentially with Dire Misfortune, players will be able to stack multiple Doom effects on enemies, though it will not deal the full amount of Doom and instead will deal bonus damage when Doom hits depending on how many stacks you’ve placed.
Dire Misfortune cannot be upgraded using Poms, however, if used correctly, players will deal a great deal of damage.
The different Rarities will raise the amount of Bonus damage for curse placed, being:
COMMON
The Common Dire Misfortune will increase the damage dealt by every curse by 10.
RARE
The Rare Dire Misfortune will increase the damage dealt by every curse by 12.
EPIC
The Epic Dire Misfortune will increase the damage dealt by every curse by 14.
HEROIC
The Heroic Dire Misfortune will increase the damage dealt by every curse by 16.
IMPENDING DOOM
Impending Doom will allow players to deal some extra damage after 0.5 seconds.
Players will be able to obtain it if they have Curse of Agony, Curse of Pain, or Curse of Vengeance.
Impending Doom can greatly impact the amount of damage you deal with your Doom and is multiplicative, meaning that players with strong Doom damage will reap even more benefits.
The Rarity of Impending Doom will raise how much bonus damage Doom deals:
COMMON
The Common Impending Doom will deal 60% more damage after 0.5 seconds.
RARE
The Rare Impending Doom will deal 65% more damage after 0.5 seconds.
EPIC
The Epic Impending Doom will deal 70% more damage after 0.5 seconds.
HEROIC
The Heroic Impending Doom will deal 75% more damage after 0.5 seconds.
ARES TIER 3 BOONS
Ares’ Tier 3 Boons are fairly rare to acquire and will only come in a Legendary State.
By far the Tier 3 Boon is going to be the best Boon to acquire for a god and this is very true for Ares.
In order to acquire the Tier 3 Boon players will need two separate Boons and then must rely on RNG to receive the availability of the Legendary Boon.
The following are the Boons required to unlock the Tier 3 Boon:
Black Metal or Engulfing Vortex
VICIOUS CYCLE
Viscous Cycle is going to help players deal a great amount of damage while using their Blade Rifts as players will deal more damage for each consecutive hit.
Essentially players will be deal 2 bonus damage for every hit, so if players are dealing rapid damage to enemies using Blade Rifts they can expect a great amount of damage output.
Admittedly, damage isn’t much, but if players are using their God Call with Ares, this alone will deal an epic amount of damage.
Get ready to place all the Blade Rifts you can on the map!
DUO BOONS
As I’ve already written a Duo Boons guide, I’m not going to go too deep into this.
Essentially players will want to obtain either Dionysus, Poseidon, Zeus, Demeter, Athena, Artemis or Aphrodite Boons in order to acquire a Duo Boon, though I strongly recommend selecting only one or two of these god’s Boons in order to raise your chances of gaining access to a Duo Boon.
Honestly, Ares’ synergy with all other gods is really good and even if there are some that I find more powerful than others, all are great.
I would still recommend trying to focus on the gods that you vibe with the most, but shockingly Ares is one of the only gods that you will not be hating most Duo Boons with as he is a great god duo to his Doom.
Leave a Reply