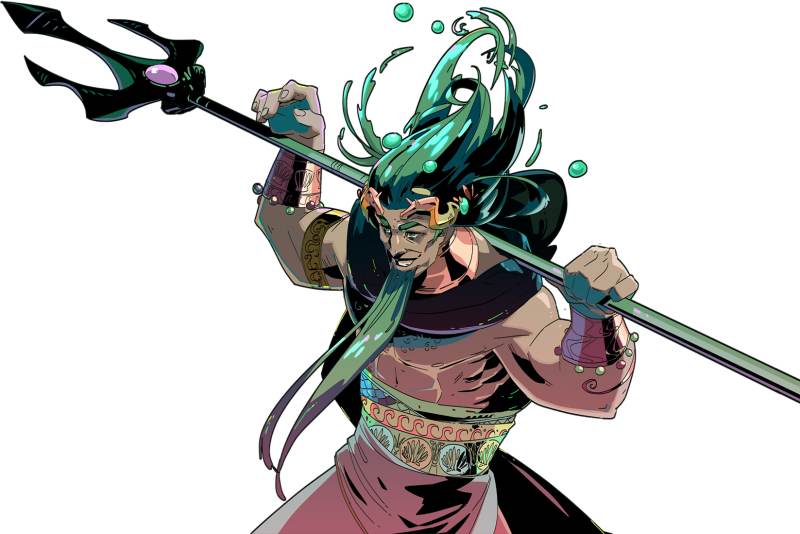
Poseidon is a pretty great god to gain access to as he has some of the most variety in options for Boons.
Poseidon can increase the damage of abilities and will have the ability to push enemies back in order to wall slam or deal trap damage to them.
Poseidon can also provide players with a great deal of Artifacts, which can make him extremely useful for when players are grinding these out for their savings.
The reality is that Poseidon has the 3rd highest damage in the game, making Poseidon a bit of second choice option, though if played strategically he can really push out the damage.
Admittedly one of the best uses of Poseidon is his Status Curse Ruptured which will deal damage to enemies as they move, though it does not impair the actual mob’s movement.
As is similar to some other Olympian gods, players will not be graced by the presence of Poseidon initially and will have to complete their first escape in order to see him for the first time.
Note: Watch me play Hades and similar games on Twitch! Always happy to answer questions there!
OLYMPIAN AFFINITY
Poseidon, being one of the many Olympian gods will have the ability to gain Affinity with a player.
Players can gain affinity by trading in Nectar to him and upon providing the first gift, he will provide a player with his Keepsake the Conch Shell.
At first players will want to hold off on providing Poseidon too much Nectar as he will not provide players with any further rewards and players are recommended to farm for Companions, though when a player has enough Artifacts to waste, they can do so, being able to max him out at 7 Hearts.
To gain full favour with with Poseidon players will have to begin Fishing with the Rod of Fishing. These Fish can be caught and sold to the Head Chef, so players will always want to make sure they are fishing anyways.
Players will need 18 fish minimum before they are able to gain Affinity with Poseidon.
Essentially after players have fished 18 fish they will have to talk to Poseidon in an escape where they have caught a fish. This will be a pretty easy Affinity to gain and in most cases players will do it by mistake passively.
POSEIDON TIER 1 BOONS
Poseidon’s Tier 1 Boons do not require players to have any other Boons and always have the ability to show up regardless of how many Boons a player has access to.
Players should be cautious of taking too many Tier 1 Boons, especially if they are on the hunt for Legendary Boons, so making yourself aware of which Boons you will need to get the Tier 2 Boons you want is going to be very important, otherwise players may lock themselves out of the Boons they require.
TEMPEST STRIKE
With Tempest Strike players will see a damage increase on their regular Attack also being able to Knock enemies away, making it a lot easier to get enemies into a wall to deal more damage.
With every rarity of Tempest Strike, players will see a damage increase on their Attack, being:
COMMON
The Common Tempest Strike will provide players with 30% Attack damage.
RARE
The Rare Tempest Strike will provide players with 1.3-1.5x Attack damage.
EPIC
The Epic Tempest Strike will provide players with 1.8-2.0x Attack damage.
HEROIC
The Heroic Tempest Strike will provide players with 2.3-2.5x Attack damage.
TEMPEST FLOURISH
Tempest Flourish is one of the better Boons that provides a good amount of damage to a player’s Special and will also make it so the player’s Special deals Knockback damage.
Players will often want to utilize Tempest Flourish on a Weapon that already deals a good amount of Special damage or will want to use it on a Weapon like the Heart-Seeking Bow, which requires enemies to be a certain distance away while they charge up their basic attack.
Tempest Flourish will provide players with more damage on their Special given the rarity of the Boon. The following are the damage enhancements provided for each rarity:
COMMON
The Common Tempest Flourish will provide players with 70% damage on their Special.
RARE
The Rare Tempest Flourish will provide players with 1.3-1.5x damage on their Special.
EPIC
The Epic Tempest Flourish will provide players with 1.8-2.0x damage on their Special.
HEROIC
The Heroic Tempest Flourish will provide players with 2.3-2.5x damage on their Special.
FLOOD SHOT
Flood Shot makes it so a player’s Cast will deal damage in an area, instead of a single target and will knock back enemies at the same time.
The damage radius for Flood Shot is 500 and it will push enemies back with an Impact Velocity of 2,500.
It should be noted players will not be able to combine Floor Shot when they have the Aspect of Beowulf, which isn’t that big of a problem as the Aspect of Beowulf has it’s own Boon.
With every rarity of Flood Shot players will deal more damage with their Cast, being:
COMMON
The Common Flood Shot will deal 60 damage.
RARE
The Common Flood Shot will deal 72 damage.
EPIC
The Common Flood Shot will deal 84 damage.
HEROIC
The Common Flood Shot will deal 96 damage.
FLOOD FLARE
With Flood Flare players will essentially do the same as Flood Shot, forcing a knockback of 2,500 and damaging enemies in a 500 radius, but will deal significantly less damage.
The other main difference is that players will only be able to use this Boon on the Aspect of Beowulf, dealing the following damage:
COMMON
The Common Flood Flare will deal 60 Cast damage.
RARE
The Rare Flood Flare will deal 72 Cast damage.
EPIC
The Epic Flood Flare will deal 84 Cast damage.
HEROIC
The Heroic Flood Flare will deal 96 Cast damage.
TIDAL DASH
Tidal Dash is not a favourite Boon for me and I typically avoid it.
Essentially with Tidal Dash players anytime a player dashes they will knock back enemies at a 2,500 velocity in a 300 radius.
The benefit of Tidal Dash is that it can actually stun some enemies on impact, though admittedly I prefer other Status Curses on my Dash, unless there are a lot of walls nearby.
The different rarities of Tidal Dash will provide players with more damage when they dash, though not very significant, being:
COMMON
The Common Tidal Dash will deal 35 damage to enemies around the player while they dash.
RARE
The Rare Tidal Dash will deal 42 damage to enemies around the player while they dash.
EPIC
The Epic Tidal Dash will deal 49 damage to enemies around the player while they dash.
HEROIC
The Heroic Tidal Dash will deal 56 damage to enemies around the player while they dash.
POSEIDON’S AID
Poseidon’s Aid is a pretty decent God Call to have especially if players need a bit more defense when they use their god call.
As much as I still prefer Artemis’ god call over all the others, I can’t deny that Poseidon has saved me in sticky situations, especially with his God Call fully charged.
While I would strongly recommend saving up your God Call until it is fully charged, I would definitely say that this is a good God Call to use when you’re being overwhelmed in a chamber with many mobs, especially if you want to keep your health up.
Players will be able to become Impervious for 1.2 seconds anytime they use their God Call, though if a player charges it fully it will last for 7.2 seconds.
Players will always knock back enemies at a 3,500 Impact Velocity, meaning that a player will benefit the most in a chamber with lots of walls.
Players will deal the following amount of impact damage with the different tiers of Poseidon’s Aid:
COMMON
The Common Poseidon’s Aid will deal 250 Impact Damage.
RARE
The Rare Poseidon’s Aid will deal 300 Impact Damage.
EPIC
The Epic Poseidon’s Aid will deal 350 Impact Damage.
HEROIC
The Heroic Poseidon’s Aid will deal 400 Impact Damage.
TYPHOON’S FURY
Typhoon’s Fury is the only Poseidon Tier 1 Boon that requires other Boons in order to actually acquire.
With Typhon’s Fury players will deal more damage when they are able to successfully smash mobs into walls, being a bit of a difficult task to do but well worth it for players who are good at completing this mechanic.
Players will only be able to proc Typhoon’s Fury if they successfully smash an enemy into a Wall using the Knock back of a Boon and will not be able to if they use their Weapon alone.
Players will need Tempest Strike, Tempest Flourish, Flood Shot, Tidal Dash or Poseidon’s Aid in order to acquire Typhoon’s Fury.
Players will deal the following extra damage when they smash enemies into the wall using Typhoon’s Fury:
COMMON
The Common Typhoon’s Fury will provide players with 200% extra Slam Damage when enemies are smashed into a wall.
RARE
The Rare Typhoon’s Fury will provide players with 250% extra Slam Damage when enemies are smashed into a wall.
EPIC
The Epic Typhoon’s Fury will provide players with 300% extra Slam Damage when enemies are smashed into a wall.
HEROIC
The Heroic Typhoon’s Fury will provide players with 350% extra Slam Damage when enemies are smashed into a wall.
HYDRAULIC MIGHT
Hydraulic Might will provide players with extra damage on their Attack and Special for the first 10 seconds of any encounter and doesn’t seem to have a whole lot of use in late game content, but is especially useful when Artifact grinding since mobs that you face are probably going to be lower levelled than you, making a very easy kill.
I personally don’t think that having an upped Attack and Special for 10 seconds is actually the best benefit in the late game, but some players may still want to use it if they have a great amount of damage already on their Attack or Special.
Players should utilize Hydraulic Might to burst down weaker mobs so they don’t have to deal with them later.
The different rarities of Hydraulic Might will provide players with more Initial Damage bonus for the first 10 seconds, being:
COMMON
With the Common Hydraulic Might players will deal 50% bonus Attack and Special Damage for the first 10 seconds of an encounter.
RARE
With the Rare Hydraulic Might players will deal 62.5% bonus Attack and Special Damage for the first 10 seconds of an encounter.
EPIC
With the Epic Hydraulic Might players will deal 75% bonus Attack and Special Damage for the first 10 seconds of an encounter.
HEROIC
With the Heroic Hydraulic Might players will deal 87.5% bonus Attack and Special Damage for the first 10 seconds of an encounter.
OCEAN’S BOUNTY
Ocean’s Bounty is a pretty interesting Boon to pick up, especially if you are doing Artifact runs as it can be the best way to get yourself all the rewards you want while recompleting lower tier content.
Players who accept Ocean’s Bounty will be able to receive extra Gemstones, Darkness or Chiron’s Obol whenever they are chamber rewards.
I strongly recommend avoiding this Boon if you are doing progression content, but if you are repeating easier Heats just to get resources, it is absolutely amazing, providing the following bonuses per rarity:
COMMON
The Common Ocean’s Bounty provides players with 50% more Gemstones, Darkness and Chiron’s Obol.
RARE
The Rare Ocean’s Bounty provides players with 55% more Gemstones, Darkness and Chiron’s Obol.
EPIC
The Epic Ocean’s Bounty provides players with 60% more Gemstones, Darkness and Chiron’s Obol.
HEROIC
The Heroic Ocean’s Bounty provides players with 65% more Gemstones, Darkness and Chiron’s Obol.
SUNKEN TREASURE
Sunken Treasure is a bit and a miss kind of Boon for me and acts very similar to Ocean’s Bounty, though players will receive rewards immediately versus whenever they gain a room reward.
Essentially players will be able to get an assortment of Gemstones, Darkness, Chiron’s Obol, Health and have a rare chance of getting Nectar or Diamonds.
Players will only be able to use this Boon once and it will be consumed immediately, making it best for repeat Heats where a player is Artifact Grinding.
Players will receive the following Rewards for each rarity of Sunken Treasure:
COMMON
The Common Sunken Treasure will provide players with the following rewards:
50-70 Chiron’s Obols
1-3 Health Items
50-100 Darkness
10% chance for Nectar
0.03% chance of a Diamond
RARE
The Rare Sunken Treasure will provide players with 1.3-1.5x more rewards.
EPIC
The Epic Sunken Treasure will provide players with 2.0-2.2x more rewards.
HEROIC
There is no Heroic tier of Sunken Treasure.
POSEIDON TIER 2 BOONS
Tier 2 Boons Poseidon Boons will require players to unlock at least one other Boon in order to acquire. Many of these Boons require any of the Tier 1 Boons though some will require a specific Boon in order to obtain.
The following is all the information you need to know about the Tier 2 Poseidon Boons.
RAZOR SHOALS
The Razor Shoals will allow players to cause Rupture anytime they Knock-away enemies using their Boons. Players will not be able to use Razor Shoals if they are using a Weapon to knock-away.
Razor Shoals will require players to have Tempest Strike, Tempest Flourish, Flood Shot, Tidal Dash, or Poseidon’s Aid before it is obtainable.
If players successfully knock-away enemies with one of their Boons and Rupture can take place it will deal damage every 0.2 seconds, dealing more damage based on the rarity of Razor Shows, being:
COMMON
The Common Razor Shoals deals 10 Rupture damage every 0.2 seconds.
RARE
The Rare Razor Shoals deals 15 Rupture damage every 0.2 seconds.
EPIC
The Epic Razor Shoals deals 20 Rupture damage every 0.2 seconds.
HEROIC
The Heroic Razor Shoals deals 25 Rupture damage every 0.2 seconds.
BOILING POINT
Boiling Point is honestly a Boon I never take because it requires players to take damage in order to activate.
Essentially with Boiling Point, any time a player takes damage their God Gauge will fill up a bit.
While this can be very useful for triggering your God Gauge, there are other Boons a player can obtain that provide God Gauge Charge much easier and more efficiently.
Players will need one of the God Calls in order to acquire Boiling Point, being Aphrodite’s Aid, Ares’ Aid, Artemis’ Aid, Athena’s Aid, Demeter’s Aid, Dionysus’ Aid, Poseidon’s Aid, or Zeus’ Aid.
The different rarities of Boiling Point will provide players with more God Gauge every time a player is hit, being:
COMMON
The Common Boiling Point will provide players with 40% faster Gauge Gain when hit.
RARE
The Rare Boiling Point will provide players with 50% faster Gauge Gain when hit.
EPIC
The Epic Boiling Point will provide players with 60% faster Gauge Gain when hit.
HEROIC
The Heroic Boiling Point will provide players with 70% faster Gauge Gain when hit.
BREAKING WAVE
Breaking Wave is truly interesting as it can be used for protection or for dealing extra damage to enemies.
Essentially with Breaking Wave, any time a player slaps foes into Walls, even if it is not using a Boon, players will stun enemies for a certain duration.
Players will still need Tempest Strike, Tempest Flourish, Flood Shot, Tidal Dash, or Poseidon’s Aid to acquire Breaking Wave, however, players are encouraged to constantly smash enemies into walls to ensure that you are as protected as possible.
Players will be able to stun enemies for longer depending on the rarity of Wave Pounding:
COMMON
The Common Breaking Wave will stun enemies for 100 seconds.
RARE
The Rare Breaking Wave will stun enemies for 150 seconds.
EPIC
The Epic Breaking Wave will stun enemies for 200 seconds.
HEROIC
The Heroic Breaking Wave will stun enemies for 250 seconds.
WAVE POUNDING
Wave Pounding is great for players who have a Knock-Away on their Boons as any time a player uses a Boon’s Knockback (doesn’t include Weapons) players will simply deal Bonus Damage to Bosses.
Players will need Tempest Strike, Tempest Flourish, Flood Shot, Tidal Dash, or Poseidon’s Aid in order to acquire Wave Pounding.
While Wave Pounding is not great for regular mobs, it can be very useful for bursting down Bosses, especially because they are going to be the harder of the two to deal with.
Players will gain more bonus damage depending on the rarity of Wave Pounding, being:
COMMON
The Common Wave Pounding will deal 20% bonus damage to bosses when a Knock-Away effect is placed from a Boon.
RARE
The Rare Wave Pounding will deal 30% bonus damage to bosses when a Knock-Away effect is placed from a Boon.
EPIC
The Epic Wave Pounding will deal 40% bonus damage to bosses when a Knock-Away effect is placed from a Boon.
HEROIC
The Heroic Wave Pounding will deal 50% bonus damage to bosses when a Knock-Away effect is placed from a Boon.
RIP CURRENT
Rip Current is going to be a Poseidon’s Aid specific Boon that essentially elongates the length of the God Call.
If you’re running Poseidon’s Aid it’s really not a bad idea, because it means more invulnerability and more damage, so I strongly recommend taking it if you have the opportunity.
At the end of the day, even a couple extra seconds can save a player and can help them deal more damage. So don’t take these statistics lightly.
Players will receive the following extra time on Poseidon’s Aid depending on the rarity of Rip Current:
COMMON
The Common Rip Current will cause Poseidon’s Aid to last 1 second longer.
RARE
The Rare Rip Current will cause Poseidon’s Aid to last 1.25 second longer.
EPIC
The Epic Rip Current will cause Poseidon’s Aid to last 1.5 second longer.
HEROIC
The Heroic Rip Current will cause Poseidon’s Aid to last 1.75 second longer.
POSEIDON TIER 3 BOONS
Poseidon has two Tier 3 Boons that players can acquire depending on how they have build their Boons.
Players do have a chance to obtain one of their Tier 3 Boons immediately, being Huge Catch if they have the Conch Shell, though this isn’t true for Second Wave.
I’m going to break down each of the Tier 3 Boons on their own as they have different requirements and do different things altogether.
HUGE CATCH
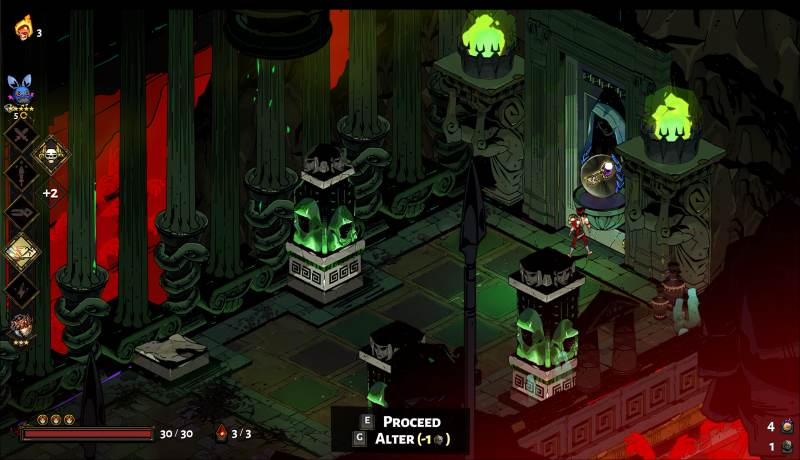
Huge Catch requires Ocean’s Bounty and Sunken Treasure or Conch Shell.
With Huge Catch players will have a 20% chance that a Fishing Point will appear in each Chamber.
Huge Catch is perfect for Artifact Runs and players will probably want to apply Conch Shell as their Keepsake while completing early content so they can get as many fish as they can to sell.
Players will not have to deal with the “Chambers Since Last Fishing Point” spawn requirement, meaning that they can essentially get an unlimited amount of fish from it.
When you first encounter Huge Catch in an escape, a scripted text will appear making it the only choice. This will only happen once.
SECOND WAVE
With Second Wave, players will be able to shove enemies with their Boons a second time, essentially meaning that they will Knockback enemies Twice.
Players will need two Boons, one from each category:
Breaking Wave or Typhoon’s Fury
Tempest Strike, Tempest Flourish, Flood Shot, Tidal Dash, or Poseidon’s Aid
With Second Wave, players will have to wait a short 0.7 seconds before the second Knockback takes place. This will only take place when it is Boon enabled and will not trigger if a player uses their Weapon.
DUO BOONS
Players should note that Poseidon interacts with the most Duo Boons with his Boon Flood Shot, so if you’re ever looking for a Duo Boon with Poseidon you will be able to significantly increase your chances this way.
Leave a Reply