When it comes to playing Hades there can be some aspects that feel overwhelming for players to figure out, especially when it comes to passive upgrades that players must choose from.
Although many of the upgrades players are going to be focusing on have to do with the Mirror of Night, players are going to be happy to note that there are other elements that will help strengthen a character including the hidden system of Keepsakes.
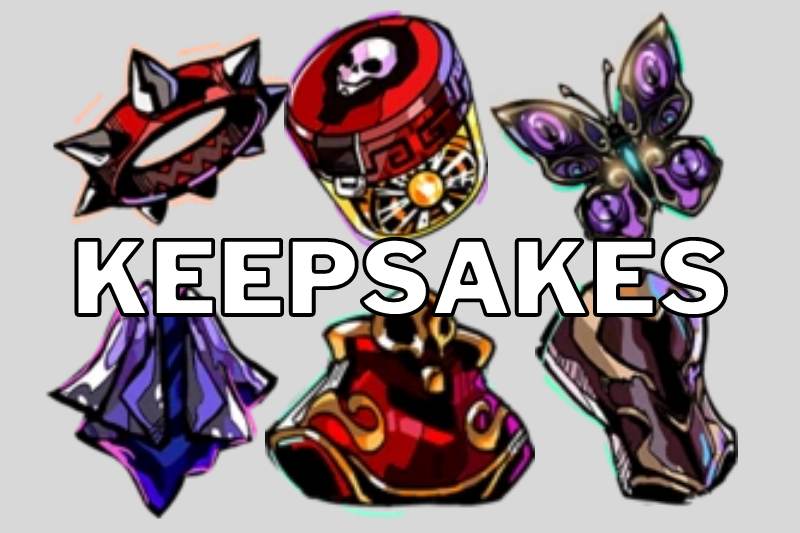
WHAT ARE KEEPSAKES?
Keepsakes are a passive item that can be placed on the main character in order to get special perks or bonus stats.
In many cases there are going to be Keepsakes that a player prefers over others, which often has to do with their play style.
Though this is true, players will be happy to note that they will be able to choose different Keepsakes to use throughout their journey as each time they clear an area they will be able to reselect which Keepsake they use in the Display Case.
Players will also have access to the Display Case before they begin a run when selecting a Weapon/Infernal Arm.
It should be noted that if a player exchanges their Keepsake they will no longer be able to select that Keepsake for the rest of the run, making it very important to keep track of what Keepsake you last used and plan out which Keepsakes you use for different areas to ensure that you get the most out of the Keepsakes. I will tell you what my typical run looks like as I dissect the different Keepsakes.
There are technically two different types of Keepsakes, basic Keepsakes and Companions, known as Legendary Keepsakes.
Players will be able to use one of each type of Keepsake at a time, meaning that players can always run with two different Keepsakes at a time.
HOW DO YOU GET KEEPSAKES?
Keepsakes can be obtained by providing characters with Nectar for the first time, though Hades will require two Nectar before he will provide the player with a Keepsake, only being unlocked after completing the main story.
Players will be able to obtain Legendary Keepsakes by giving a character Ambrosia after a player completes a quest for them.
Players will want to make sure that they always talk to characters any opportunity they get as this will help them reach a stage where the quest can be completed.
If a player is lazy about chatting with characters, they will essentially prolong how long it takes to obtain the Legendary Keepsakes.
UPGRADING YOUR KEEPSAKE
Keepsakes will automatically upgrade as players complete runs, essentially needing to complete different chambers in order to fully upgrade the Keepsake.
Players will need to complete 25 encounters to upgrade their Keepsake to tier 2 and will need to complete another 50 to level them up to tier 3. This means that a player will need to complete 75 encounters to completely upgrade a Keepsake, meaning that a player has a good amount of grinding ahead of them.
In my opinion, players will want to upgrade most, if not all of the Keepsakes just so they can have them at the highest tier if they ever need. I commonly will run Keepsakes that are not as useful in the first two stages of a run since I don’t need to rely on Keepsakes to stay alive and then I switch to the necessary Keepsakes to continue my grind.
As mentioned, not all Keepsakes are going to be as powerful as others, so if you think you’ll never use one, don’t worry about it and ignore it.
It should be noted that players will only be able to upgrade normal Keepsakes this way and will instead have to provide their Companions with Ambrosia in order to upgrade them, though I think I’m going to cover Companions in another post because of how detailed I will need to be.
SPECIAL NOTE ABOUT OLYMPIAN KEEPSAKES
When it comes to Olympian Keepsakes, players will need to note that the Olympian Boon is not guaranteed to spawn in the first room, but a Boon that is associated with that Olympian that the Boon is in play.
After a player collects a Boon associated with the the Keepsake, players will consume the Keepsake and it will no longer have effect through the rest of the escape, essentially meaning that a player will want to switch their Keepsake in the future levels.
WHAT ARE THE KEEPSAKES AND WHICH ARE THE BEST TO USE?
The following are all of the Keepsakes players will be able to obtain in Hades, what stats or perks they provide as well as what I think of them.
OLD SPIKED COLLAR
The Old Spiked Collar can be obtained by providing Cerberus the first gift of Nectar.
The Old Spiked Collar is a great Keepsake to obtain early on, since it provides players with some Health. Though, I would say in the mid-to-late game it heavily falls in usefulness simply because there are much more powerful Keepsakes.
The following are the Health stats provided for each tier of the Old Spiked Collar:
Tier 1: 25 Health
Tier 2: 38 Health
Tier 3: 50 Health
MYRMIDON BRACER
The Myrmidon Bracer can be obtained by providing Achilles the first gift of Nectar.
The Myrmidon Bracer is a Keepsake I’ll admit I rarely ever use and will be a Keepsake players take if they are struggling to keep themselves alive.
Essentially with the Myrmidon Bracer players will take less damage from the front, but will always take 10% more damage from the back, significantly providing the player with sustainability if they know how to dodge enemies from behind and tank everything through the front.
Admittedly, the Myrmidon Bracer can really help a struggling player clear the first few Heats of Hades, though there are better Keepsakes that will provide you similar aspects.
If players are dying during regular encounters, this is going to be the better approach of avoiding damage in comparison to some of the other tactics I provide for you today. I would say if this is true for you, then the Myrmidon Bracer is a good choice for you in the third and maybe fourth area of Hades, though you will want to switch away from this in the final stage to ensure that you have a Keepsake that helps protect you from Hades himself.
The following are the Defense stats provided for each tier of the Myrmidon Bracer:
Tier 1: 20% less damage taken from the front
Tier 2: 25% less damage taken from the front
Tier 3: 30% less damage taken from the front
BLACK SHAWL
The Black Shawl can be obtained by providing Nyx the first gift of Nectar.
Admittedly, the Black Shawl is a bit of a niche Keepsake and one that I only apply when I’m doing speed runs of Hades on lower Heats, reason being, it helps make damaging weak enemies a lot faster.
In general, I usually focus my Boons on damage dealing and run a Keepsake that helps protect me from being battered to pieces by strong opponents, though as I mentioned in my Artifacts guide, there is no shame in running easier Heats repeatedly in order to collect rarer Artifacts to ensure that you empower your character as quickly as possible.
With Black Shawl, players will be able to deal more damage to enemies that have not been damaged before, though it will also boost the amount of damage players deal when striking enemies from behind, essentially making this one of the best ways to speed run.
I strongly recommend focusing on upgrading this Keepsake when you are doing lower tier content, especially if you already have a good amount of Keepsakes upgraded for the end game, you’re going to want the Black Shawl fully powered up by the time you’re ready to do speed runs.
The following are the Damage stats provided for each tier of the Black Shawl:
Tier 1: Deal 10% damage striking undamaged foes; also striking foes from behind
Tier 2: Deal 15% damage striking undamaged foes; also striking foes from behind
Tier 3: Deal 20% damage striking undamaged foes; also striking foes from behind
PIERCED BUTTERFLY
The Pierced Butterfly can be obtained by providing Thanatos the first gift of Nectar.
I have to admit that the Pierced Butterfly is quite a tricky Keepsake to use and tends to be best for speed running, simply because it’s easier for players to get the most out of this Keepsake.
I will say, I find it difficult to find success with this Keepsake in the late game as essentially players receive extra damage buffs when they complete an Encounter without taking any damage.
If a player is good at kiting, they should usually take the Pierced Butterfly as it will make them a lot more powerful in the long run. I honestly wish I could run the Pierced Butterfly with more success in the late game, even if it was for the first area of Hades, because the damage boost is nothing to scoff at. It’s honestly great.
The following are the Damage stats provided for each tier of the Pierced Butterfly:
Tier 1: Players will gain 1% damage for each Encounter they clear without taking damage
Tier 2: Players will gain 1.5% damage for each Encounter they clear without taking damage
Tier 3: Players will gain 2% damage for each Encounter they clear without taking damage
BONE HOURGLASS
The Bone Hourglass can be obtained by providing Charon the first gift of Nectar.
The Bone Hourglass is another niche kind of Keepsake that I recommend running whenever players are trying to collect Artifacts, though it doesn’t have much use in progression content.
Essentially with the Bone Hourglass players will be able to prolong the use of items purchased from the Well of Charon, essentially making its best use prolonging how many Encounters players will receive bonus Artifacts.
I, admittedly, do not use the Well of Charon often unless I am struggling when I’m clearing new content, but when I’m on lower Heats I do try to ensure that I get bonus Darkness, Gems or even Charon’s Obol to ensure that I get the most out of a run.
The following are the duration increases provided for each tier of the Bone Hourglass:
Tier 1: Items from the Well of Charon will have durations increased by 4 Encounters
Tier 2: Items from the Well of Charon will have durations increased by 6 Encounters
Tier 3: Items from the Well of Charon will have durations increased by 8 Encounters
CHTHONIC COIN PURSE
The Chthonic Coin Purse can be obtained by providing Hypnos the first gift of Nectar.
The Chthonic Coin Purse is one of my favourite Keepsakes to place right before I enter a run as it will give players a healthy amount of Charon’s Obol.
As I’m currently in the stage of grinding up Artifacts, Charon’s Obol is a necessity for me as I want to make sure all my Weapons/Infernal Arms are fully upgraded.
Realistically, the Chthonic Coin Purse is a pretty weak Keepsake for players and if players have all of the loot that they need or don’t struggle with collecting Charon’s Obol, then don’t worry about it.
Still, I would recommend levelling this up all the way to ensure that you always get the most Charon’s Obol whenever you need it as you don’t want to waste time in the mid-to-late game grinding up it’s tiers.
It should be noted that if players select the Chthonic Coin Purse they should switch it out as soon as they can as it is a single use Keepsake per run and will essentially leave a player with no buffs beyond this. Rotating the Chthonic Coin Purse does not remove the amount of Charon’s Obol players receive from the Keepsake.
The following are the amounts of Charon’s Obol players will receive from each tier of the Chthonic Coin Purse:
Tier 1: Players will receive 100 Charon’s Obol once per escape attempt
Tier 2: Players will receive 125 Charon’s Obol once per escape attempt
Tier 3: Players will receive 150 Charon’s Obol once per escape attempt
SKULL EARRING
The Skull Earring can be obtained by providing Megaera the first gift of Nectar.
The Skull Earring is quite an interesting as it rewards players that have low health with extra damage.
I don’t run the Skull Earring regularly, though admittedly for players who are new to Hades and find it impossible to keep their Health up, it’s really not a bad idea.
I would also say that in the late-game the Skull Earring ends up being really rewarding as it can feel quite tough to keep your health up, though players will want to ensure that they have enough health to actually pass through Encounters.
With the Skull Earring players will deal more damage if they are under 35% health.
While it might sounds scary to always stay under 35% health, this can be especially useful if players are late in the game and do not have their health up to max.
There is no shame in switching to the Skull Earring late into a run, especially if they do not have ways of regaining health or another Keepsake that will defend a player from damage.
The Skull Earring works the best when players have Defensive Boons on them, as this will help a player keep their health low while dealing empowered damage.
The following are the amounts of damage players will receive from each tier of the Skull Earring when under 35% health:
Tier 1: Players will deal 20% more damage
Tier 2: Players will deal 30% more damage
Tier 3: Players will deal 40% more damage
DISTANT MEMORY
The Distant Memory can be obtained by providing Orpheus the first gift of Nectar.
Distant Memory is most useful for players who are running the Heart-Seeking Bow as players are going to get a damage boost on enemies that are further than 500 units away from them.
In a lot of cases, players will not want to run Distant Memories as many of the Weapons won’t immediately provide players with the damage boost, though this isn’t the worst choice, especially if players were going to run Skull Earring instead.
Unfortunately players will not have an indicator that let’s them know where 500 units is so they will just have to trust their instincts.
The following are the amounts of damage players will receive from each tier of the Distant Memory when they attack an enemy 500 units away:
Tier 1: Players will deal 10% more damage
Tier 2: Players will deal 20% more damage
Tier 3: Players will deal 30% more damage
HAPPY FEATHER DUSTER
The Happy Feather Duster can be obtained by providing Dusa the first gift of Nectar.
I’ll be honest, I thought the Happy Feather Duster was going to be more useful, but even at it’s highest stage I don’t really like using it.
The Happy Feather Duster is great for the early game when players don’t have better Keepsakes, but significantly falls in usefulness even in the mid game.
Realistically, players will not need a whole lot of extra healing when they build up their passives in the Mirror of Night or select the right Boons, so the Happy Feather Duster isn’t one that you’re going to need to upgrade.
With the Happy Feather Duster players have a very small chance, even when completely upgraded, to drop healing items. In my opinion, this is a significant waste of a Keepsake, again especially if you have better Keepsakes. I would have to say that the majority of the time I would only get a maximum of 3 healing items during my escape attempts. *sigh*
The following are the chances players have to locate an urn that contains healing items:
Tier 1: Players have a 3% chance to break an urn with a healing item
Tier 2: Players have a 5% chance to break an urn with a healing item
Tier 3: Players have a 6% chance to break an urn with a healing item
LUCKY TOOTH
The Lucky Tooth can be obtained by providing Skelly the first gift of Nectar.
At first I thought that the Lucky Tooth wasn’t useful, but I’m happy to say that it is actually one of the best Keepsakes, even in the late-game.
Essentially players will want to avoid using Lucky Tooth until they have depleted enough Death Defiance as it’s only use is to resurrect a player once per escape providing them with a bit of Health.
Players will be happy to note that they will be able to acquire the Lucky Tooth almost immediately, as long as they have Nectar to spare.
I strongly recommend levelling up your Lucky Tooth as soon as you can because you will want it to be maximum level whenever you use it.
The lower tiers of the Lucky Tooth admittedly don’t feel as useful as the higher tiers, so upon accessing the Lucky Tooth always carry it until it is fully upgraded then only put it on when you absolutely need it.
The Lucky Tooth will provide players with the following health when they are resurrected:
Tier 1: 50 Health provided upon resurrecting
Tier 2: 75 Health provided upon resurrecting
Tier 3: 100 Health provided upon resurrecting
THUNDER SIGNET
The Thunder Signet can be obtained by providing Zeus the first gift of Nectar.
The Thunder Signet is not essential and will essentially make it so players are guaranteed to get a Zeus Boon by the second Encounter. Upon receiving the Zeus Boon players will be able to switch this Keepsake as it will no longer do anything.
Players have a chance for the Zeus Boon to be Rare or better by the following amounts:
Tier 1: 10% Chance to be Rare or better
Tier 2: 15% Chance to be Rare or better
Tier 3: 20% Chance to be Rare or better
CONCH SHELL
The Conch Shell can be obtained by providing Poseidon the first gift of Nectar.
The Conch Shell is not essential and will essentially make it so players are guaranteed to get a Poseidon Boon by the second Encounter. Upon receiving the Poseidon Boon players will be able to switch this Keepsake as it will no longer do anything.
Players have a chance for the Poseidon Boon to be Rare or better by the following amounts:
Tier 1: 10% Chance to be Rare or better
Tier 2: 15% Chance to be Rare or better
Tier 3: 20% Chance to be Rare or better
OWL PENDANT
The Owl Pendant can be obtained by providing Athena the first gift of Nectar.
The Owl Pendant is not essential and will essentially make it so players are guaranteed to get a Athena Boon by the second Encounter. Upon receiving the Athena Boon players will be able to switch this Keepsake as it will no longer do anything.
Players have a chance for the Athena Boon to be Rare or better by the following amounts:
Tier 1: 10% Chance to be Rare or better
Tier 2: 15% Chance to be Rare or better
Tier 3: 20% Chance to be Rare or better
ETERNAL ROSE
The Eternal Rose can be obtained by providing Aphrodite the first gift of Nectar.
The Eternal Rose is not essential and will essentially make it so players are guaranteed to get a Aphrodite Boon by the second Encounter. Upon receiving the Aphrodite Boon players will be able to switch this Keepsake as it will no longer do anything.
Players have a chance for the Aphrodite Boon to be Rare or better by the following amounts:
Tier 1: 10% Chance to be Rare or better
Tier 2: 15% Chance to be Rare or better
Tier 3: 20% Chance to be Rare or better
BLOOD-FILLED VIAL
The Blood-Filled Vial can be obtained by providing Ares the first gift of Nectar.
The Blood-Filled Vial is not essential and will essentially make it so players are guaranteed to get a Ares Boon by the second Encounter. Upon receiving the Ares Boon players will be able to switch this Keepsake as it will no longer do anything.
Players have a chance for the Ares Boon to be Rare or better by the following amounts:
Tier 1: 10% Chance to be Rare or better
Tier 2: 15% Chance to be Rare or better
Tier 3: 20% Chance to be Rare or better
ADAMANT ARROWHEAD
The Adamant Arrowhead can be obtained by providing Artemis the first gift of Nectar.
The Adamant Arrowhead is not essential and will essentially make it so players are guaranteed to get a Artemis Boon by the second Encounter. Upon receiving the Artemis Boon players will be able to switch this Keepsake as it will no longer do anything.
Players have a chance for the Artemis Boon to be Rare or better by the following amounts:
Tier 1: 10% Chance to be Rare or better
Tier 2: 15% Chance to be Rare or better
Tier 3: 20% Chance to be Rare or better
OVERFLOWING CUP
The Overflowing Cup can be obtained by providing Dionysus the first gift of Nectar.
The Overflowing Cup is not essential and will essentially make it so players are guaranteed to get a Dionysus Boon by the second Encounter. Upon receiving the Dionysus Boon players will be able to switch this Keepsake as it will no longer do anything.
Players have a chance for the Dionysus Boon to be Rare or better by the following amounts:
Tier 1: 10% Chance to be Rare or better
Tier 2: 15% Chance to be Rare or better
Tier 3: 20% Chance to be Rare or better
FROSTBITTEN HORN
The Frostbitten Horn can be obtained by providing Demeter the first gift of Nectar.
The Frostbitten Horn is not essential and will essentially make it so players are guaranteed to get a Demeter Boon by the second Encounter. Upon receiving the Demeter Boon players will be able to switch this Keepsake as it will no longer do anything.
Players have a chance for the Demeter Boon to be Rare or better by the following amounts:
Tier 1: 10% Chance to be Rare or better
Tier 2: 15% Chance to be Rare or better
Tier 3: 20% Chance to be Rare or better
COSMIC EGG
The Cosmic Egg can be obtained by providing Chaos the first gift of Nectar.
The Cosmic Egg is actually one of the best Keepsakes that is tied to an Olympian as it will both provide players with a higher chance to get a Rare Blessing and it will also make sure that a player does not lose any health when they enter the Chaos Gates.
Realistically, I don’t really use the Cosmic Egg, nor do I really use the other Olympian Keepsakes, however, if you’re someone who doesn’t want to lose Health entering Chaos Gates, this may be the Keepsake for you.
Players have a chance for the Chaos Blessing to be Rare or better by the following amounts:
Tier 1: 20% Chance to be Rare or better
Tier 2: 30% Chance to be Rare or better
Tier 3: 40% Chance to be Rare or better
LAMBENT PLUME
The Lambent Plume can be obtained by providing Hermes the first gift of Nectar.
The Lambent Plume can be extremely useful for players, especially those who are struggling with dodging enemies and not taking damage.
Essentially players have to quickly complete Encounters in order to get stat boosts on their Dodge Chance and Move Speed.
Admittedly, this is a Keepsake I never use, because I don’t really care for the stats, however, depending on what Boons you have, this can be helpful if you’re placing Status Curses on the ground.
Players will receive the following stats for completing Encounters quickly (note that the time required depends on the difficult of the Encounter):
Tier 1: 1.0% Dodge Chance and Move Speed for completing an Encounter quickly
Tier 2: 1.1% Dodge Chance and Move Speed for completing an Encounter quickly
Tier 3: 1.2% Dodge Chance and Move Speed for completing an Encounter quickly
SHATTERED SHACKLE
The Shattered Shackle can be obtained by providing Sisyphus the first gift of Nectar.
Interestingly enough, the Shattered Shackle isn’t a bad choice in the early game for players as it will empower attacks that don’t have Boons attached to them.
Admittedly, players in the early game that don’t have enough skills boosted in their Mirror of Night will find that they have less of a chance to score a Boon and thus will notice that they will be in many situations where none of their attacks are actually empowered by Boons.
Players can get a solid amount of damage out this way and may even want to be strategic in avoiding taking upgrades that provide them with damage on their attacks.
Players can also utilize the Shattered Shackle to lower tier speed runs so they can focus on their Artifacts, especially if their Weapons are upgraded far enough to deal a great deal of damage on their own.
I would strongly recommend upgrading the Shattered Shackle as fast as you can, especially if you foresee yourself doing speed runs to get more Artifacts.
You want to make sure that the Shattered Shackle is upgraded to maximum before you attempt speed runs with it, especially because of how much damage it can really provide a player.
Players will receive the following damage buff on their Attack, Special and Cast whenever they are not empowered by a Boon:
Tier 1: 50% bonus damage
Tier 2: 75% bonus damage
Tier 3: 100% bonus damage
EVERGREEN ACORN
The Evergreen Acorn can be obtained by providing Eurydice the first gift of Nectar.
The Evergreen Acorn is my favourite Keepsake in all of Hades and is actually the only reason I was able to clear the first escape so quickly.
Although not absolutely necessary, I will say that the Evergreen Acorn can single-handedly help you defeat all Bosses, including Hades simply due to how powerful it is.
Players will be able to tank hits from Bosses, taking no damage up to 5 times and will essentially be able to tank and spank without any worry, pushing the enemies down one or two health states before it expires.
Admittedly, players will not be able to be protected the whole time as the Evergreen Acorn does expire, but unlike other Keepsakes, the Evergreen Acorn will recharge its charges for every boss, making it one of the most powerful Keepsakes in the game.
I personally make sure I have it activated for the second half of the run, since I hate the battle between Theseus and Asterius and of course I will always use it for Hades.
The Evergreen Acorn will be able to block the following amounts of hits in the final encounter of each underworld region per tier:
Tier 1: The Evergreen Acorn blocks 3 hits
Tier 2: The Evergreen Acorn blocks 4 hits
Tier 3: The Evergreen Acorn blocks 5 hits
BROKEN SPEARPOINT
The Broken Spearpoint can be obtained by providing Patroclus the first gift of Nectar.
I’ll be honest, I really like the Broken Spearpoint, but it’s not the strongest Keepsake to run.
Essentially I would always recommend the Evergreen Acorn as your main Defense Keepsake, however, the Broken Spearpoint comes with the benefit of being able to protect players while in regular Encounters versus only against Bosses.
I would run Broken Spearpoint if you’re struggling to survive regular Encounters, especially in the second last stage of an escape
I truthfully feel like the Broken Spearpoint can be a good idea even for Bosses, though players will want to make sure that they leave enough time to kite in between so they only “take damage” when they are invulnerable.
Essentially if players time the Broken Spearpoint well enough they will actually get a lot more defense out of it than the Evergreen Acorn, though it can be a bit harder to control if players struggle with kiting or have lower tiers of the Broken Spearpoint.
The Broken Spearpoint will be able to make a player Invulnerable for the following amount of time, refreshing every 7 seconds:
Tier 1: Players before Invulnerable for 1 second every 7 seconds.
Tier 2: Players before Invulnerable for 1.25 second every 7 seconds.
Tier 3: Players before Invulnerable for 1.5 second every 7 seconds.
POM BLOSSOM
The Broken Spearpoint can be obtained by providing Persephone the first gift of Nectar.
The Pom Blossom isn’t actually a Boon I use regularly, though admittedly if it is placed early on in a game it can provide the player with a great deal of power.
Most players will not need the Pom Blossom in order to complete the earlier runs of Hades, however, in the late game, having those extra bonuses to push a player’s stats can come in extra helpful.
I would say, make sure you power up your Pom Blossom as soon as possible because the higher tiers are actually very powerful, again especially if you are running this Keepsake from the very beginning of a run.
I would strongly recommend using this Boon in your later Heats, simply because of how accessible it makes these runs.
With Pom Blossom, players will receive 1 Level on a random Boon every 4-6 Encounters based on the tiers below:
Tier 1: Players will receive 1 Level on a random Boon every 6 Encounters.
Tier 2: Players will receive 1 Level on a random Boon every 5 Encounters.
Tier 3: Players will receive 1 Level on a random Boon every 4 Encounters.
SIGIL OF THE DEAD
The Sigil of the Dead can be obtained by providing Hades the second gift of Nectar.
With the Sigil of the Dead players will gain access to Hades’ God Call which cannot be received any other way.
Admittedly, the Sigil of the Dead is not necessary to run, however, there are many situations where a player does not receive a God Call, making it a fairly good choice for players in this situation.
With Sigil of the Dead, players will be start with a semi-full God Call and will be able to use Hades’ Aid which makes them briefly invisible.
Hades’ Aid provides players with a good amount of defense, simply because they are invisible to enemies, though admittedly it’s a God Call I don’t really care for personally.
The reality of God Calls is that they charge up slowly and even with boosts on the God Call particularly, they are never fully reliable. I would rather prefer to choose a God Call that deals damage than one that is Defensive.
Upgrading Sigil of the Dead will provide players with a more full God Call, essentially making it easier to use Hades’ Aid or let players use it more often.
The following is how full the gauge will be based on the tiers:
Tier 1: Hades’ Aid will be 10% full upon entering an encounter or boss battle
Tier 2: Hades’ Aid will be 20% full upon entering an encounter or boss battle
Tier 3: Hades’ Aid will be 30% full upon entering an encounter or boss battle
CONCLUSION
While there are a number of useful Keepsakes players can use while completing a run of Hades, I definitely have some favourites that I always tend to run.
I personally have ones that I run based on what it is I’m trying to acquire or complete in a run, so this is my personal break down.
EARLY GAME
In the early game I tend to use the following in order of usefulness:
Lucky Tooth, so I can resurrect an extra time after dying
Shattered Shackle, to deal extra damage if I’m not getting enough Boons
Old Spiked Collar, if I need more health and don’t have access to defensive Keepsakes
Happy Feather Duster, if I’m struggling with keeping my Health up, though I still recommend against.
ARTIFACT GRINDING
For Artifact grinding I tend to use the following in order of usefulness:
Chthonic Coin Purse, if I am trying to grind the rarest Artifacts and don’t think I will get enough Charon’s Obol, though I switch immediately to another Keepsake shortly after
Black Shawl, if I need to complete a run quickly
Pierced Butterfly, if I feel confident enough and can grind enough damage
Bone Hourglass, if I’m feeling risky and think I can get more of an Artifact using the Well of Charon
MID – LATE GAME
In the late game I tend to use the following in order of usefulness:
Pom Blossom, so I can maximize my Boon damage, switching to Evergreen Acorn as soon as I need it.
Evergreen Acorn, so I can tank more hits from Bosses
Lucky Tooth, so I can resurrect an extra time after dying
Broken Spearpoint, to avoid taking damage regularly.
Skull Earring, because it’s pretty difficult to keep your health up in the late game and I’d like to deal extra damage.
WHAT DO YOU THINK?
As Keepsakes are going to depend on a personal player’s play style, I’m very curious what your favourites are and if you think I’ve got something wrong!
What Keepsakes do you usually run or what’s your regular rotation, let me know in the comments below!
Leave a Reply