The Boomerang Monkey is quite a versatile tower for players to use when on most maps, though the Boomerang Monkey does come with some downfalls, being a tower that does not technically gain Camo Detection and in the early game may miss more bloons than it hits due to the way it throws its boomerang.
Players are able to manipulate a Boomerang Monkey by selecting the Boomerang Monkey and deciding what hand the Boomerang Monkey throws from.
While players were originally only able to control the Boomerang Monkey when they had the Ambidextrous ‘Rangs Monkey Knowledge, Ambidextrous ‘Rangs has since been replaced and players will be able to manipulate a Boomerang Monkey upon placing any Boomerang Monkey without the need of any Monkey Knowledge.
Unlike the Dart Monkey, the Boomerang Monkey sees a bit less use than the Dart Monkey simply due to the fact that Boomerang Monkeys have a smaller amount of versatility in comparison.

PATH 1 TIER-5 BOOMERANG MONKEYS – GLAIVE LORD
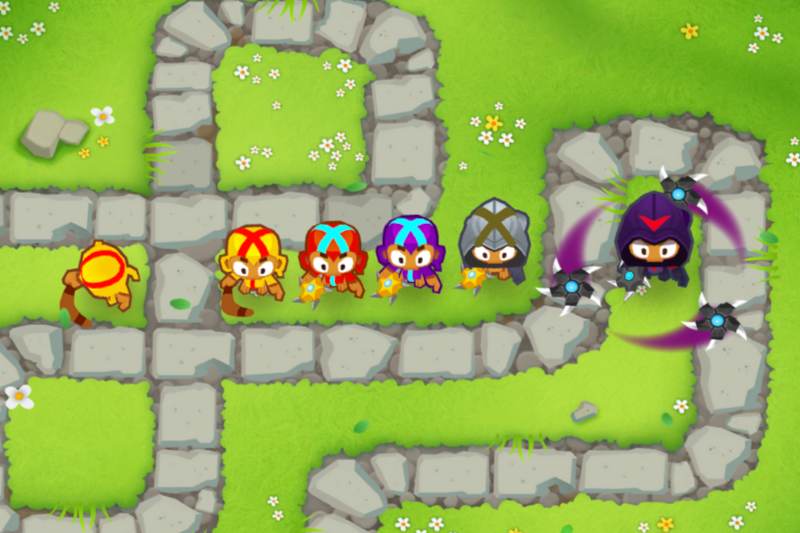
The Glaive Lord is the first option players have when trying to upgrade a Boomerang Monkey and can often be the best option for players to use, especially if they hope to use the Boomerang Monkey as their primary form of damage.
The Glaive Lord has multiple forms of damage, the main source being the glaives that revolve around the Glaive Lord, essentially having unlimited pierce and deal 2 damage to normal bloon types and 7 damage to Ceramic Bloons, dealing damage to bloons every 0.1 seconds.
The glaives the Glaive Lord provides players can often deal more damage than the Glaive Lord’s regular boomerang attack.
Players should note that if they upgrade a Glaive Lord with Red Hot Rangs (-/-/2) the glaives will also receive the benefits of shredding through Lead Bloons.
The lovely thing about the glaives is that they have Camo detection though it should be noted that the regular basic attacks the Glaive Lord has does not have Camo detection without the use of Etienne or a Monkey Village with Radar Scanner (-/2/-).
In regards to the Glaive Lord’s basic attacks, they will deal 150 damage to bloons over a 15 second period as the glaives have a shredding damage-over-time effect that can be stacked indefinitely.
While the Glaive Lord does provide players with a good amount of wave clear, especially against groups of bloons, the Glaive Lord upgrade is quite pricy especially as the M.O.A.R. Glaives (4/-/-) provides players with similar perks.
The main bloons players will struggle dealing with when using a Glaive Lord is a Super Ceramic Bloon, though this can easily be mitigated by having Dart Monkeys, Mortar Monkeys or other forms of Boomerang Monkeys to shatter the Super Ceramic Layers.
Glaive Lords are exceptional when dealing with big baddies like the Big Airship of Doom (BAD).
In regards to cross pathing with a Glaive Lord, both are useful as a (5/-/2) cross path will help provide players with the ability to shred through Lead Bloons and will help the glaives deal more damage and the (5/2/-) cross path will help make the basic attacks shoot out faster.
Most players would choose the option of (5/2/-) Glaive Lord as it tends to deal more damage to clumped bloons and the Lead Bloons can be easily mitigated with other towers.
Players can optimize a Glaive Lord with a Glue Gunner with MOAB Glue or Glue Hose, an Ice Monkey, Engineer Monkey with Overclock or an Alchemist with Stronger Stimulant.

PATH 2 TIER-5 BOOMERANG MONKEYS – PERMA CHARGE
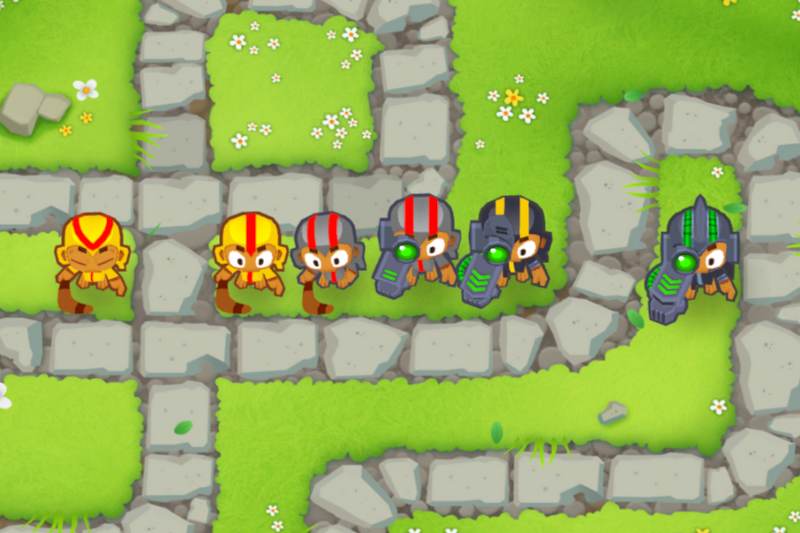
A Perma Charge Boomerang Monkey is a pretty strong Boomerang Monkey as as it’s name suggests, the Perma Charge Boomerang Monkey’s main focus is to speed up the Boomerang Monkey in hopes of having it rapidly pop bloons.
Unlike the Turbo Charge (-/4/-) Boomerang Monkey, the Perma Charge Boomerang Monkey keeps all of the stats of the Turbo Charge ability and gains an additional 2 damage.
The Perma Charge Boomerang Monkey gains a new ability that when activated will increase it’s damage by 8 for 15 seconds.
The Perma Charge ability has a cooldown of 40 seconds.
The Perma Charge Boomerang Monkey is great for players who hope to deal high amounts of rapid damage, being best for dealing with groups of bloons, though with a Monkey Intelligence Bureau (-/3/-) Monkey Village, players will be able to deal with all types of bloons, including the Dark Dirigible Titans (DDTs).
When it comes to cross pathing players will want a (-/5/2) Perma Charge Boomerang Monkey as the Red Hot Rangs upgrade will provide players with 4 damage, providing the Boomerang Monkey with a total of 8 damage per boomerang instead of 4.
A (2/5/-) Perma Charge Boomerang Monkey is still fairly strong, though players will only benefit from some extra pierce and attack speed, essentially being a weaker upgrade since the alternative doubles the damage of each boomerang thrown.
Perma Charge Boomerang Monkeys are pretty much tied with Glaive Lords for me for usage, though the reality is that Perma Charge Boomerang Monkeys output a lot more damage if players are able to pair them up with a variety of support Towers including Alchemist Monkeys or Monkey Villages.

PATH 3 TIER-5 BOOMERANG MONKEYS – MOAB DOMINATION
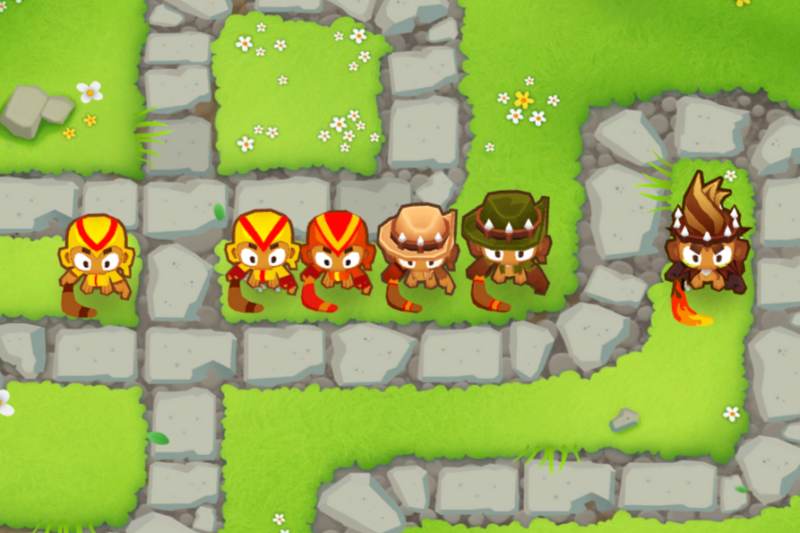
The MOAB Domination Boomerang Monkey is by far one of my favourite upgrade Towers go place on any map as it has the ability to stun any affected MOAB class bloons for 0.25 seconds before knocking them back.
Kylie Boomerangs will deal up to 280 damage per shot as well as the ability to cause an explosion that deals 100 damage upon the projectile expiring.
The explosion will also cause bloons to burn for 4 seconds dealing 50 damage every second up to a maximum of 20 bloons.
MOAB Domination will respectively shred through 12 layers of bloons and will double the attack speed of both the normal attack of the Boomerang Monkey as well as the Kylie Boomerang.
The most notable use of the MOAB Domination Boomerang Monkey is to push back MOAB-class bloons that are at risk of leaking as the MOAB Domination Boomerang Monkey has the ability to push back MOAB-class bloons by a considerable distance, allowing Towers that are placed earlier on the track to damage the MOAB-class bloon again.
In most cases players will want to cross path a MOAB Domination Boomerang Monkey with Path 2 as Path 2 will raise the attack speed of a Boomerang Monkey, essentially meaning that a player has a higher chance of stunning or shoving MOAB class bloons that come your way.
Players will only want to cross path with Path 1 if they want some extra piece, though this isn’t as useful as a MOAB Domination Boomerang Monkey doesn’t deal a whole lot of damage to regular bloons.
When it comes to support towers with a MOAB Domination, it’s recommended that players pair up a MOAB Domination Boomerang Monkey with a Monkey Village with Radar Scanner (-/2/-) to provide it with Camo detection in order to attack Dark Dirigible Titans (DDTs). MOAB Domination Boomerang Monkeys are great for managing DDTs as otherwise they have the chance to flood, especially when they have Fortification properties.
Players can also place an Alchemist Monkey with Permanent Brew or an Engineer Monkey with Overclock (-/4/-) to improve its attack speed.
The only MOAB-class bloon players will have difficulty with is the Big Airship of Doom (BADs), meaning that player will need other Towers to deal with them.
Players should always put a Path 3 Boomerang Monkey on “Strong” targeting as this will ensure that they always hit MOAB-class bloons.
CONCLUSION
When it comes to placing a tier-5 Boomerang Monkey any choice is going to be a good one, though I would recommend always placing at least one tier-5 Path 3 Boomerang Monkey, being the MOAB Domination Boomerang Monkey.
Path 3 provides players with some of the highest defences they can receive when dealing with MOAB-class bloons and while they will not be able to solo all types of MOAB-class bloons, they will buy players a lot of time when other towers try to destroy the MOABs.
When it comes to choosing between the other tier-5 Boomerang Monkeys, players will want to make their choice based on what towers they are placing in tandem.
If you’re planning on placing a Monkey Village with Monkey Intelligence Bureau use a tier-5 Path 2 Boomerang Monkey for its immense speed or if you’re not I would recommend using a Path 1 Boomerang Monkey.
Having all three types of Boomerang Monkeys on the field can be a good choice, however, it does leave you exposed to Camo Bloons.
So what do you think? What’s your favourite Boomerang Monkey? Do you also like Path 3 or do you have a better strategy? Let me know in the comments below!
This is exactly what I needed to know for the challenge event, I’m trying to get my boomerang XP up now that paragons have been added. Thank you!
No worries! Glad you found it helpful 🙂