The Banana Farm is by far one of the most essential Towers players can place in Bloons TD 6 as the Banana Farm is by far the best source of income in all of BTD6.
Upon placing a Banana Farm, players will begin collecting bunches of Bananas which will provide them with $20 each, though these bunches of Bananas can be upgraded in order to provide players with more money by either providing more bunches of Bananas or increase the worth of the Bananas that drop.
Unlike BTD5, the Banana Farm has three very different upgrade paths, one requiring players to hover over the bunches of Bananas in order to collect the money, one providing players with a Monkey Bank that they can invest and leave money inside of in order to gain interest on the money they invest and the final being a similar upgrade, though instead providing players with cash throughout the round that automatically collects and can expand with the placement of specific Towers.
In most cases it will not matter what kind of Banana Farm players place as any source of income proves to be helpful on every map, though players will need to get used to when to upgrade the Banana Farm in order to balance out the amount of money they are trying to collect and the amount of damage they are able to output.
In many cases, players may find themselves losing a round simply because they spent all of their income upgrading a Banana Farm too early instead of upgrading Towers, so while Banana Farms are useful it’s undeniable that they can sometimes distract a player from focussing on what’s most important when playing bloons, dealing damage.
The following guide will take you through everything you need to know when placing a Banana Farm, strategies on when to upgrade Banana Farms as well as tips on which Banana Farm players should select and what situations they are most useful in.
Note: If you want to watch me play games like BTD6 on Twitch head on over here! I’m always happy to answer your questions there as well!

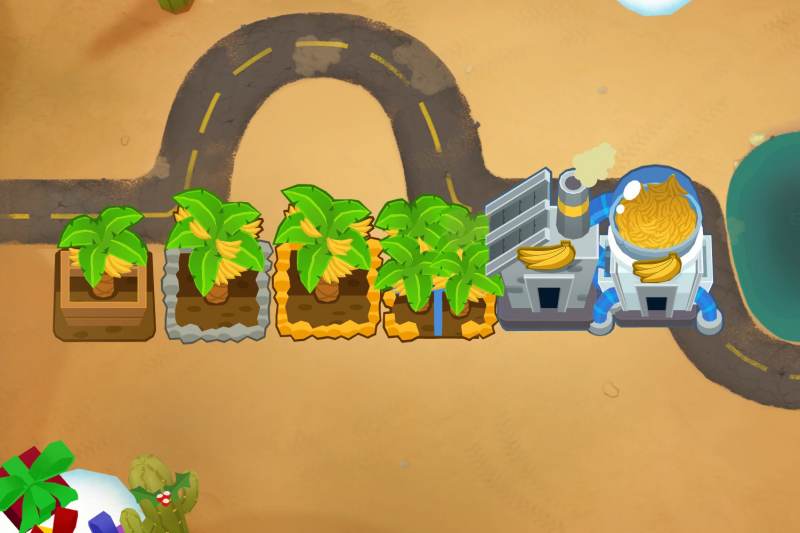
PATH 1 TIER-5 BANANA FARM – BANANA CENTRAL
The Banana Central is by far the most common Banana Farm upgrade players choose to use simply because it yield a tremendous amount of cash and allows players to collect their cash throughout the round with no consequences.
Without a cross path, the Banana Central will drop 5 crates each worth $1,200 though players can expand this income by choosing a Path 2 cross path, which I will cover shortly.
The Path 1 Banana Central is by far one of the strongest options for Banana Farms as it will help players maximize their income for the late game, though their one downfall is the need to have players hover over their drops before they disappear.
Not only do Banana Centrals have an impressive yield of income, they can also grow the income of lower-tier Banana Research Facilities (4/-/-) by raising their income by 25%.
Before players purchase the Bank Deposits Monkey Knowledge, which empowers Path 2 Banana Farms, the Path 1 Banana Central will yield more cash, especially when placed in tandem with multiple Banana Research Facilities or Engineer Monkeys with Overclock to raise the efficiency of these cash cows.
Due to their high cost, players should wait to upgrade a Banana Central until they have at least 3 Banana Research Facilities to empower as the buff it provides the Banana Research Facilities will help make back the money players spend in order to make the initial upgrade.
Players should try to make this purchase before round 70 and ideally by round 50 as upgrading the Banana Central too late in the game as by itself players will take between 14-20 rounds to make back their money (without the use of Banana Research Facilities).
Using Overclock on the Banana Central can cut this time in half.
Even if players plan to use another path in the future for Banana Farms, having lower-tier Path 1 Banana Farms or the Banana Central itself can help fuel the income necessary to make the upgrades and activate the special abilities of the other Banana Farms as, again, they will constantly provide the player with money with no catches.
When it comes to cross pathing a Banana Central, players should only use Path 2 as doing so will raise the income of each Banana Crate to $1,500, essentially allowing players to collect a much higher yield of cash they would not otherwise obtain.
Path 3 will allow players to wait a bit longer to collect their funds and will ensure that if their funds are collected too late they will still make a decent chunk of money, though in my opinion this is only useful for mobile players who find it difficult to both maintain their damage Towers at the same time as collecting crates of money.

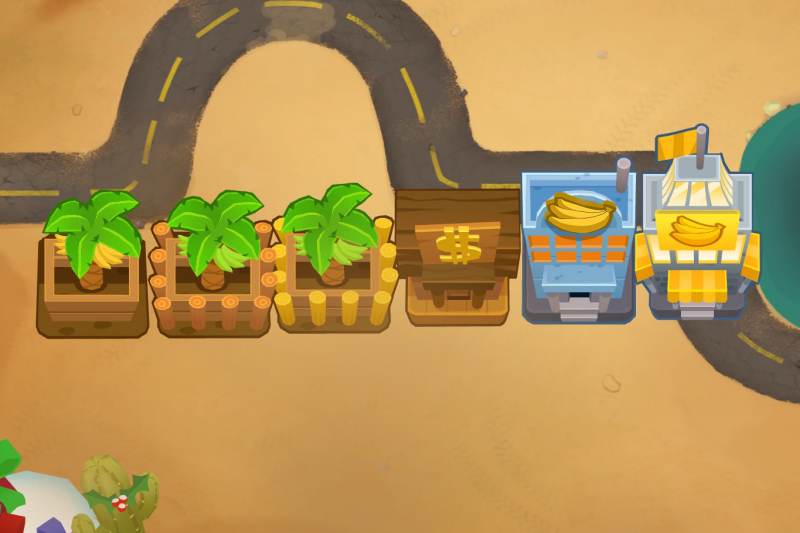
PATH 2 TIER-5 BANANA FARM – MONKEY-NOMICS
By far my personal favourite when it comes to Banana Farms is the Monkey-Nomics Banana Farm.
The Monkey-Nomics Banana Farm, as powerful as it is, will require players to micromanage quite a bit and will not actually yield much cash on a turn by turn bases as it relies on the interest players collect and deposit into the Monkey-Nomics Banana Farm.
Before I get into that, let me explain the Bank Deposits Monkey Knowledge.
Without Bank Deposits, players will only be able to collect the $230 the Monkey-Nomics Banana Farm collects each round, being a substantially low amount of money.
Players with the Bank Deposits Monkey Knowledge active will be able to deposit funds into the Monkey-Nomics Banana Farm in order to take advantage of the 15% interest players will receive on the money deposited into the Monkey Bank.
Players will mostly benefit by the new special ability that the Monkey-Nomics obtains, allowing players to collect $10,000 upon activating without the need to pay back the loan.
Players will be able to activate this ability every minute they are playing and if they have the Backroom Deals Monkey Knowledge they will collect even more money, being $12,000.
In most cases the Monkey-Nomics upgrade is completely unnecessary at it costs players too much for the amount of money it yields, so players may want to simply stick to a number of IMF Loans (-/4/-) Banana Farms to gain around the same amount of money, especially if they are simply playing to round 100.
Beyond round 100, players will benefit much more from the Monkey-Nomics upgrade.
If possible, players will want to place an Energizer (5/-/-) Monkey Sub in order to further reduce the cooldown of the Monkey-Nomics special ability, decreasing the cooldown by 20% or bringing it down to 40 seconds.
Unfortunately, many maps a player will be playing on will not have water, making this impossible for a number of situations.
When it comes to cross pathing a Monkey-Nomics Banana Farm, players will only want to cross path with Path 1 in order to generate a bit more income each round, allowing players to gain $40 extra each round bringing the income up to $310.
While not much, this in tandem with Bank Deposits and the 15% interest can really help a player generate much more income.
Path 3 can be useful, although it doesn’t provide players with more income, instead it will notify players when the Monkey-Nomics Monkey Bank is full and needs players to collect the income generated inside of it.
Players placing a Path 2 Monkey Bank should always think about placing Benjamin as doing so will greatly increase the amount of the Monkey Bank can generate.

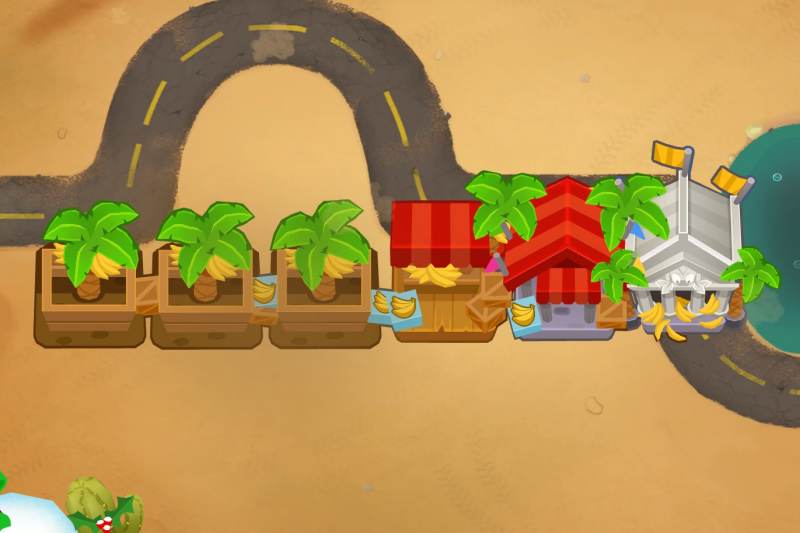
PATH 3 TIER-5 BANANA FARM – MONKEY WALL STREET
The Monkey Wall Street Banana farm is unfortunately my least favourite types of Banana Farm, though it undeniably provides players with a good chunk of money.
Without cross paths, the Monkey Wall Street Banana Farm will supply players with 16 collections of $70 Banana bunches players will not need to collect as well as an extra $4,000 at the end of every round.
The best part of the Monkey Wall Street is the fact that it empowers Path 3 Monkey Buccaneer to provide players with more cash per round.
The Monkey Wall Street Banana Farm will provide any Merchantman or above with 10% more income, essentially making it so the player will simply have more ways of generating more money per round.
The reality is that the Monkey Wall Street Banana Farm is by far one of the best upgrade paths players can use, outweighing a Path 1 Banana Farm even, though similar to the Central Market, the Monkey Wall Street Banana Farm is less powerful than a Path 2 IMF Loans or Monkey-Nomics Banana Farm when the Bank Deposits Monkey Knowledge is purchased.
When it comes to cross pathing a Monkey Wall Street players will have to make the decision based on what Monkey Knowledge they have activated.
Unfortunately neither of the cross paths will affect the end of round cash, making a Path 1 cross path if they want two more Banana bunches, though this only leads to $140 extra.
A Path 2 cross path upgrade will provide players with 25% more income, essentially providing $280 more.
CONCLUSION
When it comes to selecting a Banana Farm to help fuel your income I strongly recommend using a Path 2 IMF Loan or Monkey-Nomics Banana Farm as the special ability is by far the best upgrade players can purchase, especially in tandem with the 15% interest players can take advantage of, especially when they have access to the Bank Deposits Monkey Knowledge as without it any Monkey Banks will make very little cash.
Players should place a Path 1 Banana Central if they expect themselves to multiple Banana Farms as this will provide the most income, especially throughout rounds before Round 100.
There are no downfalls to using Banana Centrals in comparison to the pay back that lower tier Path 2 IMF Loan Monkey Banks require.
Now, as much as a Path 3 Monkey Wall Street Banana Farm is powerful and provides players with a great deal of money, as they do not help empower each other, players will only require one.
In reality I would recommend only placing one of these and only placing multiple if you expect to place multiple Monkey Buccaneers who are upgraded to Merchantman or higher as they will be the only Towers boosted by these upgrades.
Otherwise, if players are thinking about placing only one Banana Farm, this is the tier for you.
In reality, players will want to optimize their income by placing multiple types of Banana Farms.
So I’m curious, what’s your favourite Banana Farm Strategy?
Do you like to place multiple Path 1 Banana Farms?
Do you find the micromanaging of a Path 2 Monkey-Nomics Banana Farm to be too difficult?
Or do you simply enjoy the sheer amount of money that a Path 3 Monkey Wall Street provides?
Let me know in the comments below!
i like spaming 2-0-4 farms and 0-0/1/2-4 bunkaneers bc the 0-0-4 farm ability stacks
but which path actually gives you most? I want as much money as possible saving for paragons etc.
The answer is sadly the fact that you’d need a mix of at least two of them, especially because their yield will depend on how many you have of the same type and what Monkey Knowledge you have. That being said, it also depends on how early you are in a match or how much time has passed.
banana central costs 100k, the initial cost is way higher than monkey wall street plus it doesn’t give 3 lives at the end of the round. ideally it’d be better to get monkey wall street first than banana central especially since monkey wall street can auto collect banana central