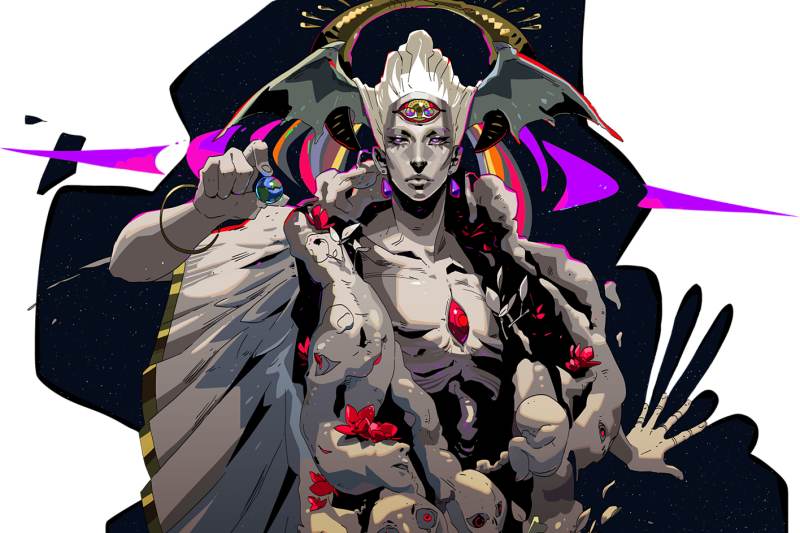
Chaos is one of the most interesting gods to talk about because they are not obtained in a typical manner.
While all other gods will be available for players to collect their Boons from completing encounters, players will have to choose to go through a Chaos Gate when available in order to locate Chaos.
Chaos Gates will only appear when players have completed 6 escape attempts.
Anytime a player enters a Chaos Gate they will sacrifice a bit of their Health in order to enter the gate, so players will want to keep an eye out on their Health to make sure that they will be able to sustain their journey with whatever Health they have left.
Chaos is usually a good god to focus on getting Boons for, especially if players are trying to grind out Artifacts. Even if players aren’t focusing on Artifacts I commonly recommend heading into one of their portals to see what upgrades you can get.
Also unlike other gods in the game, players will reap benefits from Chaos, but will also have to deal with a penalty for a number of rounds, being random for both. There are no Boons that are tied to Curses, so making a choice will depend on what Curse you’re willing to take and whether or not a Boon is worth taking for the Curse you get.
I will shortly cover the Boons I usually take and which Curses I tend to avoid and when, though at the end of the day, everything is going to be based on a player’s preference.
Note: Watch me play Hades and similar games on Twitch! Always happy to answer questions there!
OLYMPIAN AFFINITY & FAVOUR
Chaos, being one of the many Olympian gods will have the ability to gain Affinity with a player.
Players can gain affinity by trading in Nectar to them and upon providing the first gift, they will provide a player with his Keepsake the Cosmic Egg.
Players will not want to hold off on providing Chaos too much Nectar as they will provide players with any further rewards being one of the Companions, and will have to max them out at 8 hearts.
As Chaos requires 8 hearts to gain full affinity, the are one of the only Olympian gods who will require 6 Nectar and 2 Ambrosia in total.
In order to fully obtain Favour with Chaos, players will have to complete Nyx at the same time, essentially reuniting them and fulfilling one of the Fated List of Minor Prophecies.
If folks are paying attention to the story they will notice Chaos mention that they have been trying to reach out to Nyx and Nyx will instruct Zagreus to upgrade the eldest sigil in the administrative chamber to reunite Chaos with her.
Players will have to spend 3,142 Darkness at the House Contractor to purchase this upgrade. Upon purchasing the upgrade, Nyx will always be in Chaos’ domain and will mention how pleased they are to be reconnected.
CHAOS BOON BLESSINGS
As mentioned, Chaos has both a blessing and a curse with their Boons. Unlike all other gods, Chaos will only have one tier of Boons, though they will have rarities for Common, Rare and Epic (not having any Heroic versions, though having a single Legendary).
Players will not be able to upgrade Chaos’ Boons with Poms, though they will be able to receive the same blessing more than once to stack its effects.
AFFLUENCE
The Common Affluence provides players with 30-50% more Chiron’s Obol.
The Rare Affluence provides players with 45-75% more Chiron’s Obol.
The Epic Affluence provides players with 60-100% more Chiron’s Obol.
AMBUSH
The Common Ambush provides players with 40-60% more damage when striking foes from behind.
The Rare Ambush provides players with 60-90% more damage when striking foes from behind.
The Epic Ambush provides players with 80-120% more damage when striking foes from behind.
Note: Players can only get Ambush with the Mirror of Night Talent Shadow Presence.
ASSAULT
The Common Assault provides players with 30-40% more damage when striking foes for the first time.
The Rare Assault provides players with 45-60% more damage when striking foes for the first time.
The Epic Assault provides players with 60-80% more damage when striking foes for the first time.
Note: Players can only get Assault with the Mirror of Night Talent Fiery Presence.
ECLIPSE
The Common Eclipse provides players with 75-100% more Darkness and Gemstones.
The Rare Eclipse provides players with 112.5-150% more Darkness and Gemstones.
The Epic Eclipse provides players with 150-200% more Darkness and Gemstones.
FAVOUR
The Common Favour provides players with 11-20% more chance to obtain Rare or better Boons moving forward. This also includes a 10% boost to get Epic or Legendary Boons.
The Rare Favour provides players with 16.5-30% more chance to obtain Rare or better Boons moving forward. This also includes a 10% boost to get Epic or Legendary Boon.
The Epic Favour provides players with 22-40% more chance to obtain Rare or better Boons moving forward. This also includes a 10% boost to get Epic or Legendary Boon.
FLOURISH
The Common Flourish provides players with 30-60% more damage when dealing damage with their Special.
The Rare Flourish provides players with 45-90% more damage when dealing damage with their Special.
The Epic Flourish provides players with 60-120% more damage when dealing damage with their Special.
GRASP
Oddly, Grasp is the same for each tier, providing players with 1 Blood Shard for each.
LUNGE
The Common Lunge provides players with 30-60% more damage when dealing damage with their Dash Attack.
The Rare Lunge provides players with 45-90% more damage when dealing damage with their Dash Attack.
The Epic Lunge provides players with 60-120% more damage when dealing damage with their Dash Attack.
SHOT
The Common Shot provides players with 30-40% more damage when dealing damage with their Cast.
The Rare Shot provides players with 45-60% more damage when dealing damage with their Cast.
The Epic Shot provides players with 60-80% more damage when dealing damage with their Cast.
SOUL
The Common Soul provides players with 30-40 more Health.
The Rare Soul provides players with 45-60 more Health.
The Epic Soul provides players with 60-80 Health.
STRIKE
The Common Strike provides players with 30-40% more damage when dealing damage with their Attack.
The Rare Strike provides players with 45-60% more damage when dealing damage with their Attack.
The Epic Strike provides players with 60-80% more damage when dealing damage with their Attack.
DEFIANCE
Defiance is the only Legendary Boon available for Chaos and will require players to select another Chaos Boon before they see it. Players with Defiance will have an extra use of Death Defiance for this escape attempt.
CHAOS BOON CURSES
As mentioned, with every Boon comes a Curse, so it’s going to be very important to know where you are before you make a choice of what Curse you’re fine with.
Players are encouraged to keep track of Bosses in specific, as fighting a Boss with certain Curses can be problematic.
In the first 3 biomes, Bosses appear on floor 14, 24 and 36 and the rooms before them are always going to be non-combat chambers. But by the time you realize that you’re in a non-combat zone it’s too late.
It should be noted that if you receive a curse that deals damage to you, such as Addled, Flayed or Maimed, you will not be able to take damage beyond 1HP, so if you’re running Boons that protect you like Athena’s, you could get away with dealing damage with the attack they are attached to as long as you deflect all other incoming damage. This is not encouraged for newer players.
It should be noted that there are no rarities for Curses and they are completely random.
ABYSSAL
With Abyssal for the next 3–4 encounters, players will take 300%–500% more damage from traps.
*I would take this, it’s pretty easy to avoid Traps.
ADDLED
With Addled for the next 3–4 encounters, each time a players use their Cast, they will lose 3–5 Health.
*I would take this, it’s easy not to use a Cast for a few rounds.
ATROPHIC
With Atrophic for the next 3-4 encounters, your Life Total is reduced by 25–49 Health.
Note: Will not appear if you have less than 50 total health.
*I would sometimes take this, as 25-49 Health can be serious to lose, unless you’re at full Health.
CAUSTIC
With Caustic for the next 3–4 encounters, slain foes will toss an Inferno-Bomb at you.
*I would take this as the Inferno-Bombs are pretty easy to avoid.
ENSHROUDED
With Enshrouded for the next 4–5 chambers, chamber reward previews are hidden.
*I would not take this if you need specific Boons or are Artifact grinding.
EXCRUCIATING
With Excruciated for the next 3–4 encounters, you take 20%–50% more damage.
*I would avoid taking this unless you’re good at avoiding damage.
FLAYED
With Flayed for the next 3–4 encounters, each time you use your Special, you will lose 3–5 Health.
*I would take this as your Special is easy to avoid using.
HALTING
With Halting for the next 3–4 encounters, your Dash has 20%–50% reduced range.
*I would take this curse as having a shorter dash to me isn’t the worst.
MAIMED
With Maimed for the next 3–4 encounters, each time you Attack, you lose 3–5 Health.
*I don’t usually take this curse because without your Attack players will deal damage significantly slower.
PAUPER’S
With Pauper’s for the next 3–4 encounters, you cannot earn Obols.
*I tend to avoid this for any Artifact grind run I do, though this isn’t the worst Curse players can acquire.
ROLLING
With Rolling, for the next 3–4 encounters, you face 30%–80% more foes.
*I actually don’t mind this Curse, though it can be terrible for players who struggle against lots of mobs in Encounters.
SLIPPER
With Slipper, for the next 3–4 encounters, you cannot collect Cast Ammo for 10–15 seconds.
Note: Will not appear when Stygian Soul talent is selected.
*I tend to use this Curse because it doesn’t really affect you a whole lot, especially if you have a Cast that deals damage on the floor.
SLOTHFUL
With Slothful, for the next 3–4 encounters, you have 40%-60% less move speed.
*I personally don’t mind this one, though if you need to rely on running away from enemies to survive, this isn’t the Curse for you.
Leave a Reply