When it comes to selecting a class to main in Trove, players will often find themselves trying out a few different characters in order to find something that matches their play style.
In reality choosing a class to play will not lock players in any way shape or form as players can ultimately rotate between classes as often as they want and at any time, though when it comes to grinding out good Gems, players may want to focus on some classes more than others simply because of how powerful certain classes are.
Although classes used to be obtainable with Credits, players will now have to craft all of their classes with resources using the Chaos Core Crafter.
Players can also purchase classes for Credits, though this will require players to spend real life currency and different tiers of Classes will cost more than others, often leading players to purchase packs that include skins instead of just purchasing the class alone.
Players can also use Class Coins and Starter Class Coins to acquire a few of the characters, speaking of if you are a new player or are simply a player who is under Mastery 20, please use my “Refer-A-Friend” code to get a free Starter Class coin. This comes at no cost to you, but can help jump start you into the game.
The following guide will take you through all the classes that are available for players to play in Trove and will rank them by the least noteworthy to the most noteworthy.
16. CHLOROMANCER
While it hurts me to say, the Chloromancer is and always has been one of the weakest classes to play as it is considered a Support/Damage class.
The Chloromancer was my main for many years, as it provides players with a good amount of crowd control and healing, however, due to the sheer amount of time it takes for it’s “turrets” known as flowers to grow in order to deal damage, players will often steer clear of this class due to the DPS lost sheerly from things taking too long to grow.
The other severely unfortunate aspect to the Chloromancer is that their main Flowers, the Leafy Lashers, do not stack, essentially meaning that players will not deal a tremendous amount of damage if they simply rely on these, though players can cover more ground with multiple Leafy Lashers to ensure that mobs are consistently slowed, though I will cover more on this shortly.
HOW TO CRAFT
To craft the Chloromancer, players will need the following items:
3 Chaos Cores
15,000 Flux
1,200 Sunlight Bulbs
750 Mushroom Chunks
175 Enchanted Wood
HOW TO PURCHASE OR ALTERNATE WAYS TO UNLOCK
Players can alternatively unlock the Chloromancer by:
Using a Class Coin
Paying 750 Credits
Purchasing the Flower Pack
Completing the RIFT Cross-Promotion Quest
DAMAGE TYPE
Magic Damage
DIFFICULTY
Advanced Class
PLAYSTYLE
Ranged
WEAPON
Staff
STAT GAIN PER LEVEL
LEVEL 2
10 Magic Damage
20 Maximum Health
1 Health Regeneration
1 Energy Regeneration
LEVEL 3
10 Magic Damage
20 Maximum Health
1 Health Regeneration
1 Energy Regeneration
LEVEL 4
18 Magic Damage
40 Maximum Health
1 Health Regeneration
1 Energy Regeneration
LEVEL 5
18 Magic Damage
40 Maximum Health
1 Health Regeneration
1 Energy Regeneration
LEVEL 6
35 Magic Damage
60 Maximum Health
1 Health Regeneration
1 Energy Regeneration
LEVEL 7
35 Magic Damage
60 Maximum Health
1 Health Regeneration
1 Energy Regeneration
LEVEL 8
50 Magic Damage
80 Maximum Health
1 Health Regeneration
1 Energy Regeneration
LEVEL 9
50 Magic Damage
80 Maximum Health
1 Health Regeneration
1 Energy Regeneration
LEVEL 10
50 Magic Damage
100 Maximum Health
1 Health Regeneration
1 Energy Regeneration
LEVEL 11
50 Magic Damage
100 Maximum Health
1 Health Regeneration
1 Energy Regeneration
LEVEL 12
50 Magic Damage
100 Maximum Health
1 Health Regeneration
1 Energy Regeneration
LEVEL 13
50 Magic Damage
100 Maximum Health
1 Health Regeneration
1 Energy Regeneration
LEVEL 14
50 Magic Damage
100 Maximum Health
1 Health Regeneration
1 Energy Regeneration
LEVEL 15
50 Magic Damage
100 Maximum Health
1 Health Regeneration
1 Energy Regeneration
LEVEL 16
50 Magic Damage
100 Maximum Health
1 Health Regeneration
1 Energy Regeneration
LEVEL 17
50 Magic Damage
100 Maximum Health
1 Health Regeneration
1 Energy Regeneration
LEVEL 18
50 Magic Damage
100 Maximum Health
1 Health Regeneration
1 Energy Regeneration
LEVEL 19
50 Magic Damage
200 Maximum Health
1 Health Regeneration
1 Energy Regeneration
LEVEL 20
50 Magic Damage
300 Maximum Health
50 Health Regeneration
10 Energy Regeneration
LEVEL 21
100 Magic Damage
200 Maximum Health
100 Health Regeneration
1 Energy Regeneration
LEVEL 22
100 Magic Damage
200 Maximum Health
100 Health Regeneration
1 Energy Regeneration
LEVEL 23
100 Magic Damage
200 Maximum Health
100 Health Regeneration
1 Energy Regeneration
LEVEL 24
100 Magic Damage
200 Maximum Health
100 Health Regeneration
1 Energy Regeneration
LEVEL 25
150 Magic Damage
300 Maximum Health
150 Health Regeneration
1 Energy Regeneration
LEVEL 26
150 Magic Damage
300 Maximum Health
150 Health Regeneration
1 Energy Regeneration
LEVEL 27
150 Magic Damage
300 Maximum Health
150 Health Regeneration
1 Energy Regeneration
LEVEL 28
200 Magic Damage
300 Maximum Health
150 Health Regeneration
1 Energy Regeneration
LEVEL 29
200 Magic Damage
400 Maximum Health
200 Health Regeneration
1 Energy Regeneration
LEVEL 30
250 Magic Damage
500 Maximum Health
250 Health Regeneration
10 Energy Regeneration
ABILITIES
PASSIVE
Every 18 seconds, the Chloromancer has the ability to gain a shield that equals to 30% of its maximum health that absorbs damage when the Chloromancer is under 50% health.
The shield will last a maximum of 15 seconds, providing the Chloromancer with more sustain.
BASIC ATTACK
The Chloromancer’s basic attack deals 100% of it’s Magic Damage and has a range of 29 blocks, attacking 2x it’s attack speed per second.
The Chloromancer’s basic attack also has a partywide buff that heals allies for 2% of their maximum health and plants for 12% of the Chloromancer’s maximum health, essentially speeding up the process it takes for them to explode.
ACTIVE ABILITY 1 (M2)
Every 0.2 seconds, the Chloromancer can throw out a Leafy Lasher for the cost of 20 Energy.
Leafy Lashers take 2 seconds to grow and will spin around, snaring enemies and dealing 215% of the Chloromancer’s Magic Damage every 0.4 seconds.
Leafy Lashers can be attacked/healed to speed up the process of growth and will last a total of 7 seconds and although players can place a maximum of 4 Leafy Lashers, players will not be able to stack the damage that comes from Leafy Lashers.
Leafy Lashers are best used for the crowd control that they provide, essentially slowing enemies that walk through them in a 3.5 block radius.
Players will want to make sure that they attack the Leafy Lasher as they will grow much faster by being “healed.”
ACTIVE ABILITY 2 (1)
Every second players can throw out a Blooming Pollinator for the cost of 50 Energy.
Blooming Pollinators take 20 seconds to grow and will gradually heal nearby players while they grow.
Once a Blooming Pollinator fully grows it will burst and heal players by 12.5% of their maximum health and will damage enemies by 550% of the Chloromancer’s Magic Damage.
Blooming Pollinators will be the primary source of a Chloromancer’s damage, although players wouldn’t assume so from their animation.
Players will want to make sure that they place 6 Blooming Pollinators whenever they can and attack them as quickly as possible in order to maximize their damage.
Players will have a bit of leeway when throwing Blooming Pollinators as they have a 4.5 Block Radius.
Players can still choose to stack all of their damage in one area as this may make it easier to heal your plants rapidly so they explode faster.
Players will want to ensure that they have a good amount of Energy Regen if they hope to deal the most damage as players can get by using Leafy Lashers regularly, but Blooming Pollinators take a lot of Energy to keep spawning.
ULTIMATE (2)
Sadly, the Chloromancer’s Ultimate is the least useful ultimate in all of Trove as it will allow the player to throw a total of 10 Leafy Lashes and Blooming Pollinators around it.
While the cost of Sow Chaos is awesome, being that it does not require any energy, the reality is that it does not provide players with enough control over where these plants land, thus wasting a lot of the damage that the Chloromancer would be able to cause.
Sow Chaos can be used every 50 seconds and has a 4 Block radius, lasting for 5 seconds.
CLASS GEM
My favourite thing about the Chloromancer is the Class Gem Key, as is with most classes.
The Chloromancer can obtain Green Gatling, which will provide the player with an 8% chance to spawn a Green Gatling whenever using Leafy Lasher or Blooming Pollinator.
Green Gatlings attack very quickly and deal 100% Magic Damage for 5 seconds, having the longest range of 8 blocks.
Realistically, this is the most powerful plant that Chloromancers have, meaning that a player will need to obtain this Class Gem as soon as possible.
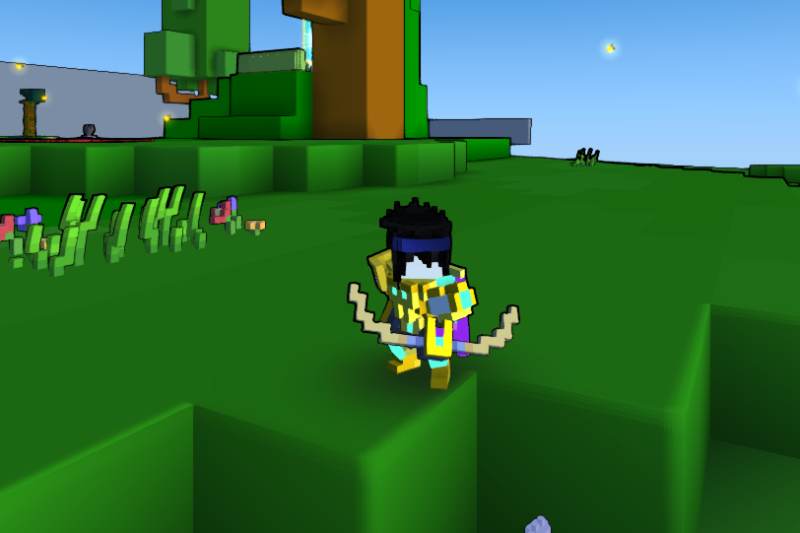
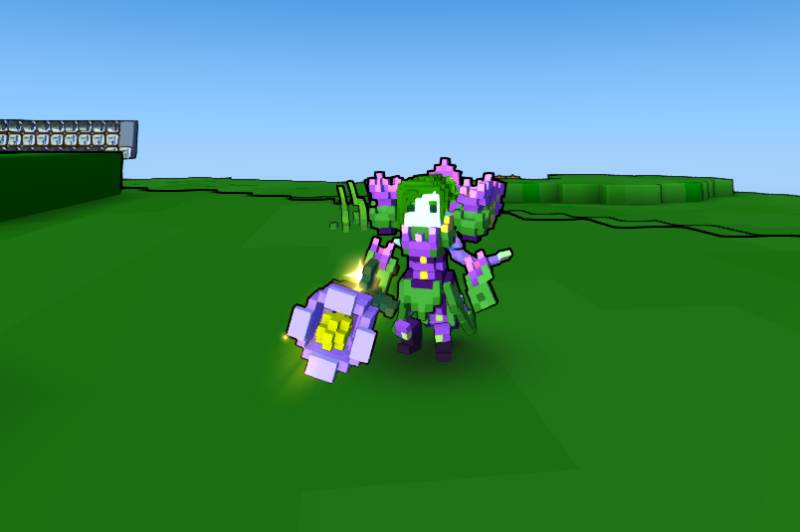
15. SHADOW HUNTER
While the Shadow Hunter is definitely one of the more fun classes to play, especially with the Class Gem, the reality is that the Shadow Hunter isn’t as powerful as other Physical Damage classes, simply due to the stats it gains passively.
The Shadow Hunter is perfect for early mid-game play and is perfect for solo farming, however, when players begin farming out the Delves, I would recommend steering clear of this class simply because there are much better classes that will help you grind bosses much faster.
Although very low on my list of priorities to power up, if you’re looking for a class to quickly grind out Gem Boxes or quickly get your dalies done, I strongly recommend grabbing yourself a Shadow Hunter as they will also help you get enemies that are far from you, but again this class is definitely not an End Game kind of class.
What’s special about the Shadow Hunter is that it maxes out Critical Hit fairly quickly, especially with Dragons and levelling up, meaning that players will not need to get Critical Hit on many of their Gems.
Shadow Hunters are considered essential for Rampages and quite frankly, as you are dealing 1 damage per hit no matter what class you are playing, it’s always a good idea to have a Class Gem on any power rank Shadow Hunter so you can quickly deal damage to Rampage Bosses in any situation.
HOW TO CRAFT
To craft the Shadow Hunter, players will need the following items:
3 Chaos Core
15,000 Flux
2,000 Radiant Shards
20 Somber Soul
1,500 Crystalized Cloud
HOW TO PURCHASE OR ALTERNATE WAYS TO UNLOCK
Players can alternatively unlock the Shadow Hunter by:
Using a Class Coin
Paying 750 Credits
DAMAGE TYPE
Physical Damage
DIFFICULTY
Advanced Class
PLAYSTYLE
Ranged
WEAPON
Bow
STAT GAIN PER LEVEL
LEVEL 2
10 Physical Damage
20 Maximum Health
1 Energy Regeneration
0.2 Critical Hit
LEVEL 3
10 Physical Damage
20 Maximum Health
1 Energy Regeneration
0.3 Critical Hit
LEVEL 4
18 Physical Damage
40 Maximum Health
1 Energy Regeneration
0.2 Critical Hit
LEVEL 5
18 Physical Damage
40 Maximum Health
1 Energy Regeneration
0.3 Critical Hit
LEVEL 6
35 Physical Damage
60 Maximum Health
1 Energy Regeneration
0.2 Critical Hit
LEVEL 7
35 Physical Damage
60 Maximum Health
1 Energy Regeneration
0.3 Critical Hit
LEVEL 8
50 Physical Damage
80 Maximum Health
1 Energy Regeneration
0.2 Critical Hit
LEVEL 9
50 Physical Damage
80 Maximum Health
1 Energy Regeneration
0.2 Critical Hit
LEVEL 10
50 Physical Damage
100 Maximum Health
1 Energy Regeneration
0.2 Critical Hit
LEVEL 11
50 Physical Damage
100 Maximum Health
1 Energy Regeneration
0.3 Critical Hit
LEVEL 12
50 Physical Damage
10 Maximum Health
1 Energy Regeneration
0.2 Critical Hit
LEVEL 13
50 Physical Damage
100 Maximum Health
1 Energy Regeneration
0.3 Critical Hit
LEVEL 14
50 Physical Damage
100 Maximum Health
1 Energy Regeneration
0.2 Critical Hit
LEVEL 15
50 Physical Damage
100 Maximum Health
1 Energy Regeneration
0.3 Critical Hit
LEVEL 16
50 Physical Damage
100 Maximum Health
1 Energy Regeneration
0.2 Critical Hit
LEVEL 17
50 Physical Damage
100 Maximum Health
1 Energy Regeneration
0.3 Critical Hit
LEVEL 18
50 Physical Damage
100 Maximum Health
1 Energy Regeneration
0.2 Critical Hit
LEVEL 19
50 Physical Damage
100 Maximum Health
1 Energy Regeneration
0.3 Critical Hit
LEVEL 20
100 Physical Damage
200 Maximum Health
1 Energy Regeneration
0.5 Critical Hit
LEVEL 21
100 Physical Damage
200 Maximum Health
1 Energy Regeneration
0.5 Critical Hit
LEVEL 22
100 Physical Damage
200 Maximum Health
1 Energy Regeneration
0.5 Critical Hit
LEVEL 23
100 Physical Damage
200 Maximum Health
1 Energy Regeneration
0.5 Critical Hit
LEVEL 24
100 Physical Damage
200 Maximum Health
1 Energy Regeneration
0.5 Critical Hit
LEVEL 25
150 Physical Damage
300 Maximum Health
2 Energy Regeneration
0.7 Critical Hit
LEVEL 26
150 Physical Damage
300 Maximum Health
1 Energy Regeneration
0.7 Critical Hit
LEVEL 27
150 Physical Damage
300 Maximum Health
1 Energy Regeneration
0.7 Critical Hit
LEVEL 28
200 Physical Damage
300 Maximum Health
2 Energy Regeneration
0.7 Critical Hit
LEVEL 29
200 Physical Damage
300 Maximum Health
2 Energy Regeneration
0.7 Critical Hit
LEVEL 30
250 Physical Damage
500 Maximum Health
4 Energy Regeneration
1 Critical Hit
25 Critical Damage
ABILITIES
PASSIVE
Periodically the Shadow Hunter will mark a nearby enemy with Shadow Mark which allows players to see the mob through walls.
Players will be able to trigger Shadow Mark every 5 seconds and will be able to see them 21 blocks away for 10 seconds.
BASIC ATTACK
As a basic attack the Shadow Hunter will shoot a pure light arrow that deals 480% Physical Damage 1.04x per second with a range of 51 Blocks.
As a start, the Shadow Hunter isn’t all that powerful and players tend to find it difficult to grind out on their own, making the Class Gem very important for players.
ACTIVE ABILITY 1 (M2)
The Shadow Hunter’s first Active Ability is Radiant Arrow which pierces through walls and enemies.
Uncharged the Radiant Arrow will only deal 200% Physical Damage, however, if players fully charge it they will deal 750% Physical Damage as long as an enemy has a Shadow Mark on it, essentially consuming the Mark.
It costs 40 Energy to use Radiant Arrow , though it has no cooldown and has a range of 56 blocks.
ACTIVE ABILITY 2 (1)
The Shadow Hunter’s second Active ability is Sun Snare which is a trap that stuns enemies for 2 seconds and deals 115% Physical Damage.
While Sun Snare can be effective for tasks such as Cursed Skulls where hoards of enemies appear suddenly, though this is an ability I rarely use.
Sun Snare costs a whopping 65 energy and has a 3 block radius.
ULTIMATE (2)
The Shadow Hunter’s ultimate, Arrow of the Goddess” is by far one of the best things about the Shadow Hunter.
Arrow of the Goddess will mark all enemies within 15 blocks with a Shadow Mark and will empower the next Radiant Arrow, essentially increasing it’s damage, doubling it’s critical damage and knocking back enemies.
CLASS GEM
By far the most impressive attack that the Shadow Hunter can get is Shadow Blitz which is granted by obtaining the Class Gem.
Players will now be able to rapid-fire using their Basic Attack, dealing damage 12 times per second and dealing 100% Physical Damage.
If players attack a Shadow Marked mob, players will deal 750% Physical Damage and will cause a 3×3 explosion around it.
The biggest downside to the Class Gem, which is simply not worth talking about, is the fact that it shrinks the Shadow Hunter’s attack range to 45 Blocks instead of 51 Blocks.
14. FAE TRICKSTER
The Fae Trickster is arguably my least favourite class to play as it just does not suit my play style, though in reality it is still a viable option to play in the early to mid game.
The Fae Trickster focuses on dealing AoE damage, though the reality is that the Fae Trickster comes with very high DPS in general as long as the player is not hit by mobs.
The Fae Trickster is well named as it comes with a bundle of tricks such as being able to spawn in decoys that will help ensure that the Fae Trickster itself doesn’t get damaged.
The Fae Trickster runs out of Energy very quickly, making Energy Regeneration extremely important for players, being even more important when players are in higher levels as the attack speed on the Fae Trickster is not as impressive as spamming it’s abilities, though attack speed traits are going to be very helpful for you as you build your stats.
HOW TO CRAFT
To craft the Fae Trickster, players will need the following items:
3 Chaos Cores
15,000 Flux
200 Faerie Dust
30 Blank Scrolls
100 Diamonds
HOW TO PURCHASE OR ALTERNATE WAYS TO UNLOCK
Players can alternatively unlock the Fae Trickster by:
Using a Class Coin
Paying 750 Credits
DAMAGE TYPE
Magic Damage
DIFFICULTY
Advanced Class
PLAYSTYLE
Ranged
WEAPON
Staff
STAT GAIN PER LEVEL
LEVEL 2
10 Magic Damage
20 Maximum Health
1 Energy Regeneration
0.1 Critical Hit
LEVEL 3
10 Magic Damage
20 Maximum Health
1 Energy Regeneration
0.1 Critical Hit
LEVEL 4
18 Magic Damage
40 Maximum Health
1 Energy Regeneration
0.1 Critical Hit
LEVEL 5
18 Magic Damage
40 Maximum Health
1 Energy Regeneration
0.1 Critical Hit
LEVEL 6
35 Magic Damage
60 Maximum Health
1 Energy Regeneration
0.1 Critical Hit
LEVEL 7
35 Magic Damage
60 Maximum Health
1 Energy Regeneration
0.1 Critical Hit
LEVEL 8
50 Magic Damage
80 Maximum Health
1 Energy Regeneration
0.1 Critical Hit
LEVEL 9
50 Magic Damage
80 Maximum Health
1 Energy Regeneration
0.1 Critical Hit
LEVEL 10
50 Magic Damage
100 Maximum Health
1 Energy Regeneration
0.1 Critical Hit
LEVEL 11
50 Magic Damage
100 Maximum Health
1 Energy Regeneration
0.1 Critical Hit
LEVEL 12
50 Magic Damage
100 Maximum Health
1 Energy Regeneration
0.1 Critical Hit
LEVEL 13
50 Magic Damage
100 Maximum Health
1 Energy Regeneration
0.1 Critical Hit
LEVEL 14
50 Magic Damage
100 Maximum Health
1 Energy Regeneration
0.1 Critical Hit
LEVEL 15
50 Magic Damage
100 Maximum Health
1 Energy Regeneration
0.1 Critical Hit
LEVEL 16
50 Magic Damage
100 Maximum Health
1 Energy Regeneration
0.1 Critical Hit
LEVEL 17
50 Magic Damage
100 Maximum Health
1 Energy Regeneration
0.1 Critical Hit
LEVEL 18
50 Magic Damage
100 Maximum Health
1 Energy Regeneration
0.1 Critical Hit
LEVEL 19
50 Magic Damage
200 Maximum Health
1 Energy Regeneration
0.1 Critical Hit
LEVEL 20
50 Magic Damage
300 Maximum Health
2 Energy Regeneration
0.2 Critical Hit
1 Jump
LEVEL 21
100 Magic Damage
200 Maximum Health
1 Energy Regeneration
0.5 Critical Hit
LEVEL 22
100 Magic Damage
200 Maximum Health
1 Energy Regeneration
0.5 Critical Hit
LEVEL 23
100 Magic Damage
200 Maximum Health
1 Energy Regeneration
0.5 Critical Hit
LEVEL 24
100 Magic Damage
200 Maximum Health
1 Energy Regeneration
0.5 Critical Hit
LEVEL 25
150 Magic Damage
300 Maximum Health
1 Energy Regeneration
0.7 Critical Hit
LEVEL 26
150 Magic Damage
300 Maximum Health
1 Energy Regeneration
0.7 Critical Hit
LEVEL 27
150 Magic Damage
300 Maximum Health
1 Energy Regeneration
0.7 Critical Hit
LEVEL 28
200 Magic Damage
300 Maximum Health
2 Energy Regeneration
0.7 Critical Hit
LEVEL 29
200 Magic Damage
400 Maximum Health
3 Energy Regeneration
0.7 Critical Hit
LEVEL 30
250 Magic Damage
500 Maximum Health
4 Energy Regeneration
1 Critical Hit
25 Critical Damage
ABILITIES
PASSIVE
Every 2 seconds, if the Fae Trickster has not been damaged it will deal 400% Magic Damage with all of it’s attacks.
Players will need to either kite enemies or use their decoys in order to properly activate this passive, but this tends to be harder in the Geode Topside due to the sheer amount of ranged enemies.
The Fae Trickster’s passive is called Ego Blast.
BASIC ATTACK
The Fae Trickster’s basic attack has a range of 31 blocks and can attack 1.25 times per second, dealing 200% Magic Damage as a base.
This gets buffed by Ego Blast.
ACTIVE ABILITY 1 (M2)
Blink is the Fae Trickster’s first Active Ability that costs 40 Energy and can be used every 0.5 seconds.
Blink will leave behind a Decoy that will attack enemies and will allow the Fae Trickster to teleport 7 blocks into the direction they are facing.
ACTIVE ABILITY 2 (1)
Glitter Bomb is going to be your spammable ability and costs 30 Energy.
As Glitter Bomb does not have a cooldown, players can use this as their main source of damage as long as they have enough Maximum Energy and Energy Regen to compensate the Energy drain.
Glittering Bomb deals 450% Magic Damage and can be buffed with Ego Blast, dealing even more damage.
The lovely thing about Glitter Bomb is that it can damage enemies in a 3.5 block radius and will stun enemies for 0.5 seconds.
Players will have to target their Glitter Bomb, unfortunately, making it a bit tricky to use, however they can target it as close or far as they need, having a range of 29 blocks.
ULTIMATE (2)
The Fae Trickster’s ultimate, Faerie Dance, is by far the best thing about the Fae Trickster as it summons 3 staves that auto attacks enemies for 15 seconds for 200% Magic Damage.
Faerie Dance only costs 40 Energy and can be summoned every 32 seconds, being able to damage for more when Ego Blast is active.
Staves have 15 block radiuses and will be one of the most useful ways to annihilate enemies quickly.
CLASS GEM
FAE-GO MY EGO
The current Class Gem players can acquire is the Fae-go my Ego Class Gem which can trigger every 2 seconds.
The Fae- Go my Ego Class Gem is extremely useful as players can take another hit before they lose Ego Blast, making it much easier to handle the Fae Trickster.
FAEROCIOUS FACSIMILIE (RETIRED)
Unfortunately the Faerocious Facsimilie Class Gem is retired now, however, it still functions the way it used to, meaning that players can technically have two Class Gems.
The Faerocious Facsimilie is not as useful as the Fae-go my Ego Class Gem, so fear not if you didn’t get a chance to get it, however, for those of you with both Class Gems this is what you’re looking forward to.
Blink Decoys will no longer be immobile and instead will move towards enemies and explode dealing 300% Magic Damage and stunning enemies that are within a 10 Block radius.
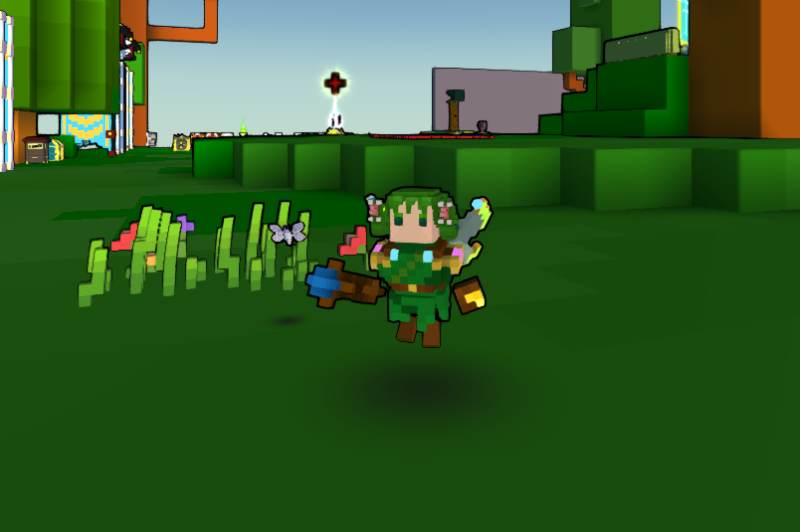
13. BOOMERANGER
The Boomeranger is a class that I have to admit I want to try out more, however, I feel like it’s much less interesting than you would expect, being a class that can be both Ranged and Melee.
The Boomeranger tends to act more aggressively when given a Sword, however, tends to be more of a support class when given a Bow.
HOW TO CRAFT
To craft the Boomeranger, players will need the following items:
1 Chaos Core
1,000 Flux
10 Primal Flame
1 Golden Soul
HOW TO PURCHASE OR ALTERNATE WAYS TO UNLOCK
Players can alternatively unlock the Boomeranger by:
Using a Class Coin
Using a Starter Class Coin
Paying 250 Credits
Purchasing the Adventure Pack
DAMAGE TYPE
Physical Damage
DIFFICULTY
Starter Class
PLAYSTYLE
Close Range & Long Ranged
WEAPON
Melee (Swords & Axes) or Bow
STAT GAIN PER LEVEL
LEVEL 2
10 Physical Damage
20 Maximum Health
10 Health Regeneration
1 Stability
LEVEL 3
10 Physical Damage
20 Maximum Health
10 Health Regeneration
1 Stability
LEVEL 4
18 Physical Damage
40 Maximum Health
20 Health Regeneration
1 Stability
LEVEL 5
18 Physical Damage
40 Maximum Health
20 Health Regeneration
1 Stability
LEVEL 6
35 Physical Damage
60 Maximum Health
30 Health Regeneration
1 Stability
LEVEL 7
35 Physical Damage
60 Maximum Health
30 Health Regeneration
1 Stability
LEVEL 8
50 Physical Damage
80 Maximum Health
40 Health Regeneration
1 Stability
LEVEL 9
50 Physical Damage
80 Maximum Health
40 Health Regeneration
1 Stability
LEVEL 10
50 Physical Damage
100 Maximum Health
50 Health Regeneration
1 Stability
LEVEL 11
50 Physical Damage
100 Maximum Health
50 Health Regeneration
1 Stability
LEVEL 12
50 Physical Damage
100 Maximum Health
50 Health Regeneration
1 Stability
LEVEL 13
50 Physical Damage
100 Maximum Health
50 Health Regeneration
1 Stability
LEVEL 14
50 Physical Damage
100 Maximum Health
50 Health Regeneration
1 Stability
LEVEL 15
50 Physical Damage
100 Maximum Health
50 Health Regeneration
1 Stability
LEVEL 16
50 Physical Damage
100 Maximum Health
50 Health Regeneration
1 Stability
LEVEL 17
50 Physical Damage
100 Maximum Health
50 Health Regeneration
1 Stability
LEVEL 18
50 Physical Damage
100 Maximum Health
50 Health Regeneration
1 Stability
LEVEL 19
50 Physical Damage
100 Maximum Health
50 Health Regeneration
1 Stability
LEVEL 20
50 Physical Damage
300 Maximum Health
150 Health Regeneration
2 Stability
10 Attack Speed
3 Movement Speed
LEVEL 21
100 Physical Damage
200 Maximum Health
100 Health Regeneration
2 Stability
LEVEL 22
100 Physical Damage
200 Maximum Health
100 Health Regeneration
2 Stability
LEVEL 23
100 Physical Damage
200 Maximum Health
100 Health Regeneration
2 Stability
LEVEL 24
100 Physical Damage
200 Maximum Health
100 Health Regeneration
2 Stability
LEVEL 25
150 Physical Damage
300 Maximum Health
150 Health Regeneration
3 Stability
LEVEL 26
150 Physical Damage
300 Maximum Health
150 Health Regeneration
3 Stability
LEVEL 27
150 Physical Damage
300 Maximum Health
150 Health Regeneration
3 Stability
LEVEL 28
150 Physical Damage
300 Maximum Health
150 Health Regeneration
3 Stability
LEVEL 29
200 Physical Damage
400 Maximum Health
200 Health Regeneration
4 Stability
LEVEL 30
250 Physical Damage
500 Maximum Health
250 Health Regeneration
5 Stability
ABILITIES
PASSIVE
The Boomeranger’s passive depends on what weapon it yields, though the passive will always happen during the third attack.
Melee weapons will cause the Boomeranger to do a spin attack that deals damage to enemies twice in a 4 block radius.
Bows will shoot three arrows , damaging three nearby enemies.
BASIC ATTACK
The Boomeranger’s basic attack also depends on what weapon it yields.
Melee Weapons deal 300% Physical damage and deal AoE damage in a 4 block range.
Bows will deal 200% Physical Damage, though players can shoot from 24 blocks away.
ACTIVE ABILITY 1 (M2)
The Boomerang is the first Active Ability and will allow players to through a Boomerang every 9 seconds, returning to a player after hitting an enemy or travelling it’s max distance.
Boomerangs deal 300% Physical damage and will stun mobs for 1.5 seconds.
Players will be required to catch the boomerang in order to reduce all cooldowns by 7 seconds, though if not caught, the cooldown is all a player will be missing out on.
ACTIVE ABILITY 2 (1)
The Boomeranger’s Big Bomb is the second Active Ability and can be thrown every 18 seconds.
Big Bombs deal 500% Physical Damage and will stick to a surface for 2 seconds before exploding, damaging 2 blocks on each side and 6 blocks up.
ULTIMATE (2)
The Boomeranger’s ultimate, Mysterious Urn, is a bomb that deals 600% Physical Damage in a 6×6 radius and has 4 different bonus effects that can spawn.
Each effect has a 25% chance to spawn one of the following effects:
Cluster Bombs that have a 2 block radius and deal 400% Physical Damage.
8 Healing Gems that will heal 7 nearby players as well as the Boomeranger.
8 Cooldown Gems which will reduce the cooldown of 7 players by 12 seconds and the Boomeranger.
3 Chickens to spawn that deal 200% Physical Damage each.
CLASS GEM
The Bawk-Bomb is the Class Gem for the Boomeranger and will cause Big Bombs to spawn 3 chickens that attack nearby enemies dealing 65% Physical Damage each.
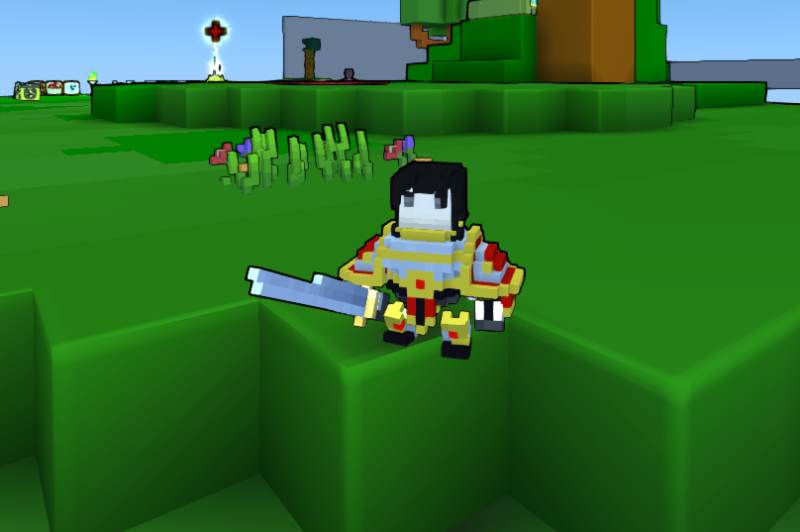
12. KNIGHT
I can’t say that I use the Knight very often, though as a sub class it’s extremely helpful and undoubtedly is a very useful class to solo farm with.
The Knight is Bulky and with high Physical Damage, Attack Speed and Maximum Health the Knight is viable for all players who are just starting out in Trove.
The Knight is very good at mitigating damage and making sure a player stays alive when under attack by many mobs, but as a Melee Class can run out of Energy very quickly if not built correctly.
HOW TO CRAFT
To craft the Knight, players will need the following items:
1 Chaos Core
1,000 Flux
80 Mushroom Chunks
20 Enchanted Wood
HOW TO PURCHASE OR ALTERNATE WAYS TO UNLOCK
Players can alternatively unlock the Knight by:
Using a Class Coin
Using a Starter Class Coin
Paying 250Credits
DAMAGE TYPE
Physical
DIFFICULTY
Starter Class
PLAYSTYLE
Close Ranged
WEAPON
Melee Weapons (Swords & Axes)
STAT GAIN PER LEVEL
LEVEL 2
10 Physical Damage
20 Maximum Health
1 Health Regeneration
1 Stability
LEVEL 3
10 Physical Damage
20 Maximum Health
1 Health Regeneration
1 Stability
LEVEL 4
16 Physical Damage
40 Maximum Health
1 Health Regeneration
1 Stability
LEVEL 5
16 Physical Damage
40 Maximum Health
1 Health Regeneration
1 Stability
LEVEL 6
35 Physical Damage
60 Maximum Health
1 Health Regeneration
1 Stability
LEVEL 7
35 Physical Damage
60 Maximum Health
1 Health Regeneration
1 Stability
LEVEL 8
50 Physical Damage
80 Maximum Health
1 Health Regeneration
1 Stability
LEVEL 9
50 Physical Damage
80 Maximum Health
1 Health Regeneration
1 Stability
LEVEL 10
50 Physical Damage
100 Maximum Health
1 Health Regeneration
1 Stability
LEVEL 11
50 Physical Damage
100 Maximum Health
1 Health Regeneration
1 Stability
LEVEL 12
50 Physical Damage
100 Maximum Health
1 Health Regeneration
1 Stability
LEVEL 13
50 Physical Damage
100 Maximum Health
1 Health Regeneration
1 Stability
LEVEL 14
50 Physical Damage
100 Maximum Health
1 Health Regeneration
1 Stability
LEVEL 15
50 Physical Damage
100 Maximum Health
1 Health Regeneration
1 Stability
LEVEL 16
50 Physical Damage
100 Maximum Health
1 Health Regeneration
1 Stability
LEVEL 17
50 Physical Damage
100 Maximum Health
1 Health Regeneration
1 Stability
LEVEL 18
50 Physical Damage
100 Maximum Health
1 Health Regeneration
1 Stability
LEVEL 19
50 Physical Damage
100 Maximum Health
1 Health Regeneration
1 Stability
LEVEL 20
50 Physical Damage
300 Maximum Health
2 Health Regeneration
2 Stability
LEVEL 21
100 Physical Damage
200 Maximum Health
100 Health Regeneration
10 Stability
LEVEL 22
100 Physical Damage
200 Maximum Health
100 Health Regeneration
10 Stability
LEVEL 23
100 Physical Damage
200 Maximum Health
100 Health Regeneration
10 Stability
LEVEL 24
100 Physical Damage
200 Maximum Health
100 Health Regeneration
10 Stability
LEVEL 25
150 Physical Damage
300 Maximum Health
150 Health Regeneration
12 Stability
LEVEL 26
150 Physical Damage
300 Maximum Health
150 Health Regeneration
12 Stability
LEVEL 27
150 Physical Damage
300 Maximum Health
150 Health Regeneration
12 Stability
LEVEL 28
200 Physical Damage
300 Maximum Health
150 Health Regeneration
12 Stability
LEVEL 29
200 Physical Damage
400 Maximum Health
200 Health Regeneration
14 Stability
LEVEL 30
250 Physical Damage
500 Maximum Health
250 Health Regeneration
16 Stability
ABILITIES
PASSIVE
As a passive the Knight has Retribution which provides the Knight with 5% damage mitigation whenever it attacks an enemy.
BASIC ATTACK
As a basic attack, the Knight deals 250% damage in a 3 block range attacking 2.125x per second.
ACTIVE ABILITY 1 (M2)
As the first Active Ability the Knight will deal 800% Physical Damage in a 4×7 block range taunting enemies for 3 seconds.
Smash costs 20 Energy and will require a 2 second channel time.
ACTIVE ABILITY 2 (1)
As a second Active Ability the Knight can use Charge which lunges a player forward, taunting enemies and stunning them for 1 second.
Charge will deal 450% Physical Damage and has a 14 block Range, costing the player 40 Energy.
ULTIMATE (2)
As an ultimate the Knight has Iron Will which will fully heal the Knight and reduce incoming damage by 50%.
7 players who are in an 8 block radius will also get 10% of their incoming damage redirected to the Knight.
Iron Will has a 40 second cooldown and costs 25 Energy and will have a Duration of 10 seconds.
CLASS GEM
As a Class Gem the Knight can gain Spirit Squire which no longer allows the Knight to leap forward when using Charge and instead allows a Spirit Squire to charge forward dealing damage to multiple enemies both dealing damage and stunning enemies for 1 second.
Spirit Squire will still cost 40 Energy and has a 9 block range.
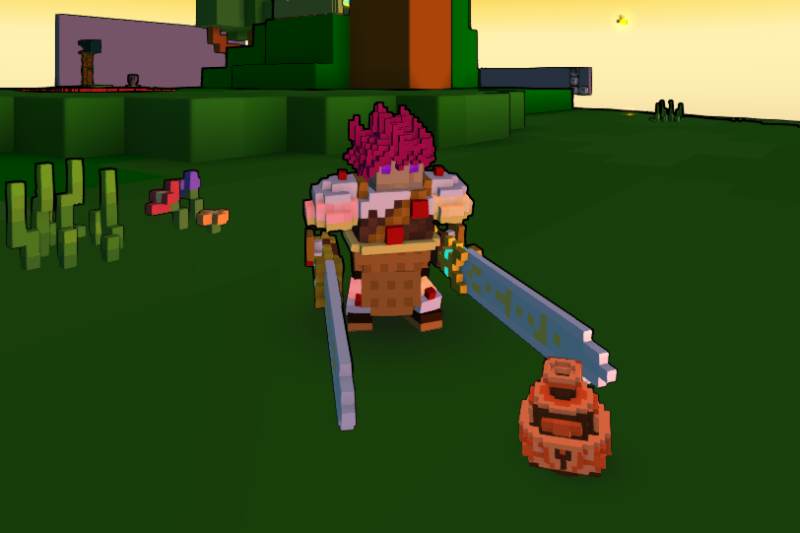
11. CANDY BARBARIAN
The Candy Barbarian, in my opinion, is one of the more fun melee classes to play, simply because of the animations and abilities that it has are some of my favourite.
Candy Barbarians are great for dealing AoE damage, though the Candy Barbarian can also be extremely powerful against single enemies.
Due to the AoE capabilities, players will want to ensure that they are in the center of fight as this will help the Candy Barbarian deal the most damage it can.
The Candy Barbarian classifies as a Tank though it does also deal a ton of damage.
HOW TO CRAFT
To craft the Candy Barbarian, players will need the following items:
1 Chaos Core
1,000 Flux
20 Wild Cupcakes
25 Glacial Shard
HOW TO PURCHASE OR ALTERNATE WAYS TO UNLOCK
Players can alternatively unlock the Candy Barbarian by:
Using a Class Coin
Using a Starter Class Coin
Paying 250 Credits
DAMAGE TYPE
Physical Damage
DIFFICULTY
Starter Class
PLAYSTYLE
Close Range
WEAPON
Melee (Swords & Axes)
STAT GAIN PER LEVEL
LEVEL 2
10 Physical Damage
20 Maximum Health
1 Health Regeneration
1 Stability
LEVEL 3
10 Physical Damage
20 Maximum Health
1 Health Regeneration
1 Stability
LEVEL 4
18 Physical Damage
40 Maximum Health
1 Health Regeneration
1 Stability
LEVEL 5
18 Physical Damage
40 Maximum Health
1 Health Regeneration
1 Stability
LEVEL 6
35 Physical Damage
40 Maximum Health
1 Health Regeneration
1 Stability
LEVEL 7
35 Physical Damage
60 Maximum Health
1 Health Regeneration
1 Stability
LEVEL 8
50 Physical Damage
80 Maximum Health
1 Health Regeneration
1 Stability
LEVEL 9
50 Physical Damage
80 Maximum Health
1 Health Regeneration
1 Stability
LEVEL 10
50 Physical Damage
100 Maximum Health
1 Health Regeneration
1 Stability
LEVEL 11
50 Physical Damage
100 Maximum Health
1 Health Regeneration
1 Stability
LEVEL 12
50 Physical Damage
100 Maximum Health
1 Health Regeneration
1 Stability
LEVEL 13
50 Physical Damage
100 Maximum Health
1 Health Regeneration
1 Stability
LEVEL 14
50 Physical Damage
100 Maximum Health
1 Health Regeneration
1 Stability
LEVEL 15
50 Physical Damage
100 Maximum Health
1 Health Regeneration
1 Stability
LEVEL 16
50 Physical Damage
100 Maximum Health
1 Health Regeneration
1 Stability
LEVEL 17
50 Physical Damage
100 Maximum Health
1 Health Regeneration
1 Stability
LEVEL 18
50 Physical Damage
100 Maximum Health
1 Health Regeneration
1 Stability
LEVEL 19
50 Physical Damage
200 Maximum Health
1 Health Regeneration
1 Stability
LEVEL 20
50 Physical Damage
300 Maximum Health
50 Health Regeneration
2 Stability
LEVEL 21
100 Physical Damage
200 Maximum Health
100 Health Regeneration
2 Stability
LEVEL 22
100 Physical Damage
200 Maximum Health
100 Health Regeneration
2 Stability
LEVEL 23
100 Physical Damage
200 Maximum Health
100 Health Regeneration
2 Stability
LEVEL 24
100 Physical Damage
200 Maximum Health
100 Health Regeneration
2 Stability
LEVEL 25
100 Physical Damage
200 Maximum Health
100 Health Regeneration
2 Stability
LEVEL 26
150 Physical Damage
300 Maximum Health
150 Health Regeneration
3 Stability
LEVEL 27
150 Physical Damage
300 Maximum Health
150 Health Regeneration
3 Stability
LEVEL 28
150 Physical Damage
300 Maximum Health
150 Health Regeneration
3 Stability
LEVEL 29
200 Physical Damage
400 Maximum Health
200 Health Regeneration
4 Stability
LEVEL 30
250 Physical Damage
500 Maximum Health
250 Health Regeneration
5 Stability
ABILITIES
PASSIVE
As a passive the Candy Barbarian has Gum Drop which has the chance to drop a Gum Drop whenever they are attacked.
Gum Drops will raise the attack speed of the Candy Barbarian to 2x and increases its movement speed by 20.
BASIC ATTACK
As a Basic Attack, the Candy Barbarian will wield two weapons. attacking in a 4 block range and dealing damage 1.5625x per second.
ACTIVE ABILITY 1 (M2)
The Candy Barbarian’s first Active Ability is Vanilla Swirlwind and will deal 650% Physical Damage in a 4 block radius, dropping a Healing Candy for every enemy hit.
Each Healing Candy will give the player 10% of their max health, essentially raising the the amount of sustain the Candy Barbarian has.
Vanilla Swirlwind costs 60 Energy.
ACTIVE ABILITY 2 (1)
The Candy Barbarian’s second Active Ability is Sugar Crash, which allows the Candy Barbarian to leap forward and deal damage in a 6×6 area, creating a Gum Drop for every enemy that is hit.
Sugar Crash deals 450% Physical Damage and will cost 35 Energy.
ULTIMATE (2)
The Candy Barbarian’s ultimate, Els-Crom Cone, drops an ice cream cone between 1-3 blocks in front of players and deals 1500% damage in a 7×7 AoE creating both Gum Drops and Healing Candies.
Els-Crom Cone has a 40 second cooldown and costs 40 Energy.
CLASS GEM
When getting the Candy Barbarian’s Class Gem, Scoop n’ Gloop, the Candy Barbarian will leap 4 blocks into the air and will crash down dealing AoE damage, vacuuming enemies within a 3-4 block radius and applying a snare.
10. LUNAR LANCER
The Lunar Lancer is by far my least favourite class to play, but only because it doesn’t suit my play style.
The reality is that the Lunar Lancer is a glass cannon who can deal some extremely lethal damage.
The unfortunate part of the Lunar Lancer is that it has a useless ability, but this doesn’t really matter since it does still have a combo which is extremely effective.
HOW TO CRAFT
To craft the Lunar Lancer, players will need the following items:
1 Chaos Core
1,000 Flux
100 Radiant Shard
8 Faerie Dust
HOW TO PURCHASE OR ALTERNATE WAYS TO UNLOCK
Players can alternatively unlock the Lunar Lancer by:
Using a Class Coin
Using a Starter Class Coin
Paying 250 Credits
Purchasing the Lunacy Pack
DAMAGE TYPE
Physical
DIFFICULTY
Starter Classes
PLAYSTYLE
Close Range
WEAPON
Spear
STAT GAIN PER LEVEL
LEVEL 2
10 Physical Damage
20 Maximum Health
1 Attack Speed
1 Movement Speed
LEVEL 3
10 Physical Damage
20 Maximum Health
1 Attack Speed
LEVEL 4
18 Physical Damage
40 Maximum Health
1 Attack Speed
1 Movement Speed
LEVEL 5
18 Physical Damage
40 Maximum Health
1 Attack Speed
LEVEL 6
35 Physical Damage
60 Maximum Health
1 Attack Speed
1 Movement Speed
LEVEL 7
35 Physical Damage
60 Maximum Health
1 Attack Speed
LEVEL 8
50 Physical Damage
80 Maximum Health
1 Attack Speed
1 Movement Speed
LEVEL 9
50 Physical Damage
80 Maximum Health
1 Attack Speed
LEVEL 10
50 Physical Damage
100 Maximum Health
1 Attack Speed
1 Movement Speed
LEVEL 11
50 Physical Damage
100 Maximum Health
1 Attack Speed
LEVEL 12
50 Physical Damage
100 Maximum Health
1 Attack Speed
1 Movement Speed
LEVEL 13
50 Physical Damage
100 Maximum Health
1 Attack Speed
LEVEL 14
50 Physical Damage
100 Maximum Health
1 Attack Speed
1 Movement Speed
LEVEL 15
50 Physical Damage
100 Maximum Health
1 Attack Speed
LEVEL 16
50 Physical Damage
100 Maximum Health
1 Attack Speed
1 Movement Speed
LEVEL 17
50 Physical Damage
100 Maximum Health
1 Attack Speed
LEVEL 18
50 Physical Damage
100 Maximum Health
1 Attack Speed
1 Movement SPeed
LEVEL 19
50 Physical Damage
100 Maximum Health
1 Attack Speed
LEVEL 20
52 Physical Damage
300 Maximum Health
10 Attack Speed
LEVEL 21
100 Physical Damage
200 Maximum Health
1 Attack Speed
LEVEL 22
100 Physical Damage
200 Maximum Health
1 Attack Speed
LEVEL 23
100 Physical Damage
200 Maximum Health
1 Attack Speed
LEVEL 24
100 Physical Damage
200 Maximum Health
1 Attack Speed
LEVEL 25
150 Physical Damage
300 Maximum Health
1 Attack Speed
LEVEL 26
150 Physical Damage
300 Maximum Health
1 Attack Speed
LEVEL 27
150 Physical Damage
300 Maximum Health
1 Attack Speed
LEVEL 28
200 Physical Damage
300 Maximum Health
1 Attack Speed
LEVEL 29
200 Physical Damage
400 Maximum Health
1 Attack Speed
LEVEL 30
250 Physical Damage
500 Maximum Health
2 Attack Speed
25 Critical Damage
Leave a Reply