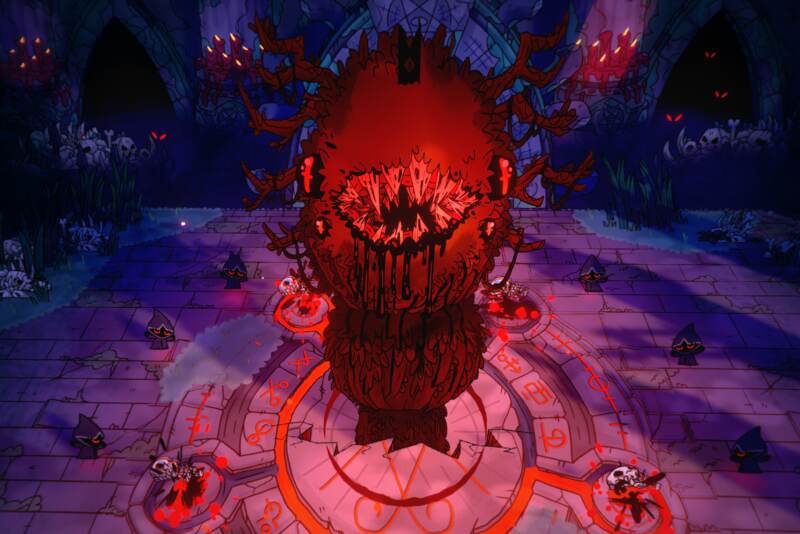
As you may already know, I’m very excited with the release of Cult of the Lamb and not only am I reaching the end of the game due to my addictive personality, I’ve been trying to come up with all the tips and tricks I would recommend that players who are new to the game follow to make their lives easier.
While Cult of the Lamb is a game where players have many options, none actually completely hindering a player from getting through the game, there are some choices that will make it easier to balance their questing and Town Managment so they’re never in a situation where all of their Followers are upset, dying or ready to defect while you’re focussing on something else.
Although I played the demo of Cult of the Lamb on Twitch Stream, I can’t say that I was prepared for how much you can actually do in the game and the versatility of the gameplay.
Though I spent the greater majority of my time in Cult of the Lamb completing the levels of dungeon crawling, I found this game truly enjoyable even with the number of tasks you needed to complete in order to make sure of everything available to you.
Now, while I covered Doctrines in the past, which are an important element of the game, I strongly feel like Rituals are going to be your saving grace as they are the aspect of the game that allows you to essentially ignore your Followers for long periods of time so you can do other tasks such as Fishing or my favourite element, Dungeon Crawling.
The unfortunate reality is that while players can have access to many Rituals, players will never be able to get them all as many are unlocked with Doctrines. Doctrines are one of the only elements in the game that require you to make a single choice on what it is you want and essentially lock you out of different decisions. While this feels upsetting, being that you cannot gain access to everything in your first run of the game, the reality is that not every ritual is worth having so don’t stress too hard.
The following guide will take you through all the different rituals in Cult of the Lamb and will give you tips on how to utilize them. Of course things may differ between how you play and how I play, though I will try to cover as many tactics as I can.

WHAT ARE RITUALS?
Rituals in Cult of the Lamb are essentially another way players can manipulate their Followers in Cult of the Lamb. While players will want to assemble sermons every morning to keep the Faith of their Followers high, players will also want to run Rituals to change the way that their Followers function as well as utilize them to kill off Followers that they no longer need.
Rituals must be led at the Temple and unlike Sermons have a few days of cooldown, meaning that a player cannot run them daily to keep their Faith high. Players will typically want to avoid using multiple Rituals daily due to their long cooldown and when they have a good portion of them unlocked they will want to make sure that they always have at least one “clutch save” ritual available in case of catastrophes that lead their Following to revolt against them.
CAN YOU SHORTEN THE COOLDOWN OF RITUALS IN CULT OF THE LAMB?
You can in fact shorten the cooldown of Rituals, though this may take a good amount of time as it requires players to complete a good amount of upgrades in the Shrine Skill Tree.
The only cooldown currently available to players is 50%, which is really nothing to scoff at as this greatly reduces the chance of you not having a ritual available when you need it.
I honestly recommend pushing to get this Skill as soon as you can as it can greatly affect how many resources you get and the Faith of your crew as some of these Rituals are very overpowered.
CAN YOU DECREASE THE COST OF RITUALS?
You in fact can decrease the Cost of Rituals in your Shrine Skill Tree. This comes before the Cooldown Skill and although I would say it is not as worth it, the fact that it will bring you one step closer to unlocking the Skill that allows you to reduce the Cooldown makes it super worth it.
I personally don’t find it difficult to farm up the resources needed for the Rituals, but that doesn’t mean that everyone will feel the same way, so if you’re struggling definitely prioritize this.
WHAT ARE THE RITUALS IN CULT OF THE LAMB AND HOW DO YOU GET THEM?
The following section will run you through every single Ritual in Cult of the Lamb, how to use them and which you should focus on when you have a choice between two.
Instead of making a “tier list” I’m just going to focus on describing each of them to avoid any confusion as a few will be locked out if players are currently in a decision due to Doctrines.
BONFIRE RITUAL
The Bonfire Ritual is going to be a staple for you whenever you are running low on Faith, especially if an event has occurred in the Cult that has made all of your Followers lose Faith in you. Typically this happens when you’re out on your adventuring as you will sometimes have a diety curse your Followers, though this can also happen if too many Followers die or if you don’t have suitable food for all of them.
The Bonfire Ritual is unlocked by completing the Faith of the Flock and Declare Doctrine Quests.
To run the Bonfire Ritual, players will have to pay 10 Wood and 25 Bones, though this is a really good trade-off for 30 Faith.
Admittedly, the Bonfire Ritual cannot save a Cult that is shattering and is mostly used as a top-up, but I would run it if your daily Sermon doesn’t top up your Faith for the day.
SACRIFICE OF THE FLESH
Sacrifice of the Flesh is also a great Ritual to have as it is one of the only ways that players can kill one of their Followers without actually losing any Faith. I typically will use Sacrifice of the Flesh to kill the Follower who is the oldest, though it can be used for killing the Follower who provides the player with the biggest boost in stats as levelled-up Followers provide higher thresholds of rewards than lower-tiered Followers.
I would suggest that players use Sacrifice of the Flesh whenever it is on cooldown, however, players should try to make sure they are regularly recruiting new Followers in order to justify the sacrifice.
Players can unlock the Sacrifice of the Flesh simply by continuing through the story. It’s unclear what actually unlocks this as some players have unlocked it by completing the first Dungeon, Darkwood multiple times when others have unlocked it well into the second Dungeon. Due to this information, it seems like players simply need to do a number of runs of dungeons in order to unlock them, though it may also have to do with how many times you run a dungeon after you find side quests to complete. I will update this when the exact prompt for its unlock is found, however, at this point my best advice is “just keep playing the game.”
The Sacrifice of the Flesh does have a bit of a downfall, of course, it will cost the player a Follower, but it will also cost 75 Bones. Not only that, but it will reduce the Faith of your Cult by 10, though this isn’t that big of a deal because of the reward you get.
Players will increase their power as they do in a Sermon, essentially being able to gain double the power in a day. This is honestly one of the best ways to unlock the different tiers of power and is the absolute best way to make sure that you have enough strength to quickly progress through Dungeons.
BRAINWASHING RITUAL
At first, I didn’t really care about the Brainwashing Ritual because I wasn’t struggling with Faith, but when I started getting into grinding out dungeons and going past the first section to do the unlimited modes I quickly understood how important it was to make sure that you could leave your Cult for extended periods of time.
The Brainwashing Ritual is the only way to guarantee that you can leave your cult without losing Faith as performing it will lock your Faith at 100% for two full days. Now, depending on what your Doctrines are you could essentially harm your following by running the Brainwashing Ritual, so make sure you check out my Doctrines guide to see how you can avoid this.
To unlock the Brainwashing Ritual players will need to unlock Spore Grotto and give Menticide Mushrooms to Sozo. As part of Sozo’s quest, players will have to actually do the Brainwashing Ritual, though I recommend doing this ritual anytime you’re planning on heading out for long periods of time.
The Brainwashing Ritual will cost players 25 Menticide Mushrooms and 10 Wood. This can feel a bit costly, especially if you’re not grinding out the second Dungeon regularly, though if you set up a good automated farm it becomes a lot easier.

RITUAL OF RESURRECTION
The Ritual of Resurrection is part of the second Afterlife Doctrine and is typically the better choice to make. Honestly, I don’t know where I would be without the ability to resurrect my followers as not only will it help you fix any mistakes you made along the way, but it will actually be the only way you can ensure that you get the top level Followers you have.
Essentially, the Ritual of Resurrection will allow you to resurrect any Followers that you have died meaning that you can resurrect anyone you have Murdered, Sacrificed, Ascended or has died naturally of old age.
Although there are no other benefits to resurrecting Followers, it can be hard to level up your Followers, especially if they have modifiers that make it slower, so get to cracking and keep resurrecting your best Followers.
The Ritual of Resurrection costs 150 Bones.
FUNERAL
While I would say that the Funeral is a sweeter way to send off your Followers, the reality is that you will have this option or the Ritual of Resurrection.
The Funeral Ritual is great for keeping your Faith up, but it’s not really anything more than that.
Essentially, when a Follower dies, players will be able to hold Funerals for them providing the Cult with 20 Faith. This can be good for those struggling with Faith, however, there are many other ways players can raise the Faith of their Cult, making it a bit… well, underwhelming.
Players will have to pay 5 Camellia and 75 Bones to run the Funeral and they will be able to unlock it with the Afterlife Doctrine II.
THE GLORY OF CONSTRUCTION
The Glory of Construction is a Ritual that is pretty good to use, though it tends to fall off in the late game. Essentially players will be able to finish all work-in-progress buildings with The Glory of Construction, being best for players who go out on long adventures and then spam a dozen buildings.
While I can see a good use for this, especially in situations where you have a lot of resources to farm and don’t want your Followers to waste time constructing buildings, I can’t say that I really build much in the late game due to most buildings not needing to be repaired or rebuilt.
I really recommend the second choice for this, though this will come down to your preference.
The Glory of Construction is an option for players when they reach the third tier of Work & Worship crown and will cost a total of 75 Bones.
RITUAL OF ENLIGHTENMENT
The Ritual of Enlightenment is one of the best Rituals in my opinion as it will greatly help a player generate more Devotion, which is going to be detrimental if players want to level up their Shrine Skill Tree.
While the first few stages of the Skill Tree are relatively easy to get, the later stages are going to be quite difficult to acquire.
In my opinion, the Ritual of the Enlightenment is necessary as it will increase Devotion generation speed by 20% for 3 days. This is a big boost, however, I would strongly recommend that players only run this Ritual when they know they’re going to be at their base for an extended period of time as the Shrine has a cap for how much Devotion it can hold before it is full.
I will typically plan my days around what Rituals I have available. For example, I’ll go out whenever I have rituals that keep Faith, Hunger and Work at their highest and will focus on base or side quests whenever something has to do with devotion. Every player will have their preferred way of spending their days, so don’t worry about being too meticulous about ensuring “you don’t waste time.”
The Ritual of Enlightenment is unlocked during the Work & Worship Doctrine II and will cost 75 Bones, being a very, very good trade-off.

GLORY THROUGH TOIL RITUAL
The Glory Through Toil Ritual is quite a mean little Ritual to complete with your Followers, but realistically it’s going to be such a crowd favourite, especially because it’s going to help you make sure you get all the resources you need.
When players run the Glory Through Toil Ritual they will force their Followers to work for 3 Days and Nights with no breaks. This means that Followers will not dilly dally around, talking to each other and will make sure that they don’t sleep. Luckily for players, this will not make any of the Followers get tired and doesn’t really have any penalties, so I would strongly recommend putting it on when you’re about to go on long journies.
The Glory Through Toil Ritual will require players to unlock it using Work and Doctrine IV and will cost 75 Bones.
HOLY DAY RITUAL
As nice as the Holy Day Ritual is, I really don’t think it’s great unless you’re really struggling with Faith. Admittedly, with the Holy Day Ritual, players can save themselves from their whole Cult falling apart as it will provide you with 80 Faith, being one of the only “oh shit” Rituals that can fully save the collapse of your Cult.
Now, the biggest problem with the Holy Day Ritual is that none of your Followers will work for the day, so… be ready for no resources for that day.
I would only recommend choosing this from the Work & Worship Doctrine IV if you’re really struggling with Faith, otherwise, always go for Glory Through Toil Ritual. It’s the better option.
If you do choose to take the Holy Day Ritual it will cost you 75 Bones to run.
ALMS FOR THE POOR RITUAL
The Alms for the Poor Ritual is a pretty good Ritual and tends to be the better choice for the Possessions III Doctrine as by the mid-game players will have many ways to get themselves Coins.
Essentially it’s going to be a speedy way to get Followers to gain Loyalty to you and will provide your Cult with 10 Faith.
At the end of the day, getting more devout Followers is going to be harder and is going to be more necessary as a levelled-up Follower will boost the number of rewards the player gets. So, if it comes at the cost of giving away a few Coins, do it up!
To me, the Shrine Skill Tree took the longest to work on, even when I was trying to min-max it, so I’m certain other players are going to feel the same way.
The great thing about Alms of the Poor is that players will always have to pay 50 Coins, so it doesn’t matter whether or not you have a massive Following or not, though obviously the more the better.
I would run this Ritual any time it is off cooldown as it can greatly set you forward with your other resources.
RITUAL OF ENRICHMENT
The Ritual of Enrichment is the exact opposite of the Alms of the Poor and will be the alternate choice for Possessions III Doctrine.
For the cost of 125 Bones players will collect a set amount of Coins from each of their Followers. Unlike the Alms of the Poor, players will only want to run this Ritual when they have a lot of Followers and will want to make sure no Followers are asleep or sick as this will result in a loss of income.
This is great for players who don’t have many resources to sell, though in the long run is the lesser of the two to choose from. At the very minimum in the late game I typically can make a couple of hundred Coins a day and that’s on a bad day, so it’s really not worth having the Ritual of Enrichment.
ASCEND FOLLOWER
While the Ascend Follower isn’t a great Ritual to have, it can be useful for players who want to get rid of Followers that have negative perks and are worried they’re going to Resurrect the wrong ones.
Essentially, Ascending a Follower will get rid of a Follower and with a new patch players will also be able to resurrect them. This is mutually exclusive with the Murder Follower action, however, I can’t say that I would use either regularly.
At least when you Murder a Follower it is not part of a Ritual that requires a Cooldown and you also get a good portion of Follower Meat, but this is your choice which you’d prefer.
Players can unlock the Ascend Follower Ritual in the Law & Order I Doctrine and it will cost 75 Bones to run.

RITUALISTIC FIGHT PIT
The Ritualistic Fight Pit will allow a player to choose two Followers to fight, though players will be able to choose whether the loser lives or dies. I’m honestly not a huge fan of this one as there are no benefits, so I typically pick Wedding for the Law & Order II. I will say, for storytelling purposes, this is pretty good.
The Fight Pit will require 75 Bones to run.
WEDDING
The Wedding is the better choice in Law & Order II and will allow you to marry Followers. Players will be able to Smooch Spouses which increases their loyalty and while players can marry multiple Followers this will raise the jealousy amongst older Spouses.
I think that the Wedding is a very optimal way of raising the loyalty amongst your Followers and you, but you will have to micromanage them and their jealousy.
Each Wedding will cost 75 Bones and while there are some downfalls to marrying multiple Followers, players should not be too scared of doing this.
LOYALTY ENFORCER
The Loyalty Enforcer will designate a Follower to go around and patrol the Cult to raise the Loyalty of all other Followers. This tends to be a really great Ritual to have as it will help the player progress their Shrine Skill Tree.
The Shrine Skill Tree is the most important Skill Tree to power up if you’re hoping to focus on basing as it will allow you to place different types of buildings in your base, though it can also help with your dungeon crawling runs, so get to work on it!
The Loyalty Enforcer is one of two choices players can make during the Law & Order IV Doctrine and in my opinion, is the better choice.
It will cost 75 Bones to activate this Ritual.
TAX ENFORCER
Tax Enforcer is similar to Loyalty Enforcer, though it will provide players with Coins instead of Loyalty. As I mentioned before, Coins are really not a problem in the mid-game and quite frankly their use becomes more and more limited, so I would rather the loyalty of my Followers.
With Tax Enforcer players will have to also spend 75 Bones.
RITUAL FAST
The Ritual Fast is a great Ritual to run while you’re using other Rituals that raise Faith to the max for a few days as it will allow players to leave their base for 3 days without their Followers getting hungry.
Unfortunately, this will leave your Followers upset, so you will have to bring up your Faith, but it is very useful for players who want to spend a lot of time fighting.
I actually chose not to use the Fast in my main save, though I kind of wish I did now because I really want to see how far I can go through the endless fighting without having to come home to feed my Followers.
Players will get to make this choice during Sustenance I and it will cost 75 Bones.
FEASTING RITUAL
The Feasting Ritual is a very cute Ritual that will bring together your community to have a Meal that feeds them completely. While Food is really easy to make, it’s honestly very sweet to see all your followers get together.
Realistically the alternative is better if you’re good at getting your Faith to stay high, but the choice is still yours.
The Feasting Ritual will provide you with 25 Faith and I tend to use it on days where mistakes are made or times when my Followers are very hungry and I don’t have the patience to do skill checks.
The Feasting Ritual costs 75 Bones.
RITUAL FOR THE HARVEST
The Ritual For the Harvest is by far the least impressive Ritual to me, especially because it comes to you at Sustenance III which takes a bit of time to get to.
Admittedly, I don’t find that crops take a long time to grow and by the time I get back from missions the crops have already grown and are ready to harvest.
I understand the Ritual for the Harvest being good for players who don’t have massive farms, but realistically you can place as many farms as you want with no penalty.
Oh, what does this Ritual do? It makes all seeds immediately ready for harvest.
it will only cost 75 Bones.
RITUAL OF OCEAN’S BOUNTY
Admittedly, I think the Ritual of the Ocean’s Bounty is a much better Ritual to choose as it will allow you to catch twice the amount of fish and will raise the chance of special Fish for 2 days. This is the alternate option to Sustenance II, and I would recommend you take it instead.
Fishing isn’t something you always have to do, but it is important for you to do for your quests.
I also tend to use Fish for Follower Meals as they tend to be better, but feeding your Followers Grass is still worth it if you use the Doctrine that gets rid of the negative effects.
Nonetheless, I recommend Ritual of the Ocean’s Bounty and base your tasks whenever it’s on cooldown.
Ritual of the Ocean’s Bounty also costs 75 Bones.

Leave a Reply