Grounded is a great game that has provided my husband and I many hours of gameplay and really bringing a huge refresh into the Survival genre for us.
While we picked up Grounded very early on upon Early Access, I have to admit that we completed it within an hour, but with all of the updates that Grounded has seen we put in a good dozen of hours while playing on Twitch.
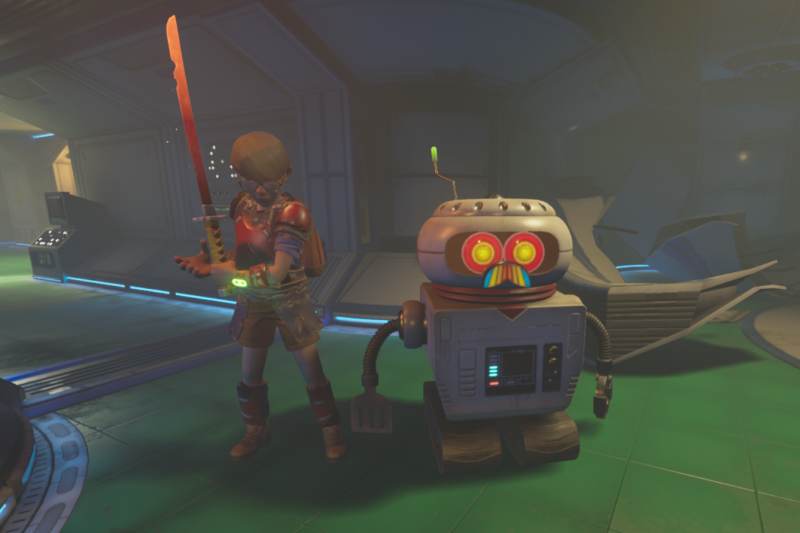
I must say, since returning to Grounded one of my favourite aspects, if not my favourite aspect is BURG.L. Not only does BURG.L add a good variety of tasks for replay ability and to help encourage exploration, BURG.L allows players to unlock a number of new ways to build and Mutations to unlock.
The following guide will take you through everything you need to know about BURG.L while playing Grounded and the best way to utilize him on your expeditions.

HOW TO ACCEPT QUESTS FROM BURG.L
To accept Quests from BURG.L players will have to head to BURG.L and click on the third option “Do you have any work for me?” This will open a list where players can see their options.
I strongly recommend that players accept all quests from BURG.L and choose to reject them if they don’t think they will be able to complete them.
Players should always reject quests before the sun rises the next day so more quests appear.
HOW TO REJECT QUESTS FROM BURG.L
To reject Quests from BURG.L, unfortunately players must also head to BURG.L. They must enter the same menu that they can accept quests from and will have to manually discard said quests. Annoying, but visiting BURG.L becomes a second nature task, especially when you’re farming up Raw Science.
DAILY QUESTS
Every in game day BURG.L will provide players with 3 daily tasks that they can complete for some Raw Science. While many of the tasks are repeatable, not all of them will be, as some tasks are exploration tasks that can only be completed once.
As players can only hold 3 Daily Quests at a time, players will have to return to BURG.L to drop one of the quests before the day passes in order to get a new one the next day. This is just a reminder that we are talking about in-game days, because my husband and I were for some reason under the impression that you could only complete these one per real life day as many of the games we play have daily resets.
All Daily Quests will provide players with Raw Science, though depending on the difficulty of the quest players will receive more or less Raw Science. I would strongly recommend that players try to complete all their tasks for the day unless the task is too difficult for the player. In cases that a task is too tough, delete the quest before you sleep for the night as BURG.L will only generate Daily Quests based on how many slots you still have open.
Quests are broken down in the following categories: Artificer, Hunter, Explorer, and Chipsleuth.
While Artificer and Hunter are repeatable Daily Quests, Explorer and Chipsleuth are one time quests and I strongly recommend trying to complete Chipsleuth quests as quickly as you can as they are the most beneficial for a player.
The following are all of the Daily Quests players can receive and their associated rewards from BURG.L:
ARTIFICER QUESTS
Artificer Quests require players to craft a variety of items varying in rarity. In most cases, these items will be pieces of Armour that the players has already crafted, meaning that a player may want to disassemble any of the items that BURG.L has them craft to conserve resources.
Players will receive between 250 Raw Science to 750 Raw Science based on how rare the item is.
I would strongly recommend that players complete these quests whenever they are available to them as they are quite simple to complete and do not require much effort, especially if a player is good at hoarding resources.
While at first, I thought that Daily Quests like this were a waste, especially for Gear that was more expensive, learning to deconstruct Gear really made it worth it for me as while you don’t get all your resources back, you do get a good portion back, though even if you didn’t, the cost isn’t actually that bad, especially when you’re in the mid-to-late game.
HUNTER QUESTS
Hunter Quests really range in difficulty and by far can be some of the more annoying quests to complete as players may have to run around the world to locate the various mobs they need to attack which might not be anywhere near where the player is currently wanting to farm. That being said, I still feel like they are always worth doing unless the mob you’re told to kill is too hard for you’re up against is too hard to defeat.
The one downside I would say to Hunter Quests are the ones that only provide you with 10 Raw Science or generally low amounts of Raw Science. Admittedly they’re not the worst quests as they are easier to defeat, but they won’t really help you purchase upgrades.
All Hunter Quests will provide players with a randomly generated amount of kills they must secure and players will be rewarded a Raw Science based on how many kills are required. This is actually really important to keep in mind as I was somehow under the impression that the amount of Raw Science provided was strictly based on the mob you were killing, making it feel a bit broken.
While again some mobs will provide you with more Raw Science than others, all are relatively worth doing as long as they don’t take too long to complete or result in you dying over and over again.
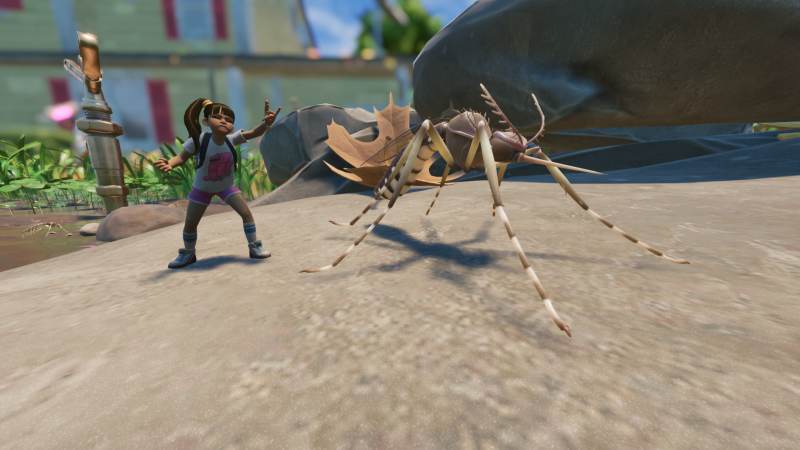
HUNTER – ANTLION
One of the most fun Hunter Quests for me are the Antlion Quests as they are quite difficult to kill on your own, but they will also provide players with 200 Raw Science for each Antlion requested to kill.
HUNTER – APHID
Quite frankly the least rewarding of these tasks is the Aphid one as not only will players get very low amounts of Raw Science, but Aphids are really annoying to chase unless you have a proper Aphid farm set up.
While I tend to always set up an Aphid farms, often updates break them which is unfortunately, though Aphid farming should really be a daily task for you as they are one of the easiest ways to farm food.
For every Aphid killed on the check list players will receive 10 Raw Science.
HUNTER – BEE
I’ll be honest, I used to skip the Bees in the early game because they were too hard to defeat, but as soon as I got access to the Crow’s Crossbow, I found them relatively easy to defeat and ended up always farming them whenever they popped up.
Bees actually provide you with a good amount of Raw Science, being 125 Raw Science per each Bee required to kill.
HUNTER – BLACK OX BEETLE
One of the toughest Hunter Quests to complete is the Black Ox Beetle one. While tough, I would strongly recommend taking the risk each time as it provides players with some of the highest Raw Science in the game and you will need Black Ox parts quite frequently.
Players will receive 350 Raw Science for each Black Ox Bettle requested.
HUNTER – BLACK SOLDIER ANT
Luckily now players have a quest that will have them farm Black Soldier Ants as there wasn’t one previously.
Black Ants can be annoying to locate and admittedly the payoff isn’t great, but it’s still worth doing for their useful parts.
Players will only get 50 Raw Science for each Black Soldier Ant requested.
HUNTER – BLACK WORKER ANT
Black Worker Ants are quite easy to defeat however in general Red Ants are much easier to locate than Black Ants. On top of that, Black Ants tend to be a bit harder to defeat than Red Ants,though due to the difficulty increase players will benefit a bit more from Black Ants.
Players will receive 20 Raw Science for any Black Worker Ants requested.
HUNTER – BOMBARDIER BEETLE
The Bombardier Beetle is actually a mob I have to regularly kill as I’m a huge fan of Drying Racks, so it’s not really a question of if I’m going to complete the Hunt for them… I am.
Bombardier Beetles are typically a mid-tier Mob and are best fought at range, though they can be tanked as long as a player doesn’t get trapped in their ranged AoE, which can be a bit difficult to understand at first.
For every successful kill of a Bombardier Beetle on the list, players will receive 100 Raw Science.
HUNTER – DIVING BELL SPIDER
I’m personally really not a fan of swimming mechanics or fighting mobs underwater, so I was a wee bit disappointed when I saw that I would have to regularly farm things like Diving Bell Spiders.
While they aren’t that tough to defeat, they are a nuisance to me, so to see that you don’t get a whole lot of Raw Science from that made me constantly want to skip this Hunter Quest.
Players will only receive 50 Raw Science for each Diving Bell Spider requested.
HUNTER – DUST MITE
Originally Dust Mites were considered to be part of other Hunter quests, however, they now officially have their own Hunter Quest.
While Dust Mites are relatively easy to defeat one at a time, the unfortunate thing about them is that they will swarm a player and tend to be a bit more difficult if you’re not good at keeping your Health up.
Grab yourself a bow and begin wacking these bad boys and get rewarded with a substantial amount of Raw Science for a decently weak foe.
Players will receive 75 Raw Science for each Dust Mite that is requested.
HUNTER – FIREFLY
I typically ignore the Firefly mission as Fireflies are difficult to locate and only appear at certain times of day. I’ll essentially try to locate Fireflies the day the quest is given and then will cancel the quest if I’m unable to get them as I feel like they’re a bit of a waste of time,.
Fireflies admittedly provide players with a decent amount of Raw Science, but honestly the chase tends to make it feel less worth it.
Players will receive 100 Raw Science for each Firefly killed on the list.
HUNTER – GNAT
As easy as Gnats are easy to kill, they can be hard to locate, making them a bit of a hit and miss quest for me to complete.
Gnats don’t really provide much Raw Science, so if you’re around them or know how to quickly find them, complete this quest. Otherwise I would encourage you to trade this in with another quest.
Players will receive 15 Raw Science for each Gnat killed on the list.
Note: Infected Gnats and Meaty Gnats count towards this goal.
HUNTER – INFECTED WEEVIL
I’ll be honest, I don’t mind killing Infected mobs, though I have to say it can be annoying if they explode before you secure a kill.
With decent Weapons this doesn’t really pose to be a problem, however, in the mid-game I would say it can be difficult to actually get this quest done, simply because the infected mobs keep killing themselves.
Infected Weevils actually provide a decent amount of Raw Science, being 120 Raw Science for each killed on the list.
HUNTER – LADYBIRD
While at first, it may seem difficult to tell the difference between Ladybugs and Ladybirds, it generally becomes a lot easier when a player has played enough of the game, especially as Ladybirds tend to only be in late-game areas.
Ladybirds are much tougher than Ladybugs, they have more health and deal more damage, so players are going to be compensated accordingly.
Players will receive 300 Raw Science for each Ladybird requested.
HUNTER – LADYBUG
While tanky, the Ladybug is one of the best creatures to farm regularly as it will be useful for Armour as it is very defensive and reasonably inexpensive.
Ladybugs are one of the easier mid-tier mobs that players can learn to kite fairly quickly, allowing them to take down many often.
Ladybugs provide players with a very decent 100 Raw Science per each killed on the list.
Note: Infected Ladybugs and Ladybirds count towards this goal.
HUNTER – LARVA
Larva are quite an annoying mob to get attacked by in the world as they tend to be invasive and don’t really drop anything a player regularly needs.
I’ll be honest, while Larvae are really easy to kill, I never get excited whenever this quest comes along because I just don’t care to farm Larvae.
Players will only receive 20 Raw Science for each Larva killed on the list.
Note: Infected Larva and Ladybird Larva count towards this goal.
HUNTER – LAWN MITE
Lawn Mites are terribly easy to kill and will be a source of supply for arrows for your bow or crossbow.
Admittedly, Lawn Mites are a bit unavoidable as they have a long aggro range and they tend to start attacking you out of nowhere when you’re travelling around the world.
Due to the ease of Lawn Mites, players will only receive 10 Raw Science for each Lawn Mite killed on the list.
HUNTER – MOSQUITO
Mosquitos as annoying as they are to defeat are going to be one of the best ways to get healing in Grounded as if players are able to get a Blood Sack from the Mosquito they can make an AoE heal with the Healbasa.
I truthfully farm Mosquitos any time I see them so I always have a generous amount of healing.
Mosquitos will provide players with 125 Raw Science for each killed on the list.
HUNTER – ORB WEAVER
The Orb Weaver can feel like a very tough mob to beat in the early game as it hits pretty hard without any armour, but let me tell you, they quickly become one of the easiest ones to farm as soon as you get yourself some good gear.
Orb Weavers can be found near the Oak Tree, though there are going to be plenty roaming around the world and attacking you randomly.
Players will receive 160 Raw Science for each Orb Weaver on the list that players defeat.
HUNTER – RED SOLDIER ANT
The Red Soldier Ant is the more important type of Red Ant that a player must farm in order for Weapons and Armour. While Red Soldier Ants are harder to beat that regular Red Worker Ants, I would strongly recommend farming as many of these as possible as Red Ant Armour is extremely useful for basing and for early game defense.
Players will receive 25 Raw Science for each Red Soldier Ant defeated on the list
HUNTER – RED WORKER ANT
Red Worker Ants are typically very Weak and while in the early game they will be a bit difficult to defeat due to them swarming you and a lack of good Gear, in the mid-to-late game they are easily one shot, so have no fret.
The Red Worker Ant quest is honestly the easiest one to farm as there are Red Ants almost everywhere and players are going to want to make sure they head into their tunnels to get some juicy Quartzite for upgrades.
Players will receive 10 Raw Science for each Red Worker Ant that is defeated on the list.
HUNTER – ROLY POLY
Roly Polys are quite a difficult mob to solo and quite frankly any time I get this I somewhat dread it and call my husband to help. Roly Polys have high damage and defence as well as some of the most annoying attack patterns in the game.
Though this is the case, Roly Polys are going to be very important to farm for their loot, so take these quests whenever they are offered to you.
Players will receive 200 Raw Science for each Roly Poly requested.
HUNTER – SPIDERLING
As easy as Spiderlings are, they’re really a nuisance to farm. Admittedly, there are some Spiderlings scattered around the world, however, they are really located up in the Hedge in trees. I typically avoid completing this quest, simply out of it being a nuisance, however, if you are strapped on Raw Science it can be useful to complete, especially with how easy it is.
Players will receive 40 Raw Science for each Spiderling killed on the list, which is honestly really good considering how easy they are to defeat when located.
HUNTER – STINKBUG
Stinkbugs are tough and realistically having a Gas Mask is the only way for them to be relatively easy for a player. While standing at a range can help, there’s always a chance for multiple Stinkbugs to attack you and fight you and kill you with their farts.
Realistically, if players are ever hunting for Stinkbugs I strongly recommend grabbing the Mutation that helps nullify Gas damage, as this is the only other optimal resort when you don’t have a Gas Mask.
I will say, Stinkbugs come in very handy in the mid-to-late game, especially due to Gear breaking more rapidly now.
Players will receive 100 Raw Science for each Stinkbug killed that is on the list.
Note: Green Shield Bugs count towards this goal.
HUNTER – TADPOLE
While at first, I thought Tadpoles were a bit useless, their importance has grown with each update in Grounded.
Though easy to kill, these suckers are annoying for me because they are underwater and honestly… the reward is so minimal that half the time I don’t care.
Players will only receive 10 Raw Science for each Tadpole requested.
HUNTER – TERMITE
Termites were a huge addition to Grounded and when they were released they were so overwhelming to fight due to the way they all ganged up on a player.
Though we’ve gotten a better grasp of Termites, I’m kind of surprised with the little amount of Raw Science they provide you, only providing players with 30 Raw Science for each one requested.
HUNTER – TERMITE SOLDIER
Similar to regular Termites, the Termite Soldier is quite a bit harder to defeat. Admittedly, the payoff tends to be better but make sure you’re really ready to fight these buggers because you’re going to have to get through a number of Termites to actually fight them.
Termite Soldiers provide players with 75 Raw Science for each one requested.
HUNTER – WATER BOATMAN
Water Boatman are some of the most peaceful creatures in all of Grounded and quite frankly, I’m happy that there’s finally a Hunter Quest for them as sometimes I forget that they exist.
Players will need a good amount of Water Boatman to complete their swimming quests so there’s really no way to actually avoid them, so take the small amount of Raw Science when you can.
Water Boatman provide players with 15 Raw Science for each one requested.
HUNTER – WATER FLEA
The Water Flea shockingly, gives a good amount of Raw Science in comparison to other mobs of their size.
Similarly to other water creatures, I hate being requested to farm them, but hey I’ll take the extra Raw Science for these suckers.
Players will receive 20 Raw Science for each of the Water Fleas requested.
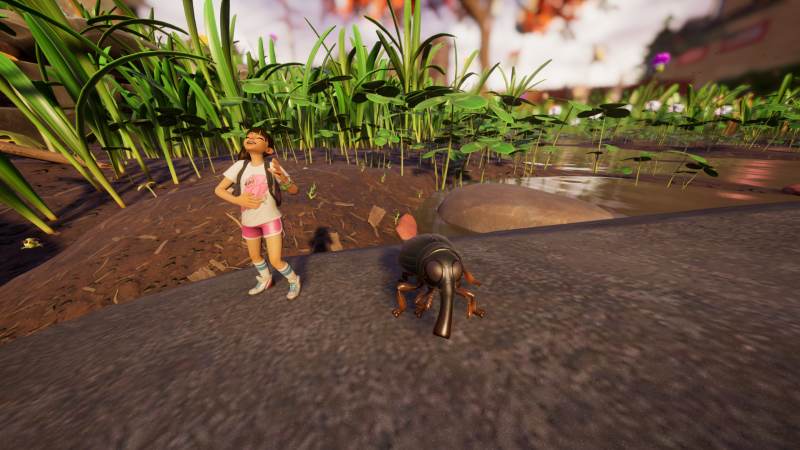
HUNTER – WEEVIL
Oddly enough, as easy as it is for Weevils to be killed, they’re really annoying to find. Weevils aren’t necessarily the quickest, however, they seem to be illusive on most servers that I have played on.
It’s funny, because Aphids are everywhere are relatively easy to spot, but they give a chase; while Weevils are also everywhere, you can hear them but I rarely actually see one to kill it.
Players can also set up Weevil Farms to help avoid this, though different updates have been known to alter a Weevil’s behaviour resulting in varying experiences for players.
For killing a Weevil players will shockingly receive 60 Raw Science for each kill on the list.
Note: Infected Weevils count towards this goal.
HUNTER – WOLF SPIDER
The Wolf Spider is one of the hardest mobs to kill in the game and quite frankly is instant death for any player unless they know what they are doing.
Wolf Spiders are easily managed when players with a Mutation that nullifies all Poison damage, completing this quest may be a bit difficult to do before obtaining it.
Players will receive 250 Raw Science for every Wolf Spider killed on the list.
EXPLORER QUESTS
Explorer Quests are quite interesting as they help force a player to discover new areas of the map, though I will say we ended up exploring the whole map before we even started seeing these quests.
As mentioned, players will only be able to be able to complete Explorer Quests a single time and each Explorer Quest will directly name the area that the player must go to, though some of the Trail Markers players must place can be a bit tricky to spot or to see.
When completing an Explorer Quest players will see the blueprint spawned for the Tail Marker (not there unless the quest is active) and will simply need the resources in order to finish the Trail Marker Blueprint.
I would strongly recommend grabbing the resources for a Trail Marker before you go out exploring to find the Blueprint as often players will not be able to find the resources as they are not always readily available in the areas where the blueprint is.
Oddly enough, the Raw Science provided from completing these quests varies, though this makes sense as some locations are more difficult to get to or survive in than others.
These are all of the quests:
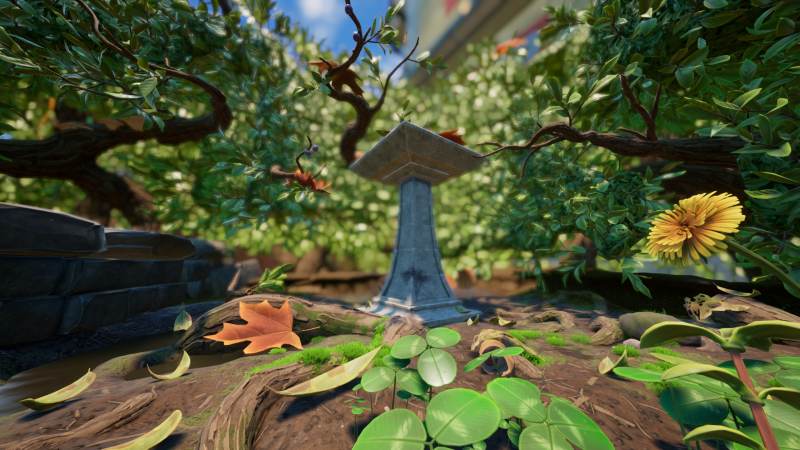
EXPLORER – BIRD BATH BLUFF
Bird Bath Bluff is located on the bird bath by the Hedge biome. Players will need to connect a Zipline in the trees, located by the Flingmans Flying Disk in order to reach it… or in our case, we built a path using Clover Roofs.
Players will receive 250 Raw Science for completing the Trail Marker.
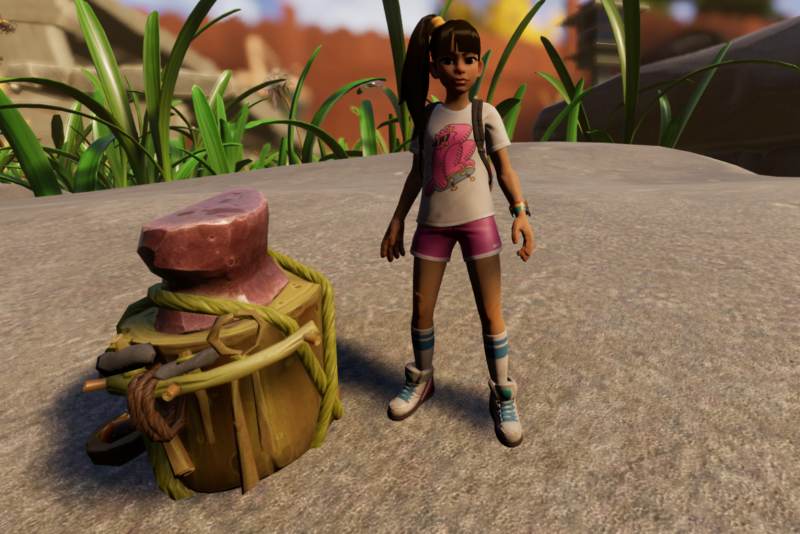
EXPLORER – FALLEN OAK BRANCH
The Fallen Oak Branch is located in the lower section of the Grasslands on the top of the branch.
Players will receive 100 Raw Science for completing the Trail Marker.
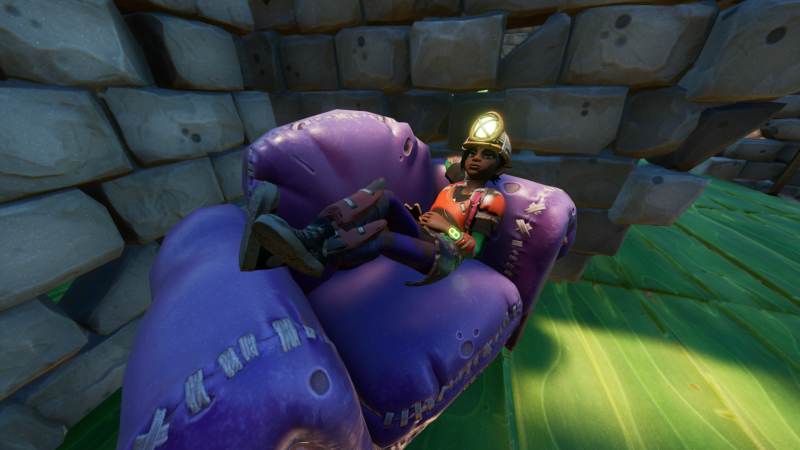
EXPLORER – GREAT OAK BEACON
The Great Oak Beacon is located in the Southern part of the Oak Hill biome and is on the large golden lamp. Players should be wary of this area as it tends to have an Orb Weaver by it.
Players will receive 100 Raw Science for completing the Trail Marker.
EXPLORER – PLANK CLIFF
Plank Cliff is actually located in the eastern part of the Grasslands and is clearly marked on the map as a rectangle.
Players must climb the Plank as the Blueprint is located right at the top, but be careful as this is a Spider hub and has all forms of spiders.
Players will receive 100 Raw Science for completing the Trail Marker.
EXPLORER – RAKE ROCK POINT
Rake Rock Point is located in the lower portion of the Dry Grasslands near the border of the Haze. Players will either need to climb up the rake itself or up the rock, though the actual Blueprint for this Trail Marker is on the rock itself.
Players should be careful here as there are plenty of infected mobs up here typically and can be very dangerous, so for newer players you may want to complete the Blueprint and run.
Players will receive 100 Raw Science for completing the Trail Marker.
EXPLORER – RED ANT HILL
The Red Ant Hill is located on the border of the Grasslands and the Dry Grassland and is located at the top of it’s entrance.
Players should be well aware of the Red Ant Hill as this is one of the best areas to farm Red Ant Eggs and will be a great place to farm Ants in general.
Players will receive 100 Raw Science for completing the Trail Marker.
EXPLORER – SAND CASTLE TOWER
The Sand Castle Tower Trail Marker is one of the harder ones to get to as players will have to build up the tower by using either Clover Roofs or Grass Stairs.
We tried making Bounce Webs and ladders, but this was severely ineffective.
I will warn players, it might be best to complete this at night as during the day as players will experience Sizzle during the day, ultimately leading to death if unprepared.
Luckily players will receive 700 Raw Science for completing this Trail Marker, making it one of the most worth it.
EXPLORER – STEPPING STONE SUMMIT
The Stepping Stone Summit is located near the Western Flooded Zone on a pile of rocks.
The very unfortunate part of locating this marker is that it will either require a good amount of parkour or players will need to craft Bounce Webs in order to get to it.
I mean… that’s not the only bad part, realistically the worst part is the fact that players will have to deal with Mosquitoes that fly by.
The Stepping Stone Summit will provide players with a good amount of Raw Science, being 250 Raw Science upon placing the Trail Marker.
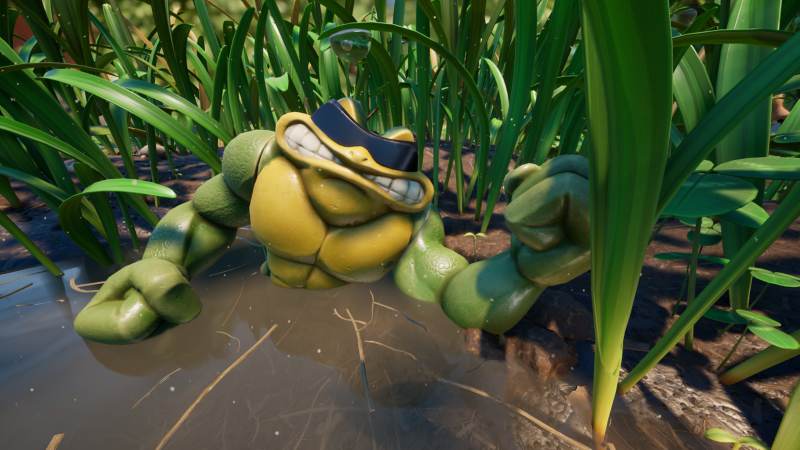
EXPLORER – TOAD SWAMP
Toad Swamp was a bit difficult for me to locate, but is actually pretty easy to spot if you know where the Rash Landmark is.
Essentially players are going to need to locate the Eastern Flooded Zone and will begin seeing Water Fleas and what looks to be a “ninja turtle” in the ground. The Trail Marker is in the hand of Rash.
Players will receive 100 Raw Science for completing this Trail Marker.
EXPLORER – TROWEL GULCH
The Trowel Gulch (used to be Spade Gulch) is located very close to the Eastern Flooded Zone and Eastern Flower Bed, but is actually in the Grasslands.
Here players will find a small ditch that leads to a cave blocked by Acorns and players may be approached by a Bombardier Beetle as well.
The marker is in the cave entrance.
Players will receive 100 Raw Science for completing this Trail Marker.
EXPLORER – WEED KILLER PEAK
Wee d Killer Peak is located in the Haze and is quite tricky to get to. Players will have to locate the source of the Haze and will need to get to the porch stairs via a long branch to climb up the nozzle of the weed killer.
The Trail Marker is located at the top of the Weed Killer.
Players will receive 100 Raw Science for completing this Trail Marker.
CHIPSLEUTH QUESTS
Clipsleuth quests are one of the harder quests to complete, though realistically are going to be the most important quests for players to complete as they will help players locate the Chips that provide BURG.L with more knowledge to sell.
Players will have to locate the areas where the Chips are and will commonly need to solve riddles and puzzles in order to actually acquire the chip as many are in laboratories.
Oddly enough, players do not need to have the Chipsleuth Quests in order to get the Raw Science rewards and can essentially cancel any of these quests given to get some extra space for other quests, however, when players are provided a Chipsleuth Quest, it’s location will appear on the map.
As to not spoil a player I will not go too in depth with these, however, if there is any interest I will write more thorough guides about each.
CHIPSLEUTH – GRAVE ROBBERY
This quest provides players with 1,000 Raw Science.
CHIPSLEUTH – JUNGLE TEMPLE
This quest provides players with 2,000 Raw Science.
CHIPSLEUTH – FISH BOWL
This quest provides players with 2,000 Raw Science.
CHIPSLEUTH – SUNKEN TREASURE
This quest provides players with 1,000 Raw Science.
CHIPSLEUTH – STUCK IN A HAZE
This quest provides players with 2,000 Raw Science.
CHIPSLEUTH – DARK DESCENT
This quest provides players with 2,000 Raw Science.
CHIPSLEUTH – CANDY CONUNDRUM
This quest provides players with 1,000 Raw Science.
CHIPSLEUTH – TASTY ASCENT
This quest provides players with 2,000 Raw Science.
CHIPSLEUTH – INTO THE WOODS
This quest provides players with 2,000 Raw Science.
BURG.Ls TECH CHIP SWAP SHOP (ITEMS BURG.L SELLS)
As mentioned, one of the best perks of the addition of BURG.L is the ability to purchase upgrades from him upon returning missing BURG.L Chips.
Note, this section of the article will contain a good portion of spoilers, including where the Chips are located. While I would like to mask what the Chips required are, I think it would be counter intuitive, so for those of you who are avoiding spoilers, please don’t keep reading.
Players should also note that there will be no purchasable upgrades for players if they have not turned in a BURG.L Chip, making BURG.L Chips extremely important to collect.
Players should note, there is no order that they must follow when collecting BURG.L Chips, so if you see a reward on this list that you want, find the Chip! Some areas are harder to complete than others, however, there isn’t a forced order.
GRASSLANDS BURG.L CHIP
The Grasslands BURG.L Chip is typically the first Chip that players locate and is found in the Oak Lab.
It provides players with a good portion of building items as well as some upgrades for Tools. I strongly recommend getting it as soon as possible.
MULTI-STORY BASES
Multi-Story Bases costs 1,000 Raw Science and is for you builders out there.
I honestly strongly recommend buying this upgrade first, even if you aren’t planning on doing much building, simply because players will be able to use this purchase and the recipes to build to areas they would otherwise be unable to reach.
While I can’t say that I use all of the crafting Recipes from this purchase, I will say there is a good amount that I use regularly, especially Clover Roofs in order to use as an alternative to ladders.
The following are all the Recipes unlocked with the Multi-Story Bases purchase:
Grass Half-Floor
Grass Floor
Triangle Floor
Sprig Railing
Acorn Railing
Acorn Spiral Stairs
Grass Stairs
Clover Roof
Roof Corner
Roof Squared Corner
Clover Flat Roof
Clover Peaked Roof
Clover Peaked Dome Roof
Clover Flat Triangle Roof
Roof Interior Corner
PEBBLET FOUNDATION
Pebblet Foundation is honestly an upgrade that most players can skip, unless they are planning to build directly on the ground and are interested in building as a whole.
There is not much utility for this purchase, other than trying to ensure that your builds are going to be perfectly lined up.
Players will spend 2,500 Raw Science to make the purchase of Pebblet Foundatin and will receive the following recipes:
Pebblet Foundation
Pebblet Ramp
FORTIFIED BASES
Fortified Bases used to have more tactical purpose back when base raids would happen, however, at this point it’s pretty much just a glamour for your base.
While it’s still a good idea to make a sturdy base, just in case you’re attacking Bugs near your base, it’s not a requirement. I do encourage players to make this purchase, however, I would say you have some time to think about it.
Players will have to spend 2,500 Raw Science in order to make the purchase of Fortified Bases and will receive the following recipes:
Sturdy Wall
Palisade Gate
Windowed Sturdy Wall
Palisade
Stem Floor
Triangle Stem Floor
Stem Half Wall
Clay Pillar
Stem Pillar
Pebblet Pillar
Stem Half Floor
SMITHING STATION
The Smithing Station is one of the most important upgrades players can purchase as it is the only way for players to make their already crafted Weapons even stronger.
The Smithing Station may feel complicated to use at first, but the easiest way to describe it that players will have to trade in resources to make their Tools stronger. Although each resource provides players with more damage and more durability, there is the option to provide them with elemental status effects which will damage certain mobs more, while some mobs resist the same elements.
In hopes of keeping this section brief, I will write a more detailed post regarding elements later, but this is the method in which you would apply these statuses.
The Smithing Station is by far the most important upgrade players can purchase from this BURG.L Chip and will cost players 100 Raw Science.
I strongly recommend grabbing this purchase as soon as you can, even if it means saving the Raw Science you would spend on other useful resources.
TORCH UPGRADE
The Torch Upgrade essentially allows players to extend the length of their Torch. When players make the purchase of the Torch Upgrade players will only be able to craft the Torch+ which is essentially a Torch for 16 minutes instead of 8 minutes, essentially being double the time.
I would also strongly recommend focusing on the Torch upgrade as not only does it help a player save on resources, but running out of a Torch in a dire circumstance is annoying as there are not always resources around to craft another.
Players will need to trade in 1,500 Raw Science in order to get the Torch Upgrade.
MEAT SHIELD
Meat Shield is another great upgrade to get and is one that I would recommend all players purchase early on as it is a Mutation players can use in order to provide themselves with more Health.
I typically use Meat Shield on a regular basis, at least until I have enough Milk Molars to provide me with Health, though even in these cases it can be useful when tanking hits.
Meat Shield is pricy, costing 3,000 Raw Science, though I recommend getting it early as it can help you defeat tougher mobs and essentially get better gear.
COOKING 101
Cooking 101 used to be Cookbook: Oaktree and has changed quite a bit
While players will be relying on Cooked Aphids and Weevils in the early game, players will want to start learning recipes for stronger foods so they can get passives that provide them with bonus stats.
Admittedly, this Cookbook doesn’t come with the best recipes as it is quickly out beaten by other recipes, but they can be useful for quickly feeding a player for relatively cheap.
Cooking 101 now requires players to pay 1,000 Raw Science and unlocks the following:
COOKERY
The Cookery is to replace the old Oven’s purpose as the Oven is now mostly for smelting. The Cookery is the new place where players will make all of their Meals.
The Cookery requires the following items to build:
9 Weed Stems
2 Clay
1 Acid Gland
1 Boiling Gland
GNATCHOS
Gnachos are a Tier 1 Meal that provides players with Fall Defense. Players will want to use this when accessing places like the Picnic Table and Hedge early on.
Gnatchos require the following ingredients to make:
1 Gnat Jerky
2 Acorn Bits
2 Grub Gloop
MITELOAF
Miteloaf is a decent starter Meal that will provide players with some Attack Stamina making it a bit easier to defeat mobs as you will not run out of Stamina as fast.
Miteloaf requires the following ingredients:
4 Mite Fuzz
2 Mushrooms
1 Aphid Jerky
SIGN SET: TEEN SPIRIT
The Sign Set: Teen Spirit is a cosmetic Item that players can use to hang up certain art pieces.
As this is a purely cosmetic item, it is hardly worth spending on immediately especially because the Sign Set: Teen Spirit costs 4,000 Raw Science to obtain.
SCA.B SCANNER: SCIENCE
While at first a player might not see the point of having the SCA.B Scanner: Science, I have to say that it is quite helpful in the mid-to-late game.
I have to admit that we did not purchase the SCA.B Scanner: Science at first as we were not strapped for Raw Science and due to it’s fairly high price, but we gave in as soon as we didn’t really have any other purchases we cared for.
Players will have to pay 5,000 Raw Science to purchase.
I will say, players don’t necessarily need the SCA.B Scanner: Science in the long run as realistically players will earn much more Raw Science from completing daily quests than from gathering Raw Science in the wild. Not only that, but players can also look up guides to find all of the Raw Science, making this fairly obsolete.
I personally still like the idea of having the SCA.B Scanner: Science as it’s a good way to know if there is any Raw Science near you while exploring the world and I’m going to be honest… as much as I write guides… I don’t like looking up guides that tell you where resources are. I’d rather just stumble on them, especially if you don’t necessarily need them.
When players have purchased this upgrade they will begin seeing a pop-up on their SCA.B Scanner with an RS on it whenever there is some nearby, This is a very similar prompt to the one players see whenever there is a Field Station nearby.
RED ANTHILL BURG.L CHIP
The Red Anthill BURG.L Chip is going to be a pretty decent BURG.L Chip to get with a few upgrades that players will not regret having, though I will say that it is not as necessary as the previous.
I will still recommend players to get this as quickly as possible as it will help a player survive more easily.
FIBER BANDAGE EFFICIENCY
I will say, the Fiber Bandage Efficiency is not necessarily a necessary upgrade to purchase, though I will say it does help players save some resources when crafting Fiber Bandages, which are used very frequently.
Fiber Bandages usually cost 3 Plant Fiber and 2 Sap, though if players purchase the Fiber Bandage Efficiency upgrade it will only cost 1 Plant Fiber and 1 Sap.
Both resources are fairly easy to come by, though admittedly they are very annoying to collect… so get this upgrade.
Due to the fact that the Fiber Bandage Efficiency upgrade is only 1,500 Raw Science, I would strongly recommend grabbing it as soon as possible.
CANTEEN UPGRADE
The Canteen Upgrade is going to be the most important upgrade for players to purchase from this Chip set as it will allow players to carry more water while travelling, being one of the most frustrating resources to run out of (other than food.)
The Canteen+ has the same recipe as the Canteen though instead of holding only two slurps of water, the Canteen+ can carry 4.
I would strongly recommend buying this upgrade immediately for 1,500 Raw Science.
BUFF LUNGS
Buff Lungs is a Mutation that players can purchase to help increase their Stamina.
While not my favourite Mutation, it is one that I rotate on every so often when I need some extra Stamina, though there is no real rush to purchase it.
Players will have to spend 3,000 Raw Science in order to purchase Buff Lungs.
SIGN SET: CREATURES
Again Sign Set: Creatures is another way to frame cosmetics in your base. I strongly recommend waiting on this purchase as it is expensive and costs 4,000 Raw Science.
SCA.B SCANNER: SCA.Bs
Quite frankly the least important of all the SCA.B Scanners is the SCA.B Scanner: SCA.Bs. as this is probably the only resource that I would look at an online guide for as it’s purely cosmetic.
The SCA.B Scanner: SCA.Bs costs a whopping 5,000 Raw Science and I would strongly recommend against purchasing it unless you have a very large amount of Raw Science to waste.
HEDGE BURG.L CHIP
The Hedge BURG.L Chip is going to be the first long winded Chip players will look for and admittedly there are some decent purchases players can make from this Chip.
Though these purchases are pretty good, I will say that they are not essential and realistically… I don’t use the majority of these simply because… I don’t care for them.
ZIPLINES
Ziplines are by far one of the most tactful recipe players can acquire, though I will say… I’m not the biggest fan of them.
While Ziplines will allow players to get from point A to point B quickly, players have to be smart about where they place them as the incline a player sets them up with will essentially determine the speed in which a player is able to travel. If a player sets up a Zipline poorly and there isn’t a big slope on it, players will take a very long time to get across the map… this was our issue.
Though we got the hang of using Ziplines after a stream, we ended up getting rid of them altogether as they can make the game feel a bit boring. At most, we would use Ziplines these days just to move resources from Point A to Point B, but the idea that we would set up Ziplines so we could quickly travel the map is no longer a priority.
Ziplines only cost 2,500 Raw Science and while I may not be using them, this shouldn’t discourage you from setting up something really dope.
LADDER
I’m going to be honest… I hate Ladders. While Ladders themselves are useful, setting up Ladders is one of the most annoying things in the world as players will not be able to carry the Weed Stems they need to construct the Ladder.
Essentially, crafting a short Ladder is fine, but as soon as a Ladder gets too tall, players will have to come up with some creative ways to get near the top of their Ladder to continue building.
I really wish that there was an update that allowed players to carry large objects up Ladders, but due to this… they’re just annoying.
Ladders cost 2,500 Raw Science and I’d prefer to use Ziplines than Ladders (if there is a way to do this.)
COOKBOOK: HEDGE
The Cookbook: Hedge provides players with two Recipes, being the Spider Slider and Larvagna.
Both of these recipes are actually very useful and I would strongly recommend trying to put them into your rotation for food frequently as they will help you kill enemies more efficiently with a lot less effort.
Both provide players with Critical Hit Chance, allowing players to deal more damage.
The Cookbook: Hedge costs 3,500 Raw Science.
MAC N BEES
Mac N Bees used to be provided in another way, but since the full release of Grounded is now part of the Hedge Cookbook. It’s not really a useful Meal to make unless players are planning on climbing on high areas and are susceptible to a lot of fall damage.
It require the following ingredients:
3 Bee Fuzz
4 Acorn Bits
3 Pollen
SPIDER SLIDER
The Spider Slider uses the following ingredients:
4 Spider Chunks
5 Nectar
2 Berry Chunks
This is a Tier 2 Meal
DAREDEVIL
Honestly, I really don’t care for the Daredevil Mutation as it simply reduces Fall Damage, but it’s worth getting if you have enough Raw Science to purchase it.
Players will need 3,000 Raw Science to purchase Daredevil.
SIGN SET: CROW
Again Sign Set: Crow is another way to frame cosmetics in your base. I strongly recommend waiting on this purchase as it is expensive and costs 4,000 Raw Science.
POND BURG.L CHIP
Quite Frankly, one of the tougher BURG.L Chip is the Pond BURG.L Chip and is a base builder’s dream more than anything.
I am glad to know that players do not necessarily need this one to get some great objects, but I will still say as the base builder in the relationship, I was gunning for us to get it as soon as possible.
BUOYANT FOUNDATION
The Buoyant Foundation is used to help players build on water, making places like the Pond inhabitable.
While I’m not the biggest fan of basing in the pond, simply because it feels out of reach from the rest of the map, it’s undeniable how pretty it is and how much safer that area is when build above the water.
In general, players are going to want to have multiple bases around the world at least for sleeping, so make sure you use some Buoyant Foundations.
Buoyant Foundations cost 2,500 Raw Science to purchase.
CURVED BASES
The Curved Bases purchase is honestly the purchase that I was waiting for, especially because I wanted to build a massive Castle in our world using Mushroom Bricks.
While purely for cosmetics, the amount of rewards a player will receive with the Curved Bases upgrade makes it very worth it, especially for those who enjoy building predominantly in Grounded.
For the cost of 2,500 Raw Science players will receive the following recipes:
Grass Curved Floor
Grass Curved Half Floor
Stem Curved Floor
Stem Curved Half Floor
Sturdy Curved Wall
Windowed Sturdy Curved Wall
Grass Curved Wall
Stem Curved Wall
Windowed Stem Curved Wall
Palisade Curved Wall
Sprig Curved Fence
Acorn Curved Fence
Grass Curved Door
Sturdy Curved Door
Palisade Curved Gate
Grass Curved Half Wall Crenellated
Grass Curved Half Wall
Stem Curved Half Floor
COOKBOOK: POND
The Cookbook: Pond only comes with a three recipes, being the Boatman Fin Soup, Spaghetflea and Tadpoloca Pudding.
BOATMAN FIN SOUP
Admittedly the Boatman Fin Soup isn’t the best food, however, it will help players swim faster underwater, which will come in handy even in small amounts.
Players will need to spend 3,500 Raw Science in order to buy this Cookbook.
Players will need the following ingredients:
3 Water Boatman Fin
2 Mushroom
4 Algae
SPEGHETFLEA
Although Speghetflea isn’t the most powerful food, it is very useful for players who are wanting to do some diving as it will give players a bit more Oxygen equal to a Gill Tube. It’s the lesser of the two Meals given in this Cookbook but requires less expensive resources.
Players will need the following ingredients for Spaghetflea:
1 Water Flea Roast
3 Acorn Bits
2 Lilypad Wax
TADPOLOCA PUDDING
Tadpoloca Pudding is one of the most powerful foods for water exploration and is actually a Tier III food. It will provide players with Vetran Diver as well as Swim Speed, making it perfect for exploration.
Players will need the following ingredients for it:
2 Tadpole Jerky
4 Lilypad Wax
3 Mint Shards
SIGN SET: SCIENCE
Again Sign Set: Science is another way to frame cosmetics in your base. I strongly recommend waiting on this purchase as it is expensive and costs 4,000 Raw Science.
TURRET: POLLEN
With the release of Grounded we saw one of the most major updates and quality of life improvements, being ability to place Turrets to protect bases.
The Pollen Turret is by far a necessity now as players will experience Raids and MIX.Rs which are waves of mobs coming at you. The coolest thing about the Pollen Turret is that it will deal 3x the damage in these MIX.Rs and Factional Raids, making them a necessity if you want the best chance at survival.
Pollen Turret use Pollen as their ammo and will slow down enemies by 70% for 20 seconds or outright stun a mob.
If the Pollen Turret runs out of ammo it will begin leeching ammo from inventory chests or players nearby, so make sure you stock up!
Players will need the following ingredients for their Pollen Turret:
2 acorn Shells
1 Acorn Top
3 Silk Rope
1 Flower Petal
2 Weed Stems
Players will need to spend 4,000 Raw Science for a Pollen Turret.
SUNKEN OUTPOST BURG.L CHIP
The Sunken Outpost BURG.L Chip is a pretty tough Chip to find as it requires players to locate the Mossy Key in the smaller cave biome to unlock the sunken chest in the Pond Depths.
SPLATBURST RECIPE
The Splatburst is going to be another varient of the Bratburst, though admittedly is easier to use than the Bratburst as it will stick onto whatever players throw it on.
While I wouldn’t say that the Splatburst is necessary to purchase, I have to say for dummies like me… it’s easier to use.
Essentially players will have to explode a variety of locations in Grounded to get through and the Splatburst makes it a lot safer to explode these areas as it will ensure that a player doesn’t get trapped in the explosion due to the bomb rolling towards them.
Not only that, if players want to use Bombs to harm enemies, the Splatburst is more effective and safer due to it’s high damage and the fact that the Splatburst will literally stick on the mob.
I truly recommend purchasing the Splatburst, but I also recognize that not every player is going to find it worth it.
Players will have to spend 2,500 Raw Science in order to buy the Splatburst recipe.
FIN FLOPS UPGRADE
The Fin Flops upgrade is an essential upgrade for all players, especially when they are getting ready to spend a lot of time under water.
I have to admit, under water swimming was my least favourite part of playing Grounded due to the fact that I struggle with death timers and navigation. If you didn’t watch me stream Grounded on Twitch you truly don’t know how many times I drowned and how many Backpacks I had to attempt to recover before I had this upgrade.
The Fin Flops Upgrade will provide you with Fin Flops + which will provide you with a Major Swim Speed Buff.
The Fin Flops Upgrade will cost players 1,500 Raw Science to purchase.
DIVING LANTERN UPGRADE
Similar to the Torch+ the Diving Lantern upgrade is going to be extremely important for players to pick up as there are plenty of long Caverns that players must dive into and navigate.
Players will be able to extend the lifespan of the Slime Lantern by double with this purchase making it last 12 minutes instead of 6, essentially providing players enough time for most of the underwater adventures they will need to complete.
The Diving Lantern Upgrade will cost players 1,500 Raw Science.
HAZE BURG.L CHIP
As tough as it is to navigate and complete the Haze Lab, it has one of the most important BURG.L Chips in my opinion.
With the Haze BURG.L Chip, players will gain access to a variety of new crafting stations which are going to take some time to get the resources that the player needs completed, so the earlier you get it, the easier it will be to stockpile all the products you need.
In my opinion, the Haze BURG.L Chip should be completed around the same time you get the Smithing Station as this is going to be the other crafting station that is so directly tied to to this Chip Set.
ADVANCED PRODUCTION BUILDINGS
Quite Frankly, the most important upgrade players are going to want to purchase is this one as it will provide players with the tools to upgrade their Weapons and Tools in the Smithing Station. While it would be lovely if players only needed the Smithing Station, this isn’t the case.
For Builders, you also get a new resource to build with as well as a way to Lure Aphids and Weevils.
The following are the items available from the Advanced Production Buildings:
Grinder
Oven
Mushroom Brick
Mushroom Slurry
Plant Slurry
Players will need to spend 2,500 Raw Science to make this purchase.
FEATHER ROOFS
While Feather Roofs are not an essential purchase they are easily the prettiest of all the Roofs available to players.
Players can avoid this purchase if they are not looking to build with them, though at the time of writing this article, they are the only Roofs both Weevils and Aphids can walk up in hopes of trapping them. Note, this may get patched out.
Players will need to spend 2,500 Raw Science in order to get the following items:
Feather Roof Corner
Feather Roof Squared Corner
Feather Roof Interior Corner
Feather Roof
Feather Peaked Roof
Feather Peaked Dome Roof
Feather Flat Roof
Feather Flat Triangle Roof
COOKBOOK: HAZE
The Cookbook: Haze is a great upgrade to purchase when players are trying to stack passives. Essentially, on its own I’m not the biggest fan of this Cookbook as it simply provides players with Attack Stamina, which is useful, but not game breaking.
Players will have access to two new recipes, being Miteloaf and Funguspacho.
Players will need to spend 3,500 Raw Science in order to make this purchase.
LARVAGNA
Larvagna is a decent recipe to have as it will slightly increase your Crit Hit chance. Although not the most potent, due to it’s relatively cheap recipe players may want to always have a few on them.
Players can craft Larvagna with the following ingredients:
3 Larva Spike
1 Fresh Billy Hog Bite
2 Grub Sludge
FUNGUSPACHO
Funguspacho is a bit trickier to make as it will require players to spend a decent amount of time in the Haze farming, though it is admittedly better at tier II.
Players will need the following ingredients to make Funguspacho:
4 Fungal Growth
2 Mushroom Chunks
2 Toadstool Chunks
SIGN SET: DAYDREAM
Again Sign Set: Daydream is another way to frame cosmetics in your base. I strongly recommend waiting on this purchase as it is expensive and costs 4,000 Raw Science.
TURRET: PEBBLET
The Pebblet Turret is one of the most important Weapons in the game as it deals the most damage passively for players.
Unlike the Pollen Turret, this Turret is focused on dealing damage versus status effects. Although it is a heavy damage dealing Tower it is quite slow.
Similar to the Pollen Turret it will deal 3x the damage to creatures during MIX.Rs and Factional Raids and will use Pebblets as ammo.
If the Pebblet Turret runs out of ammo it will begin leeching ammo from inventory chests or players nearby, so make sure you stock up!
It will cost players 4,000 Raw Science to purchase.
BLACK ANTHILL BURG.L
Honestly, the Black Anthill BURG.L Chip was one of the harder Chips for us to locate as the entrance for the Black Anthill was not the easiest to find.
The Black Anthill BURG.L Chip is quite essential to locate as it will provide players with the recipe to upgrade their Weapons and Tools and I really wouldn’t put this off longer than you have to. Players will need the Oven in order to utilize this recipe, so if for whatever reason you do not have one, the pressure is going to be less.
ADVANCED SMITHING: MIGHTY GLOB
The Advanced Smithing: Mighty Glob is going to be one of the most important upgrades a player will ever get in Grounded, especially in the mid-game. With this players will be able to upgrade their Weapons and Gear using the Smithing Station.
The only issue with this purchase is some of the recipes have finite uses and players will need to find the recipes again in the world in the late-game. While not the worst, this can be annoying for some players, especially those who are taking things slowly.
The recipes include the Mighty Glob, which is an infinite recipe, the Sturdy Plating and Sturdy Whetstone which are both Finite Recipes.
What the latter means is that players will be able to craft a certain number of these until they must locate the in world recipe.
Players will need to spend 2,500 Raw Science in order to get Advanced Smithing: Mighty Glob and should make this purpose as early as they can.
ADVANCED SMITHING: BRITTLE UPGRADES
Alright, alright, I know I said the previous purchase was going to be the most important, however, players will need Advanced Smithing: Brittle Upgrades before they get Mighty Glob.
Essentially this will provide players with the first 5 levels of upgrades until they need the Globs which are used for the next two stages. Obviously, due to this, I recommend you get Brittle Upgrades first so you can use them to carry you a bit better.
Advanced Smithing: Brittle Upgrades are actually relatively inexpensive being only 1,500 Raw Science, so snag them quickly and if you can try to get Mighty Globs at the same time, especially if you want a general buff in damage and defence.
ADVANCED SMITHING GLUE MASHER
Repairing in Grounded has changed quite a bit since release and instead of using the resources that players used to craft the weapon or Gear players can now use Repair Glue beyond level 5. I will cover all you need to know about repairing in a longer article, but for now all you need to know is the Glue Masher is the new way of getting the resource needed.
Players unlock the Glue Masher, obviously as well as the recipe for Repair Glue with this BURG.L Chip.
LURES
Lures are actually a resource that I don’t use as I simply gave to found a way to utilize them personally.
Essentially for the purchase of 2,500 Raw Science players will have access to two types of Lures, being the Lure Arrow and Lure Trap.
Both work in similar ways, allowing players to lure out specific mobs or creatures. I’m just going to say I haven’t found either o these effectively luring in mobs, so I simply avoid them.
ADVANCED SMITHING: QUARTZITE GLOB
The Advance Smithing: Quartzite Glob is by far the most important purchase from this set as players will not be able to upgrade their Weapons or Tools beyond a certain point without it. I’ll be honest, I hate how many BURG.L Chips players have to farm in order to effectively use the Smithing Station, but it’s more of a reason to farm the Chips.
Players will need to pay 2,500 Raw Science in order to gain access to the Quartzite Glob.
COOKBOOK: SANDBOX
The Cookbook: Sandbox is one of my favourite purchases as it will provide players with two different effects.
This is also the first time we see a Tier III food which will be extremely useful for adventuring in the world.
As is with most Cookbooks, there are two foods available to players, being the Omelant and the Quesadillantlion.
The Cookbook: Sandbox requires 3,500 Raw Science to purchase.
OMELANT
The Omelant is a Tier II food that providers player with Thorns. While Thorns is not the most powerful effect for players, in most games my motto is: if I can damage a mob simply for getting hit… I’ll take it!
As players can stack multiple passives, theres really no reason not to use it.
The Omelant requires the following ingredients:
1 Black Ant Egg
2 Salt Shards
2 Algae
QUESADILLANTLION
The Quesadillantlion is the more useful version of the Omelant as it will both provide players with sizzle protection and will provide the player with Thorns.
The only issue with the Quesadillantlion is that it is quite costly, requiring the following ingredients:
3 Antlion Parts
6 Salt Shards
2 Spicy Shards
SIGN SET: GLOW
Again Sign Set: Glow is another way to frame cosmetics in your base. I strongly recommend waiting on this purchase as it is expensive and costs 4,000 Raw Science.
WAFT EMITTER
The Waft Emitter is quite an interesting tool in Grounded as it can be used to artificially and instantly start a Factional Raid by placing ingredients related to the mobs you want.
The Waft Emitter can be used anywhere except for the Haze, unless it has been turned off.
The Waft Emitter requires the following ingredients to craft:
2 Ladybug Parts
1 Ladybug Head
4 Tough Gunk
5 Clay
Shockingly players will not need a crafting table to craft the Waft Emitter and will need 2,500 Raw Sciencce in order to unlock it.
Players can put multiple items into the Waft Emitter to enrage multiple types of creatures and they will receive the following responses:
Bee Fuzz adds 3/4 Rage and will attract Bees
Bee Stringers add 4/4 Rage and will attract Bees
Black Ant Heads will add 1/4 Rage and will attract Black Ants
Black Ant Mandibles add 2/4 Rage and will attract Black Ants
Black Ant Parts add 1/4 Rage and will attract Black Ants
Black Ox Horns add 4/4 Rage and will attract Black Ox Beetles
Black Ox Parts add 3/4 Rage and will attract Black Ox Beetles
Fire Ant Heads add 2/4 Rage and will attract Fire Ants
Fire Ant Mandibles add 3/4 Rage and will attract Fire Ants
Fire Ant Parts add 1/4 Rage and will attract Fire Ants
Fungal Growth adds 1/4 Rage and will attract Infected Creatures
Mosquito Beaks add 3/4 Rage and will attract Mosquitos
Larva Spike adds 2/4 Rage and will attract Larvae
Moquito Blood Sacks add 3/4 Rage and will attract Mosquitos
Red Ant Heads add 1/4 Rage and will attract Red Ants
Red Ant Mandibles add 2/4 Rage and will attract Red Ants
Red Ant Parts add 1/4 Rage and will attract Red Ants
Spider Chunks add 1/4 Rage and will attract Orb Weavers
Spider Fangs add 2/4 Rage and will attract Wolf Spiders
Termite Choppers add 2/4 Rage and will attract Termites
Termite King Carapace add 3/4 Rage and will attract Termites
Termite Parts add 2/4 Rage and will attract Termites
Tiger Mosquito Beaks add 4/4 Rage and will attract Mosquitos.
SANDBOX BURG.L CHIP
The Sandbox BURG.L Chip didn’t end up being the most useful for me, but I can’t deny that how much power it can really provide a player.
Similar to some other BURG.L Chips, this Chip will allow players to buff up their Weapons and will also unlock a new Weapon, making combat a lot easier, especially in the Sandbox.
ADVANCED SMITHING: FLAVOURED GLOBS
I’ll be honest, I mostly use Elemental Damage on my Bow rather than on my Melee Weapons, commonly sticking to using Quartzite for these, though it is undeniable that some Melee Weapons become extremely overpowered when you pair them up with the Elements.
Players will need the Advanced Smithing: Mint, Salt, Sour and Spicy Glob for the higher tier Weapons if they want to increase their damage and also pair an element on them. Quite frankly, this shouldn’t be missed.
Players will need to spend 2,500 Raw Science in order to get this upgrade.
SIGN SET: DOODLES
This is another cosmetic that players can purchase costing 4,000 Raw Science and providing new displays for Sign Frames.
PICNIC BURG.L CHIP
I have to say, the Picnic BURG.L Chip was one of the most fun BURG.L Chips to try to discover as there were more puzzles involved in it that I had expected.
While players can technically build up to the picnic table, this is a waste of time and resources as players can discover a way to get up that is actually inside of the game. Players will also need to locate a key to unlock the Minotaur Chest. In order not to spoil this, I will not mention where it is, however, I will probably write a guide on it in the future.
Players will get the following purchases from the Picnic BURG.L Chip:
SIGN SET: FOOD STUFF
Again Sign Set: Food Stuff is another way to frame cosmetics in your base. I strongly recommend waiting on this purchase as it is expensive and costs 4,000 Raw Science.
SCA.B SCANNER: MILK MOLARS
By far my favourite purchase from this set is the SCA.B Scanner: Milk Molars as Milk Molars are the most valuable resource in all of Grounded.
While admittedly players can use a guide to locate all of the Milk Molars in the game, I have to say that I prefer this method as it will help you know if you missed a Milk Molar in the area you’re currently in.
While not perfect, the SCA.B Scanner will glow, much like when a Field Station is nearby and will greatly reduce the amount of time it takes to locate said Milk Molar.
The downside is that the SCA.B Scanner: Milk Molars is quite costly, coming in at 5,000 Raw Science. I still think it’s a great purchase.
MINT MACE
The Mint Mace is a very strong Tier III Weapon and is most useful for players who are up against mobs that are susceptible to Fresh Damage. My husband ended up being the primary user of this Weapon, using it in the majority of situations as he is the tank on our team.
As there aren’t that many options for Tier III Weapons this is a great choice, especially because players get Salty Damage from it without having to use Salty Globs, meaning that it does not require as much grinding to power up.
Players will have to spend 2,500 Raw Science in order to get this upgrade.

WOODPILE BURG.L CHIP
Quite frankly, both the most annoying and easiest BURG.L Chip to locate is the Woodpile BURG.L Chip.
It does provide players with some of the best upgrades in the game, but I have to admit… it’s what made me want to put down the game again as I was not impressed.
Players will get more recipes to upgrade their Weapons, which were actually nerfed in the update that released these resources. Honestly, if I didn’t play this game before the release of Jewels, I think I would have felt differently about this Chip and these upgrades, however, this really left a bad taste in my mouth because I felt bored by the repetition and grind.
WIZARD HAT
The Wizard Hat is a whole new piece of Armour that increases the damage players can deal with the new Staffs.
Although it is light Armour, it will be very useful for support players who want to deal high amounts of damage.
Players need 3 Crow Feather Pieces
10 Berry Leather
4 Termite King Carpaces
Players will need 2,500 Raw Science to purchase this upgrade.
CANDY STAVES
Candy Staves are some of the most exciting Weapons for me to play with as I’m always excited for a Caster build in any game.
WIth this upgrade players will be able to craft three different types of Staves, being Mint, Spicy and Sour. I’ll let you play around with these, but let me tell you… they are exciting.
The Candy Staves research requires 2,500 Raw Science.
COOKBOOK: WOODPILE
The Cookbook: Woodpile comes with a couple of recipes, though unlike many other Cookbooks, both of these recipes are Tier II and both are unlike the other.
The two recipes players can receive are the Black Ox Burger and the Termite Delight.
To purchase the recipes players will need 3,500 Raw Science.
BLACK OX BURGER
The Back Ox Burger will provide players with more Maximum Health and Damage resist. To me, this is one of the most useful meals in the game, especially if players are planning on being the tank on their team.
While players are going to want to learn how to perfect block, it is very ideal for players who fail a perfect block by mistake.
Players will need the following ingredients to make the Black Ox Burger:
4 Black Ox Parts
2 Pupa Leather
5 Bug Goop
TERMITE DELIGHT
Termite Delight is honestly… useless in my opinion, especially if players have Mutations they can quickly switch to.
Essentially it will provide players with faster Rock Harvesting and Grass Harvesting and while this is somewhat useful… eh. Eh…
I’d still get it and use it if you have the resources around, but it’s not really a big priority.
Players will need the following ingredients:
4 Termite Parts
2 Dust Mite Fuxx
2 Bug Goop
SIGN SET: MORE CREATURES
If you’re looking for new displays for Sign Frames, then look no further than this. It will cost you 4,000 Raw Science though.
STUMP BURG.L CHIP
The newest addition to the Grounded Labs and will provide players with a variety of great late game crafting recipes. Admittedly you know that you’re almost done the game at this point and it will make everything a lot easier for players to simply relax while playing.
ADVANCED SMITHING: MIGHTY JEWEL
The final tier for upgrades now need Jewels instead of Globs, making the purchase of Advanced Smithing: Mighty Jewel extremely important.
Not only will players get the recipe for Jewels, which are only used on Tools and Weapons, but players will receive the finite recipes for Supreme Plating and Supreme Whetstones. Plating being used for Armour and Whetstones being used for everything.
I strongly recommend getting this as fast as possible.
Players will need to spend 2,500 Raw Science in order to make this purchase and will essentially need to grind quite a bit more than they used to in order to get their Weapons more powerful.
ADVANCED SMITHING: FLAVORED JEWELS
Advanced Smithing: Flavored Jewels is essentially the same as the Mighty Jewel, however, it allows players to empower their Weapons with stronger Elemental damage.
This will also cost 2,500 Raw Science in order to purchase and wasn’t as important for me, though again this is due to the fact that I like focussing on Quartzite more than anything to be honest.
ADVANCED SMITHING: STURDY UPGRADES
I’m not going to lie, I’m surprised this was its own unlock because you get the finite recipes for everything mentioned in the Sturdy Upgrades in the Mighty Jewel upgrade. Though this is the case, this might simply be so players can get ahead of the grind without waiting too long if they are not farming enough Raw Science.
With Sturdy Upgrades players unlock the infinite Sturdy Plating and Sturdy Whetstone recipes.
This will cost players only 1,500 Raw Science.
ADVANCED BUILDING: ASH CEMENT
Alright builders, time to get excited because you now have access to a whole new building tier. With Ash Cement players get the recipe to craft Charcoal Ash which can be turned into Ash Cement.
This building resource is very beautiful and quite frankly, I cannot wait to build beautiful things with it!
Building is one of my favourite things to do in Grounded and while my husband and I built a huge Mushroom Brick Castle on stream, I can see myself building something gorgeous with Ash Cement when we start streaming Grounded again.
This resource will cost 1,500 Raw Science.
SIGN SET: GIRTHSCRAPE
If you’re looking for new displays for Sign Frames, then look no further than this. It will cost you 4,000 Raw Science though.
mint mace does fresh damage not salt btw
Thank you! Just a typo, I appreciate the comment 😀