Grounded is a great Survival multiplayer game that I admittedly started playing during the beginning of early access, but put it down simply because of the lack of content.
At this point, I have to say that Grounded feels like a fully fledged game with a good variety of content and provided my husband and I hours of gameplay in Twitch.
When it comes to playing Grounded a good amount of your strength is going to come from crafting yourself better Gear that makes you more powerful, however along the way players will locate some nice juicy Mutations that will help make their adventures a lot more bearable.
While players will gain a good variety of Mutations passively simply by playing the game normally, there are some Mutations that will take more effort in order to acquire.
The best thing about mutations is that players will be able to switch them out anytime you are not in combat, allowing players to make the most out of their passives, especially when farming resources.
The following is all you need to know about Mutations, how to get them, and what my strategy is when using them.
UNLOCKABLE MUTATIONS
Unlockable Mutations are are specific to every player and will require each player to complete the tasks required to unlock them.
While some tasks are very easy to complete, players will have to truly focus on others.
I would strongly recommend that players try to unlock as many of the Mutations as they can and try to focus on them early on as some Mutations will have different tiers that need time to unlock and will help a player deal more damage.
The following are all of the Unlockable Mutations and the ones that I think are the best and when I use them:
LIL FIST
Lil Fist is typically the first Mutation that players will ever receive as it requires players to kill 50 creatures with their fists.
The reality is that players will not really need to use the Lil Fist Mutation beyond the first few days of playing Grounded as all it does for a player is increase the damage players deal when they are not wielding a Weapon.
As players will not have access to any Weapons early on into playing Grounded it is strongly recommended that you try to Rush this mutation by killing Weevils or Aphids so that they can progress and begin killing tougher mobs without a Weapon.
Admittedly, players will not be able to defeat many mobs with their bare fists as most mobs will have too much Health and even if a player is skilled enough to kite the damage from mobs, this will still prove to be difficult simply due to the sheer amount of Health the mobs have.
CHOPPER
Chopper has to do with killing mobs with an Axe. While admittedly, I’m not the biggest fan of using my Tools for killing mobs, especially with the reduced durability nerf that tools have received; the reality is that Grounded is filled with some really great mechanics that allow players to deal more damage to mobs depending on what Weapon or Tool they use.
Chopper will allow players to stagger the target whenever they use an Axe which essentially interrupts the mob from attacking or moving.
There are three tiers to Chopper and players can acquire it by killing any mobs with an Axe, meaning players may want to set up a Weevil or Aphid farm to quickly unlock it. The different tiers raise the chance of staggering to take effect.
Tier 1 requires players to kill 50 mobs with an Axe
Tier 2 requires players to kill 100 mobs with an Axe
Tier 3 requires players to kill 200 mobs with an Axe
SMASHER
Smasher is tied to the Hammer and will make it possible to Daze enemies, essentially slowing their attack speed. I will say, I really enjoy Smasher, especially in the early game as essentially players can crowd control a mob and then begin attacking them with a proper Weapon.
While Smasher doesn’t see the most use in late-game, it can be super useful for players to get the materials they need to craft better Weapons and Gear.
Smasher has three tiers that players must grind out and the different tiers will raise the chance of daze to occur.
Tier 1 requires players to kill 50 mobs with a Hammer
Tier 2 requires players to kill 100 mobs with a Hammer
Tier 3 requires players to kill 200 mobs with a Hammer
JAVELINEER
Javelineer is admittedly a Mutation that I ignored for the longest time because I had no clue that it existed or the fact that Spears can actually deal more damage than a good amount of other Weapons when they are thrown instead of used as a melee Weapon.
As I mentioned, there are many mobs that are more vulnerable to certain types of attacks, whether it be attacks that are elemental or tied to a specific Weapon
Essentially Javelineer will make it so a player has a chance to lower the defence of a mob when the Spear is used.
Admittedly, as useful as this is, I’m a much bigger fan of playing with ranged Weapons and the Spear can sometimes be difficult to retrieve depending on the gravity mechanics used once thrown.
Similar to many of the other Mutations mentioned above, there are three tiers to Javelineer which will raise the chance to drop the defense of the mob in question.
Tier 1 requires players to kill 50 mobs with a Spear
Tier 2 requires players to kill 100 mobs with a Spear
Tier 3 requires players to kill 200 mobs with a Spear
ASSASSIN
Assassin relates to the use of Daggers, which tend to be very useful under water. I honestly strongly recommend getting this Mutation as early as you can as it will make underwater battling much more manageable than ever.
Essentially with Assassin, players will have the chance to apply a bleed, or damage over time which is so useful when enemies become overwhelming, which tends to happen underwater. Players can also use a Dagger for terrestrial beasts as well, though I typically use a Sword or Crossbow in these situations due to their higher damage. The option is yours though, especially if you have multiple teammates who can wield different Weapons with different Mutations.
Similar to many of the other Mutations, players will need to unlock three separate tiers to increase their chance of causing a bleed on mobs:
Tier 1 requires players to kill 50 mobs with a Dagger
Tier 2 requires players to kill 100 mobs with a Dagger
Tier 3 requires players to kill 200 mobs with a Dagger
SHARPSHOOTER
Sharpshooter is my favourite Mutation to use as I’m a Crossbow main, though it should be noted that Sharpshooter will work for both Bows and Crossbows.
With Sharpshooter players have a chance to root mobs shot with the Bow or Crossbow, essentially allowing players to get more hits on a mob before they get close enough to take any damage.
Similar to many of the Mutations above, players will need to unlock the three tiers to get the highest chance of rooting a mob.
Tier 1 requires players to kill 50 mobs with a Bow or Crossbow
Tier 2 requires players to kill 100 mobs with a Bow or Crossbow
Tier 3 requires players to kill 200 mobs with a Bow or Crossbow
BARBARIAN
Barbarian was by far one of the most used Mutation I ever used simply because I used the Ant Club as my main Weapon for a very long time as it was affordable and did a good amount of damage.
With Barbarian players will deal even more damage to mobs when using a Club. It should be noted when player are in the rage mode the will not be able to perfect block, though this shouldn’t be the biggest problem, especially if you have multiple teammates and you’re not the one blocking/tanking.
Players will have 3 tiers of Barbarian to unlock, requiring the following:
Tier 1 requires players to kill 50 mobs with a Club
Tier 2 requires players to kill 100 mobs with a Club
Tier 3 requires players to kill 200 mobs with a Club
BLADE MASTER
Blade Master is a pretty sweet Mutation to have, especially for Sword mains. While Blade Master doesn’t increase the amount of damage a player will deal with a Sword it does really help players with their Stamina consumption. When players have Blade Master on, players will have a chance to reduce the stamina cost of the next combo of attacks, being most useful when players don’t have buffs on their Stamina.
Players can unlock 3 tiers of Blade Master and will need to do the following:
Tier 1 requires players to kill 50 mobs with a Sword
Tier 2 requires players to kill 100 mobs with a Sword
Tier 3 requires players to kill 200 mobs with a Sword
WHITTLE WIZARD
Whittle Wizard is a new awesome Mutation to use as it will allow players to cause status effects while using the different elements on their Weapons.
Essentially players will have a chance to slow targets when using Mint, Sour attacks can stun enemies for longer and Spicy attacks have a chance to burn enemies.
Players can unlock the 3 tiers of Whittle Wizard by doing the following:
Tier 1 requires players to kill 40 Creatures with a Candy Staff
Tier 2 requires players to kill 100 Creatures with a Candy Staff
Tier 3 requires players to kill 200 Creatures with a Candy Staff
PARRY MASTER
Parry Master is alright, but I can’t say that I find much use for it. While I admittedly grinded to get it by perfect blocking mites over and over, I haven’t actually used it practically since getting it.
Essentially Parry Master will refund players with some stamina each time they complete a perfect block. Admittedly, this is really good for players who are the main tank on their team, but being that I’m primarily a Crossbow user, I don’t have much use for it. My husband, on the other hand, has been known to use this, especially when fighting Antlions.
Parry Master has 3 tiers and each tier increases the amount of stamina refunded. To unlock the different tiers, players must do the following:
Tier 1 requires players to perfect block 20 times
Tier 2 requires players to perfect block 60 times
Tier 3 requires players to perfect block 100 times
GRASS MASTER
Grass Master is by far my most used Mutation, simply because I am the base builder in the relationship.
Grass Master helps make it so a player can chop down as much Grass as they can without any real penalties.
Essentially with Grass Master players will both gain an efficiency to cut Grass and will also regain stamina whenever they chop Grass.
I would strongly suggest always using a full set of Red Ant Armour while trying to chop down Grass as it will allow players to carry more Grass, making basing a lot more tolerable.
I’ll be honest, as much as I love basing and am truly a builder at heart, I find building in Grounded to be annoying as you cannot put Grass or Weed Stems in your inventory and instead have to carry them.
Speaking of Weeds, Grass Master’s effect also works on Husky Weeds, Bur Weeds, and even Eelgrass.
Players should be able to grab all three tiers of Grass Master easily if they are base building and I strongly recommend getting them as it really, really makes basing a lot easier due to the following upgrades from the tiers:
Tier 1 requires players to chop down 50 Blades of Grass and will provide 25% more efficiency when chopping Grass
Tier 2 requires players to chop down 200 Blades of Grass and will provide 50% more efficiency when chopping Grass
Tier 3 requires players to chop down 500 Blades of Grass and will provide 100% more efficiency when chopping Grass
ROCK CRACKER
Rock Cracker for me is one of the most important farming Mutation you can ever get as players will be on a never ending quest of farming Quartzite and Rock Cracker makes it so much more bearable.
Essentially Rock Cracker will make it so a player needs to take less swings at a rock before it breaks, meaning that players can break a rock with a single hit if they have a good enough Hammer.
I strongly recommend trying to get Rock Cracker as soon as possible and farming as much Quartzite as you can in the early game so by the time you actually need Quartzite you don’t need to wait for it to respawn in your world.
Players are recommended to use the new Survey mechanic in Field Stations as this will let players know where all the Quartzite is on the map, which I honestly wish came sooner because it’s so useful.
Rock Cracker has three tiers and will increase the Busting Efficiency of the Hammer being:
Tier 1 requires players to bust 25 rocks and will provide players with 25% more efficiency
Tier 2 requires players to bust 75 rocks and will provide players with 50% more efficiency
Tier 1 requires players to bust 100 rocks and will provide players with 100% more efficiency
ANT-NIHILATOR
Ant-nihilator is an extremely useful in the early stages of Grounded, though it feels like it falls off in the mid-to-late game simply because a player’s Weapons become powerful enough to one or two shot Ants.
I will say, any time I’m going into a Red Ant or Black Ant area I always turn on Ant-nihilator as it raises my chances of survival, though I can’t say I leave it on all of the time because I’m not always fighting ants.
There are also three tiers of Ant-nihilator and using it against Ants becomes very important as it can make or break situations where a player has aggroed a swarm of ants:
Tier 1 requires players to kill 50 Ants and players will deal 5% more damage to Ants
Tier 2 requires players to kill 100 Ants and players will deal 15% more damage to Ants
Tier 3 requires players to kill 150 Ants and players will deal 25% more damage to Ants and players will also take 10% less damage from Ants
COUP DE GRASS
Coup de Grass is a hard Mutation to actually acquire, but is by far the Mutation you should always have on. I’m not going to explain the locations of the landmarks players need to locate in this guide and write a more in depth guide for it as it’s fairly hard to describe how to acquire them and I want to do it justice.
Players will need to locate the following two landmarks in order to unlock the two tiers of Coup De Grass:
4 Leaf Clover Landmark
Roll a 20 on the dice at the Minotaur Maze’s End
Players will receive the following buffs:
Tier 1 will provide a 10% Critical Hit Chance
Tier 2 will provide a 25% Critical Hit Chance
JUICY
Juicy is a great Mutation to have if you do not have any upgrades that reduce the amount of time it takes to get thirsty.
I’ll be honest, thirst isn’t usually a problem for me, so I don’t use Juicy often unless I’m set to adventure and don’t really have time to focus on collecting Dew Drops, however, with an upgraded Canteen it’s not as necessary.
If players are struggling with keeping hydrated or don’t have Dew Collectors or any Grass that drop Dew Drops near them, turn it on, especially if you’re on a long adventure.
Players will have to discover “all 5 Juice Boxes” which is a tad bit misleading as there are many more Juice Boxes than this, but 5 will be landmarks. I’ll be honest, this wasn’t too hard to actually get as I explore a lot in the game.
Juicy will reduce the amount your thirst declines by 50%, being very useful for players who are basing or are out in the world with no water near them.
NATURAL EXPLORER
Natural Explorer is a Mutation I used in the early game, but I really don’t feel is necessary for players to use.
Essentially, Natural Explorer will make it so a player can run faster, making exploring a lot easier, but this falls off when players need to focus on damaging enemies or completing other tasks. Still, I think it’s worth having and you will definitely unlock it simply by playing the game and exploring.
There are three tiers of Natural Explorer and each makes you run a bit faster, though as a tip, try to run without a Weapon in your hand as this makes you run faster as well:
Tier 1 requires players to discover 5 Landmarks and provides a 3% speed bonus
Tier 2 requires players to discover 20 Landmarks and provides a 6% speed bonus
Tier 1 requires players to discover 50 Landmarks and provides a 10% speed bonus
MERTEEN
Merteen is an essential Mutation to have anytime a player is swimming as it will provide players with more Oxygen and more Swim Speed.
While players will want to craft themselves equipment that helps with swimming, Merteen will help carry a player so they can actually farm the resources required to swim properly.
Again, the unlock procedure is a bit misleading as it requires players to discover 3 Underwater Landmarks, but these seem tied to particular ones as there are more than 3 currently.
Merteen has one tier and will provide players with 10% more Oxygen Time and 15% more Swim Speed.
CARDIO FAN
Cardio Fan is a great Mutation to have at any point and is most notable when players are running around the world or are in battle.
Essentially with Cardio Fan will help players regenerate more stamina. Cardio Fan isn’t always essential, but I recommend having it on hand for whenever you feel you can’t complete a battle because of lack of stamina.
The different tiers of Cardio Fan will increase the speed in which stamina is regenerated and requires the following:
For Tier 1 players must exhaust themselves 100 times and will get 10% stamina regeneration
For Tier 2 players must exhaust themselves 250 times and will get 15% stamina regeneration
For Tier 3 players must exhaust themselves 500 times and will get 20% stamina regeneration
RELIABLE FRIEND
Reliable Friend is honestly a great Mutation to have, but I really feel like it requires players to waste a Mutation Slot to have.
Essentially with Reliable Friend players will be able to revive their teammates faster, which is ideal in boss battles, however, if players are focusing on damage Mutations, these should be prioritized.
Obviously, in a single-player world players will not be able to acquire or make use of Reliable Friend and I’ll be honest… even having it… I never use it. It may be nice in worlds with 3 or more players so someone can focus on reviving other players, but in 2 or less… it’s kinda… pointless.
Players will need to get three tiers of Reliable Friend and will increase the speed in which they revive players, being:
Tier 1 requires players to revive friends 5 times and increases the speed by 15%
Tier 2 requires players to revive friends 15 times and increases the speed by 25%
Tier 3 requires players to revive friends 30 times and increases the speed by 40%
FRESH DEFENSE
Fresh Defense is going to be a great Mutation to have, especially if you are in the Haze area without a mask or the Barbeque area or Sandbox without Sizzle protection.
Fresh Defense will provide players with Gas, Burning and Sizzle Protection based on the tier and is honestly very powerful in a number of situations.
To acquire the different tiers of Fresh Defense players will have to do the following:
Tier 1 requires players to eat 1 Mint Shard and will provide them with 25% Gas, Burning and Sizzle protection
Tier 2 requires players to eat 5 Mint Shards and will provide them with 50% Gas, Burning and Sizzle protection
Tier 3 requires players to eat 10 Mint Shards and will provide them with 75% Gas, Burning and Sizzle protection
SPICY SAFETY
Spicy Safety is similar to Fresh Defense, though it focusses on reducing damage from Stabbing and Smashing attacks.
While Spicy Safety is great against certain mobs, it’s one that I don’t use too often admittedly.
There are only two tiers of Spicy Safety and they are acquired as follows:
Tier 1 requires players to eat 1 Spicy Shard
Tier 2 requires players to eat 4 Spicy Shards
MOM GENES
Mom Genes is very interesting and allows players to summon Spiderlings that will fight for you whenever you attack.
While having a team of Spiderlings is a cool concept, if players attack the Spiderling or get in the way of them, they will attack you, ultimately leading to your death.
Still, very interesting and I like the idea of it.
Players must kill the Hedge Broodmother to unlock Mom Genes.
MITHRIDATISM
Mithridatism is by far one of the most important Mutations to have and is essential when farming Wolf Spiders.
While Wolf Spiders are fairly easy to kill once you get the hang of them, their Poison is a bish that will take you down, even if you end up being able to kite the Wolf Spider for the rest of the fight.
With Mithridatism, players will have a higher degree of safety when fighting Poisonous creatures.
To acquire the different tiers of Mithridatism players will have to do the following:
Tier 1 requires players to kill 1 Wolf Spider and will provide them with 25% Poison resistance.
Tier 2 requires players to kill 5 Wolf Spiders and will provide them with 50% Poison resistance.
Tier 3 requires players to kill 10 Wolf Spiders and will provide them with 75% Poison resistance.
TRUFFLE TUSSLE
Truffle Tussle is pretty interesting, though I can’t say that I would ever use it. Essentially, with Truffle Tussle, if players are not holding a Weapon they will have the chance to cause an explosion when hitting things with their fists.
While players are pretty much never going to want to be left unarmed in battle, this may be useful for players whenever their Weapons break as it can help deal a bit more damage to enemies, especially when swarmed as it explodes in an AoE fashion.
I honestly never use this Mutation, but it’s there in case I need it *shrug*
In order to get Truffle Tussle players must kill the Infected Ladybug in the Haze Lab.
GUARD DOG
With the newest update we saw the introduction of Factional Raids and MIX.Rs. These instances can be quite difficult for players, though with the addition of Guard Dog we see a bit of extra damage when completing them.
I would strongly recommend that players switch to Guard Dog whenever they are going to complete this content as it will allow players to deal extra damage.
To unlock the different tiers of Guard Dog players will need to do the following:
Tier 1 requires players to complete 1 MIX.R.
Tier 2 requires players to complete 4 MIX.Rs.
Tier 3 requires players to complete 6 MIX.Rs.
TRAPPER PEEP.R
Trapper Peep.r is an odd mechanic in grounded and will require players to use their PEEPing mechanism to take a good look at them. IF you PEEP creatures enough you will get a Gold Creature Card, and players will need a total of 5 cards in order to get to tier 3 of this Mutation.
Essentially with each tier players will inflict more damage with a Critical Hit and will need the following amount of cards:
Tier 1 requires players to locate 1 Golden Card.
Tier 2 requires players to locate 3 Golden Cards.
Tier 3 requires players to locate 5 Golden Cards.
NOTE: this has been the glitchiest Mutation and the tiers may unlock at different cards. Please feel free to comment your experiences as everyone I’ve spoken to has experienced something different.
MANTSTERIOUS STRANGER
The Mantsterious Stranger requires players to kill the Mant.
Admittedly, this is one of the most unique Mutations as it will allow players to become “Summoners.” Although not the strongest, Mantsterious Stranger will have a chance for players to summon a friendly Mant while fighting, which can deal damage and take aggression in fights before it dies. Though not the strongest, this can be useful for players who have difficulty surviving and want a little extra distraction in fights.
APEX PREDATOR
Apex Predator requires players to kill the Mantis. It unlocks hidden powers from Weapons that are made from Bosses, so if these are your favourite Weapons, you may want to use it.
Essentially the Club of the Mother Demon will have a chance to deal a much stronger Poison to enemies when using and the Scythe of Blossoms will have an increase in Weapon Attack Speed. As I’m typically a Ranged Support player, I personally don’t use this Mutation, but it is a great Mutation for those of you who enjoy using those Weapons.
CORPORATE KICKBACK
Corporate Kickback requires players to fight Director Schmector. A great Mutation for Tanks who need a bit of extra sustainability as if players block an attack they have a chance to trigger an effect that makes their next attack regenerate some health.
Admittedly, this isn’t the best in the long-run as players will want to make sure they can burst down enemies, however, if you are newer to the game or get yourself in dumb situations where you can’t heal or don’t have healing, it can be useful.
SHOCKING DISMISSAL
In the full release of the game, we saw an update that allowed us to get the Shocking Dismissal Mutation for killing the Assistant Manager.
While players may have already done this in the past, they did not receive a Mutation, but should retroactively get it now.
Shocking Dismissal will make it so Blocked Attacks have a chance to trigger an effect that will turn the next melee attack into an AoE shock. This is perfect for players who are tanking or playing up close to enemies. I strongly recommend using it if you’re playing Sword and Shield, as it will come in handy if you get swarmed.
PURCHASABLE MUTATIONS
The really cool thing about Purchasable Mutations is that they are unlocked for all players as soon as they are bought.
Players will have to buy these Mutations from BURG.L for Raw Science and quite frankly, while some of these Mutations are really great, players may want to save their Raw Science at first to make other purchases, especially if players are more interested in base building.
Currently there are only 3 Mutations that can be obtained for purchase and all will require players to locate a BURG.L chip in order to unlock their purchase.
MEAT SHIELD
Meat Shield is by far my favourite of the purchasable Mutation as it increases a player’s HP by 30.
While I can’t say that I always use Meat Shield as there is a good portion of playing where I spend building in base, I don’t usually travel without having it on.
Even if players have good gear and enough Milk Molars to maximize their Health, due to the fact that Meat Shield will provide all players with such a big buff that it can’t be overlooked.
Meat Shield is great to use in the early, mid and late game and I highly recommend purchasing it as soon as you can.
It should be noted Meat Shield costs 3,000 Raw Science and is in the default shop. No unlocks necessary.
BUFF LUNGS
Buff Lungs is a Mutation that I don’t always use, though it can be very useful for players who are regularly running around or are Melee focussed when in combat.
Buff Lungs provides players with 50 extra Stamina, being particularly useful for both Combat and sprinting around.
I must say, I don’t usually struggle with Stamina, given that I play Grounded only with my husband who makes Smoothies for Stamina boosts, however players in a solo world might find this a lot more impactful than I do.
Buff Lungs, for me, is a mutation that I switch into every time I need it, but is not my primary focus in most situations.
Players will need 3,000 Raw Science to purchase it and will need to locate the Red Anthill BURG.L Chip to unlock it.
DAREDEVIL
Daredevil is a weird Mutation, in my opinion and one that I only use when I’m in my base. While I can understand the utility of Daredevil, I feel like it is much more niche than the other purchasable Mutations.
With Dare Devil players will take 50% less damage when they take fall damage. Not only that, but if and only if a player is at 100% Health and takes fall damage that would essentially kill them, they will be left with 1 HP instead. Its’ for this reason that I use Daredevil in my base.
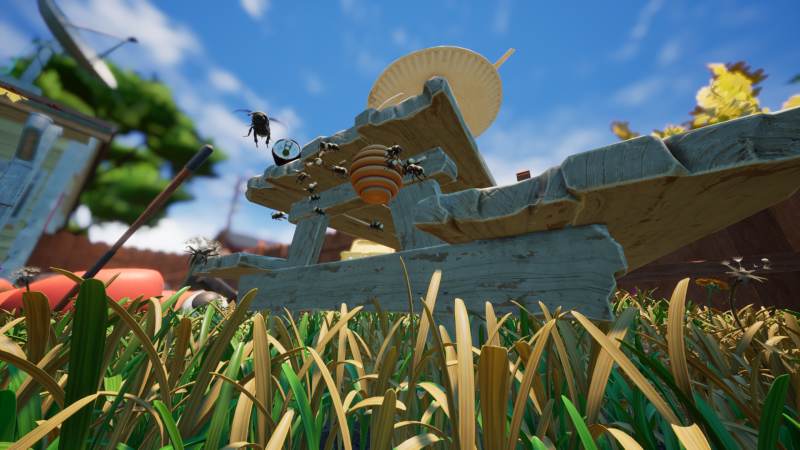
The only other time I really focus on using Daredevil is when I’m climbing very tall areas such as the Picnic Table where players have a higher chance of falling due to the Bees that are flying around.
Essentially use Daredevil if you’re ever travelling outside of your base and are at risk of being killed in one shot, but make sure you switch off of it because it ends up being a dud Mutation otherwise.
That all being said, the use of Daredevil can be completely avoided if players walk around with a glider instead as this can greatly prevent fall damage. This is my favoured way of handling fall damage as I would rather have other Mutations on.
To purchase Daredevil players will need to turn in 3,000 Raw Science and will need to locate the Hedge BURG.L Chip to unlock it.
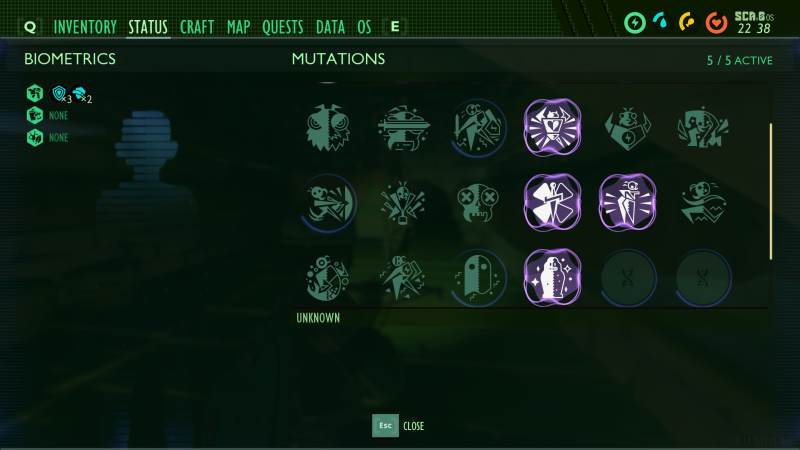
HOW MANY MUTATIONS CAN YOU USE AT A TIME?
At first players will only be able to activate a maximum of 2 Mutations, though players can progressively increase this cap using Milk Molars. It takes 3, 4, and 5 Milk Molars (a total of 12) to reach the current maximum of 5 Active Mutations.
While using 12 Milk Molars on Mutations might seem a bit extreme or a waste at first, I actually recommend that you prioritize these upgrades because once you start unlocking several strong Mutations you’ll be glad you have the slots ready for them. Stacking together strong Mutations can really help a player succeed through tough parts of the game.
CONCLUSION
While at the end of the day Mutation choices are going to be personal and many players will change what Mutations they are using, some tend to be bigger winners than others.
I’m curious though, what are your favourite Mutations? What Mutations do you always have active and which ones do you rotate with? Do you have all of the Mutations or do you find some unnecessary? Let me know in the comments below!
Leave a Reply