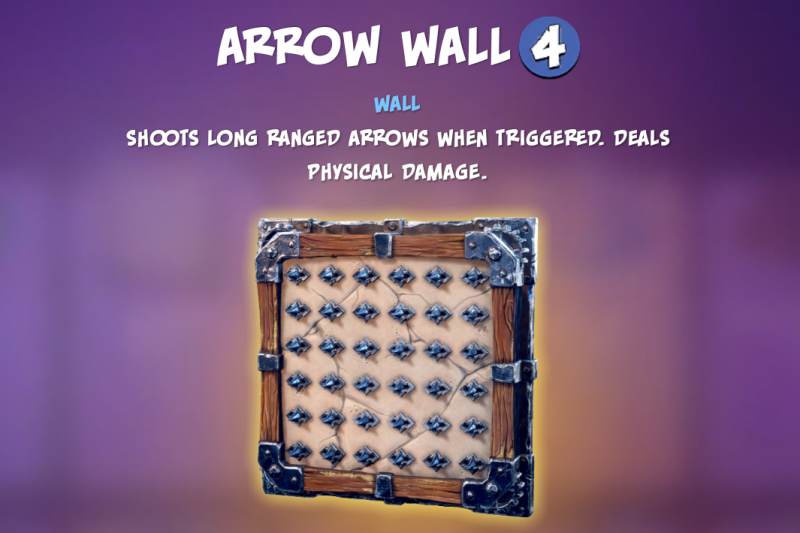
One of the first traps players are going to want to become acquainted to is the Arrow Wall.
While the Arrow Wall isn’t going to be useful in every map, it is a trap that can be extremely useful due to it’s regular charges and it’s long range attacks.
The Arrow Wall is the first trap that players have access to, giving players an ample amount of time to get acquainted to it.
In most cases players will always want to have the Arrow Wall on their roster due to it’s high speeds, decent damage and long range, however players can ask themselves the following questions if they are unsure whether or not they would like to take the Arrow Wall:
What is your favourite form of dealing damage?
What does the map look like? Does it have enough walls and long hallways to deal a good amount of damage?
Do any mobs have immunity to any of the upgrades you have for the Arrow wall?
I would strongly recommend that players build themselves Barricade mazes if they hope to use the Arrow Wall as this is the best way to ensure that the most mobs are affected by the damage.
The following guide will take you through everything you need to know about the Arrow Wall, how you will want to use it and the best combination of traps to stack with it.

ARROW WALL BASE STATS
The Arrow Wall takes up a full wall space, equalling to a 2×2 square in the game.
The Arrow Wall can be triggered from 6 squares away, which looks like 3 of the standard size squares, though shockingly the Arrow Wall can deal damage up to 14 squares or 7 standard squares in the game.
For an early game trap, the Arrow Wall has some of the best range in the game, making it best for long hallways or paths as it can deal damage to a line of mobs, especially fi they are slowed down or being damaged by multiple traps that boost the damage of the Arrow Wall.
The Arrow Wall is reasonably cheap only costing 600 Coins for every placement, meaning that players can place a few of these on most maps with no problem.
The Arrow Wall will be able to deal damage for 1.2 seconds to all units in front of it every 12 seconds as in between it will be on a cool down.
ARROW WALL’S UPGRADES
The Arrow Wall is much like other traps, being that there are two separate types of upgrades that player can unlock.
Players will be able to unlock Level Upgrades which can be upgraded immediately by using Skulls, however, there are alternate upgrades called Unique Upgrades which will require players to deal 3,000 damage using the Arrow Wall to unlock.
Players will want to make sure that they utilize all of the upgrades available to them as this will significantly increase the damage output of the Arrow Wall and can change the type of damage the Arrow Walls deal, which I will cover shortly.
LEVEL UPGRADES
The Arrow Wall’s upgrades are reasonably cheap and quite frankly aren’t the most substantial, though they are recommended and useful in the long run.
All Level Upgrades increase the damage of the Arrow Wall.
The following are the upgrades players can gain access to for their Arrow Walls in OMD3:
The first upgrade costs 3 Skulls and will raise the Arrow Wall’s damage from 8 to 9 damage.
The second upgrade costs 6 Skulls and will raise the Arrow Wall’s damage from 9 to 10 damage.
The third upgrade costs 8 Skulls and will raise the Arrow Wall’s damage from 10 to 11 damage.
UNIQUE UPGRADES
As mentioned, the Unique Upgrades for the Arrow Wall require players to deal 3,000 damage while using an Arrow Wall.
Unique upgrades are quite powerful in comparison to the Level Upgrades, though specifically for the Arrow Wall, players will have the option to either harm more mobs or will be able to change the Arrow Walls damage type.
The following are the two Unique Upgrades players can unlock for the Arrow Wall:
For 5 Skulls players will be able to convert their Arrow Walls into a Fire Damage dealer, essentially making it so other traps can help increase the damage taken by these traps, though causing some mobs to become resistant to them if they have fire resistance. This is my preferred upgrade, because my tar traps increase fire damage, though I will say in later maps there are a lot of fire resistant mobs, simply making me switch traps.
For 5 Skulls players can continue to deal physical damage with their Arrow Walls, though this will increase the pierce of their Arrow Walls allowing arrows to deal damage to an additional target.
IS THE ARROW WALL GOOD?
I would say that the Arrow Wall is fairly mediocre. It’s a good ol’ reliable for when you don’t have many Skulls or traps in your hands, but due to it’s low damage it will get out ranked in the late game.
In the late game, players are going to want to ensure that they only use Arrow Walls when they have made long, straight hallways to ensure that the most mobs get tunneled through together.
As mentioned, I think that Tar Traps that are upgraded to increase Fire Damage are some of the best pairings as this will increase the damage output of the Arrow Walls and make them a decent candidate for damage.
The most appealing thing about the Arrow Wall is it’s cost efficiency, making it a great trap to use early on in your rounds when you haven’t collected a whole chunk of coins, so it may be worth leaving it on your roster, even if you don’t focus on using it for damage.
Leave a Reply