Starting a new game can be tough especially if you are new to the genre. Although many games lock you into the job you are playing unless you create a new character and I’m really happy that FFXIV steered clear of this.
As there are 20 jobs in the game so far, with 2 new ones coming out in the next expansion, it can be terribly difficult to know which job to originally choose.
Realistically there is no wrong answer for what job to play and although it might seem cheesy or assumed for me to say, all jobs have their utility and there is no “weak job.” While yes, some jobs deal more damage as a baseline, the reality is that a player can chuck out much more damage from another job if they master their rotation than someone who is simply playing a higher damage job. That being said, the purpose for this post is not to rank the jobs on best to worst, but instead tell you a little bit about their feel.
I will cover things like, how busy is the job? Does it press a lot of buttons? Is it a punishing job where if I mess up once I miss out on a ton of damage? Does a job have extra utility and can I support my team? Does my job deal ridiculous amounts of damage so I can quickly farm things in the over world? Things like this will be the focus of this post in hopes of giving you a better understanding of what job you want to play and when you want to play it.
Unfortunately for players, all of the jobs that were released beyond A Realm Reborn (ARR) are locked behind a certain level and will require players to progress through the story in order to unlock their quests. Due to this, for each section, I’ll begin with the jobs you can immediately unlock and move into each expansion.
Note: If you have any questions about FFXIV that you want me to cover feel free to leave them in a comment below, you can also ask me while I am streaming on Twitch, YouTube or in our community discord.
TANK
Tanks are one of the most integral jobs to play in FFXIV and being a good tank can really make or break any content that you are completing.
While it might be a bit scary to think about tanking if you’ve never done it before, the reality is that with each expansion tanking seems to be becoming easier. Though this is true, some tanks are a lot easier than others and some tanks can make certain types of content a lot smoother than others.
Tanks can also range from an extremely simple rotation, being the simplest in the game, to a quick-paced dance battle where you have to press every button on your keyboard in order to deal damage while also protecting yourself and your team.
Tanking is by far one of the most forgiving roles to play when it comes to taking damage and sustainability, and I strongly recommend levelling one up even if you don’t plan on taking them into Dungeons, Raids or Trials.
The biggest reason I feel like everyone should have a Tank is because of how simple it makes a lot of overworld content that you will probably be clearing with your friends. For example, FATEs that spawn a great deal of mobs go much faster if you have a tank to bring all of the mobs in together. Admittedly, if you have a group that is big enough and has a number of Chocobo Companions you should be able to do this with a group of DPS, however, it is still a lot easier with a Tank involved.
If you don’t like the Tank role, don’t sweat levelling it up quickly, though perhaps think about levelling it up passively by using Wondrous Tales or something.
Before I start though, I’m going to be mentioning things like “deals more damage” or “has more defense.” When I refer to this I mostly mean “has more burst damage for solo content” and “can heal itself in solo content.”
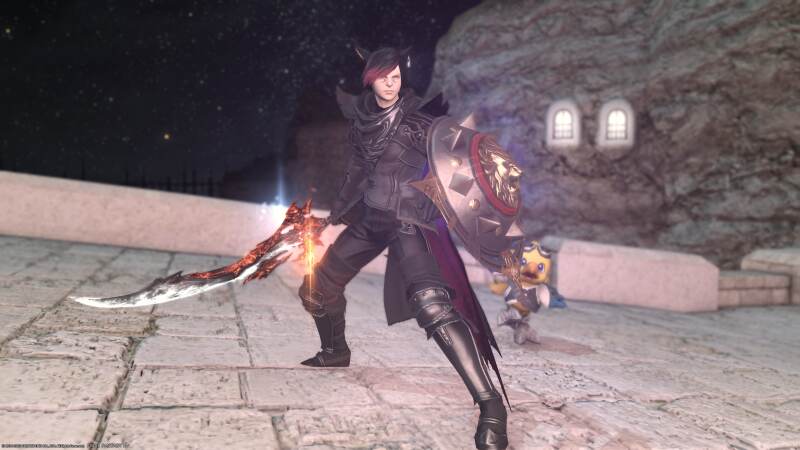
GLADIATOR/PALADIN
If you’re just starting the game and are comfortable with being a tank then I strongly recommend choosing the Paladin.
While not the most challenging tank in the game, at least in my opinion, it is the more demanding starter tank with a pretty interesting rotation.
By endgame, you have quite a bit of buttons to press and have the option to really support your team as an off-tank or simply master your more demanding damage rotation.
The coolest thing about Paladin is that your gauge allows you to spend on a shield for yourself, a shield for a party member or the ability to take 100% of the damage another teammate is going to take in order to protect them. Coolest part, you can mitigate the damage they were going to take and essentially lighten the blow completely.
Playing the Paladin will require you to be smart as while it can mitigate, a healer will have to take care of you more often than the Warrior/Marauder. This isn’t much of a problem in the early game and the end game, but you do seem a lot squishier in the in-between chunks until you get some of your better upgrades.
During this portion of levelling, you do have two skills that are going to be pretty overpowered, your “oh-shit!” button which is called Hallowed Ground which essentially makes you take 0 damage for 10 seconds, albeit, it is on a 420-second cooldown (7 minutes), meaning you can use it at most 2 times in a dungeon.
This, by far, is the most interesting ability in the game for tanks as it can allow you to pull some massively ridiculous pulls when you don’t have the best Gear and it can be really fun to use when you have a healer you are comfortable with.
Though I strongly recommend you never use it, you do have a heal that you can use repeatedly on yourself or a teammate called Clemency. The heal is actually pretty good, but it does mean that you’re dropping all the damage you could be dealing in order to heal yourself. This is pretty good for those moments where you have a new healer who doesn’t know what’s going on or if a healer dies and you have to help sustain the team to finish off the content you’re doing.
The later levels will also provide you with a heal on the shield you use most regularly, making this job a lot more sustainable, but it does come very late.
Expect dungeons to be pretty tough if you’re going to pull wall to wall, but you make up for it by dealing a good chunk of damage and the ability to do decent ranged damage during part of your rotation, which no other tank has.
The complexity of the Paladins’ rotation isn’t that difficult, however, you do want to make sure you have your rotation extremely tight in order to get your strongest abilities off during your buff as you can’t use it at will.
Essentially you have a 1-2-3-4-5-5-5 combo while weaving in a couple of off-global cooldowns and an in global cooldown with a long cooldown.
As mentioned earlier, you have a regular shield in your rotation which doesn’t take long to refill, but your sustain comes at the cost of sacrificing damage.
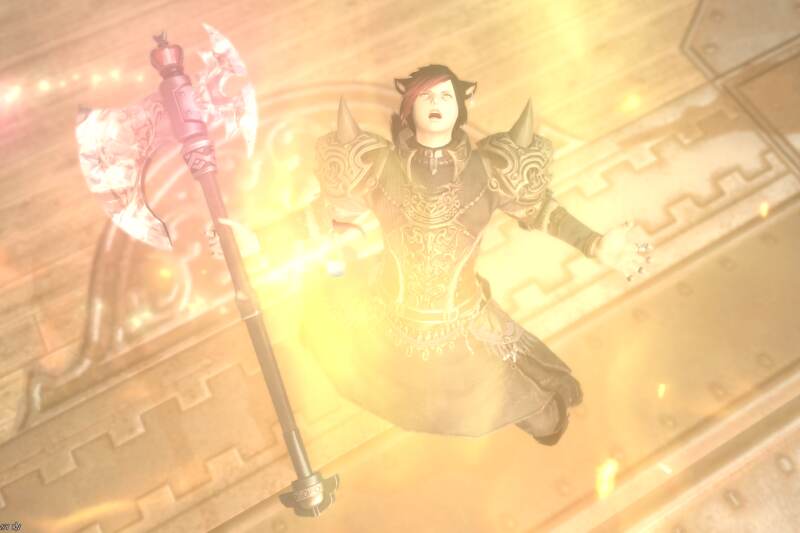
MARAUDER/WARRIOR
The Marauder/Warrior is by far the easiest tank to play and the tank that I recommend everyone have, even if they are not planning on tanking.
Essentially the Warrior is the one tank in the game who doesn’t need a healer, even if you aren’t the best at tanking. The reason being? Both your rotation and your Warrior-specific mitigation heal you.
Now, the latter comes later in the game, so expect a good chunk of your time spent to still feel like you need to rely on the healer, but there is some normal end-game content that you actually don’t need a healer in when playing Warrior because its self-sustain is so ridiculous.
I don’t expect this to change, even though there always tends to be a good amount of change to jobs when new expansions come out as the Warrior is the introductory Tank.
Now, this isn’t to say that you should be ashamed to play the Warrior, because true endgame content will still get you.
Your rotation is extremely simple, being 1-2-3 while using off globals and a damage gauge spender. You will also be able to apply a damage buff to yourself at will and you’ll just have to keep track of when you want to use it or when you should deal more damage, getting your heal in at the same time.
I will admit, even though I spent most of my FFXIV Career playing Warrior as my main tank, it hurts my fingers because of how repetitious it is but it’s the tank that you can really zone out while playing with very little risk of things going poorly.
It is also the only tank that you know will survive content that is higher than it’s level because if you time things correctly you’ll be able to heal yourself through it.
Now, when it comes to the “oh-shit” button it has a bit of a catch. It’s called Holmgang and will allow you to stay at 1 HP until it drops or the mob you targetted while you used it dies. This is the biggest problem… You should never use it when you target a mob. Instead hit escape to untarget that mob and use it directly on yourself.
I’ve seen too many players mistakingly put it on a mob that is about to die, resulting in them wiping the team which has actually made a number of Warriors make Holmgang a Macro that targets yourself first.
The nicest thing of Holmgang is that it is one of the shortest cooldowns of all “oh-shit” buttons, being only 240 seconds.
Though the damage is quite comparable amongst the tanks, the Warrior has the least leading solo content to be a bit more daunting but for the guarantee that you will not die.
I honestly call it my turn-off my brain tank for the days when I’m too overwhelmed to think about focusing and can do content I’m used to without putting in too much effort.
By far, my absolute favourite thing about the Warrior is the fact that you have two versions of Nascent, which is the Warrior-specific mitigation that heals you per hit. You have one that you place on yourself and one you can place on a team member (both have the same cooldown and are tied to each other.) I will commonly use this skill on other players when I am off tanking, especially when a healer is about to fail a mechanic or when a player has just been ressed. It’s also amazing for helping your main tank recover from a tank buster that they or the healer hasn’t seen or helped mitigate.
The Warrior, for me, is one of the most game-changing off-tanks and whenever I have a player who wants to tank a Raid or Trial for the first time, I will always choose it due to the ease of helping players recover.
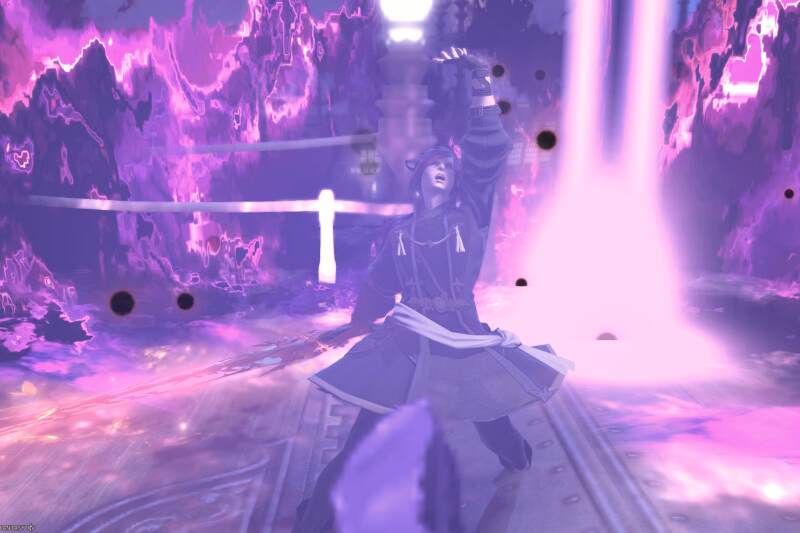
DARK KNIGHT (AVAILABLE AT 50)
Dark Knight is quite a fun Tank to play and is a bit of a mini-game when it comes to mitigation. Although early on it plays similarly to all the other tanks, when you get the Dark Knight-specific mitigation it will require you to try to only shield when you know your shield is going to break. What I mean by this is that when your shield breaks you gain a free cast of one of your attacks, essentially raising the amount of damage that you deal.
Everything else on the Dark Knight plays pretty simple and in my opinion, it is closer to the Warrior than any other tank. It doesn’t have nearly as much built-in sustainability, however the button pressing and rotation is just about as busy.
Oh! Cool thing about the Dark Knight, one of your gauge spenders is a summon somewhat like the Machinist so get ready for some passive damage that way!
As for your “Oh-shit” button, this one is a bit tricky and will depend on whether or not your healer is aware that you are using it. Living Dead essentially is a button that only works if you don’t get any heals while it is active. The goal is to actually drop to 0 and attack to “gain back” your HP. If you deal enough damage your Health will be restored, however, if you are healed through this and you do not die it is completely wasted and may result in you wiping.
Players will typically set this to a Macro so the Healer knows what you’re up to.
The only difficulty with Dark Knight is understanding how that shield and the “oh-shit” button work because if you don’t do it correctly you won’t deal as much damage as you could. Now, this isn’t the worst thing in the world, but if you’re a min-maxer expect to be a bit disappointed until you understand how to tell when this is going to be possible in various forms of content.
Admittedly the Dark Knight is another Tank that doesn’t have a great amount of built-in sustain and is a more DPS focused Tank, however, similar to all the other tanks it has a good amount of mitigation to ensure that you don’t go too low for your healer.
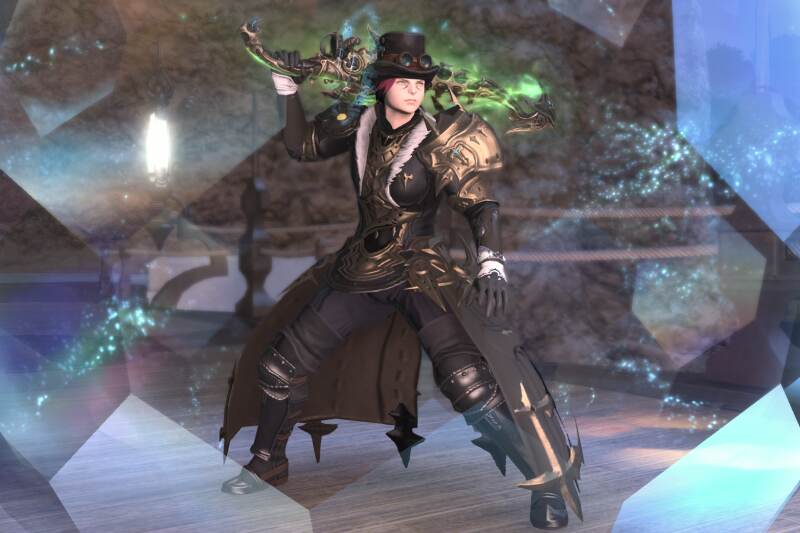
GUNBREAKER (AVAILABLE AT 60)
The Gunbreaker is by far my favourite Tank in the whole game, but that’s mostly because it’s a rapid attacking Tank that requires a good amount of prep work.
By far the Gunbreaker was the hardest Tank for me to master and I have to admit that depending on how familiar I am to the content I am completing, sometimes I still mess it up.
You see, not only does the Gunbreaker have the fastest Global Cooldown, but it also has the most buttons and you will want to ensure that you are comfortable with keeping track of multiple things. For example, the Gunbreaker has a gauge that ends off with 3 bullets. These bullets can be spent on 4 attacks, a single target low-damage spender that is always up, an AoE low-damage spender that is always up, a chain of attacks that has a decently long cooldown and a massive AoE damage dealer that spends 2 bullets. Due to the way these gauge spenders work, you’re going to need to get to know your Gunbreaker very well as forgetting to save bullets or breaking your chain will result in tremendous damage loss.
In my opinion, the Gunbreaker is the absolute only tank that I can never turn off my brain for and one I always have to focus on while playing because things come so fast while you’re also trying to mitigate all damage.
Trust me, it’s so much fun to play, but I may encourage you to either pick this tank up last, make sure you’re extremely comfortable with the majority of the content you are completing or play a DPS job that requires a lot of awareness first such as the Dancer.
For players who understand the Dancer, you know that while the job is really straightforward, it requires you to learn how to save attacks and be aware of when to use abilities as this will significantly increase the damage you output, though the Gunbreaker doesn’t have any RNG in it and will simply require you to understand a fight so you never hit a moment where you just used a buff when a boss is going to disappear.
As for the sustainability of the Gunbreaker, it exists more than most Tanks but is a bit difficult to time. You essentially have charges of regen and you will want to time it as necessary. I see many Gunbreakers never use their regen, trying to make sure they only use it in emergencies, however, it is much more powerful as a preventative because of its fairly low potency/the time it takes to fully kick in. The cool thing about it is that you can also place it on other team-members
It’s kind of a “weave when you know you’re going to take a decent amount of damage” kind of sustainability and is going to be most useful when you go into your longer rotation so you deal the most damage instead of having to worry about breaking the chain.
Finally, the “oh-shit” button for the Gunbreaker is by far the scariest button to ever see hit and for a while I had it on a keybind that I would accidentally hit because of my mouse modifiers.
Essentially this button will make it that you drop to 1HP from whatever health you are at, though you become invulnerable and cannot die while it is active. This is tremendously scary for healers who don’t know how the Gunbreaker works and quite frankly, even though I play Gunbreaker it scares me sometimes when I see someone else use it. I strongly, strongly recommend making this a macro to let people know what’s happening specifically if you know you are playing with a healer who is newer to the game.
This attack is called superbolide and is on a 360-second cooldown.
You’re not going to be able to recover from this on your own and will either require an off-tank or healer to take care of you as even your regen is not good enough. I would obviously only use this if you are already low on health and would never do it if you are above half health, well that is unless you know for certain that you would otherwise die without it.
HEALER
Healers are the most necessary job in the game and quite frankly the job that everyone relies on without really thinking about it.
There are two types of Healers in the game, being Barrier Healers and Pure Healers.
In my opinion, Pure Healers are much easier to play than Barrier Healers as they require much less awareness of mechanics and can save players after they have taken a great deal of damage. Barrier Healers, on the other hand, will require the player to be aware of everything that is going on to protect players in advance so they do not take damage from what is coming next.
While both types of Healers have… err… heals, the heals that Barrier Healers have are weaker and will not be able to rescue a team if they have taken too much damage.
Pure Healers, on the other hand, tend to have spells that will take a player from 1 HP to Full, albeit on a very long cooldown.
While both will want to make sure that they try to prevent damage in advance by putting regens on players, a Pure Healer is much more forgiving if it is your first time in content while a Barrier Healer is much more punishing.
Now, in all 8-man content, it is advisable that you have both types of healers in your party as each one comes with its extreme benefits, however, most players typically like one over another. I personally do not like playing Barrier Healer as I’m generally a much more reactive player. I typically don’t remember when most raid-wide damage is going to happen unless it is a stack marker or a clearly indicated cast.
So, I personally only play Pure Healers as that’s where my strength is going to be. That being said, I’m not a Healer main and will typically only heal when playing with friends and the party needs a healer. If you are planning on being a full-time Healer it’s probably going to be beneficial for you to max out at least one of each.
Healers are the only jobs in the game that do not have a rotation and instead are expected to use a few buttons for damage and weave their heals or shields when necessary. No healer only heals, this is not the game for that. Your expectation is to deal as much damage as you can while hitting your OGCD Heals when the damage attacks are on cooldown. While this takes practice it’s much simpler than you’d expect and it becomes second nature as you do not have many ways to deal damage.
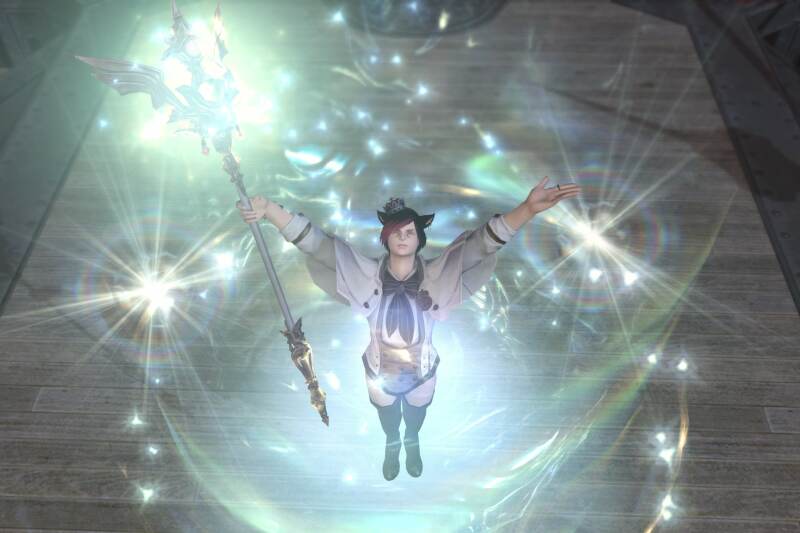
WHITE MAGE
The White Mage is by far the easiest Healer in the game and similar to the Warrior, it is a job that I recommend everyone max out just in case.
The White Mage has ridiculously strong heals and even their “big-d” heals have relatively short cooldowns.
The White Mage is impeccable at ensuring you always have enough mana and the best part of it is, you can put up a few buffs and regens then focus on spamming damage.
I personally enjoy being healed by White Mage the most, especially when playing as a Tank that cannot take care of itself. Typically when I’m playing with randoms I will feel safer when a White Mage is my Healer then when I have another Healer. Though, with that being said, it’s not like having a White Mage around is going to be sunshine and rainbows.
The White Mage still needs skill and a lot of your Healing comes from saving up gaugue and ensuring that you don’t wate healing on things that could have been fixed with a simple regen.
The nicest thing about playing White Mage is the amount of Crowd Contol you have in groups of mobs. Your main AoE, called Holy and will Stun mobs repeatedly until they build up a resistance.
This is extremely useful in all content as typically when you are using an AoE all the mobs are able to be stunned and it will also help ensure that everyone is safe from AoEs that mobs deal without the need of a melee job having to select the particular mob and stun them.
Of course Holy has limitations, and too many at once will lead the enemies to become invulnerable relatively early, so just be aware that you will have to get back to healing very soon.
With that being said, it’s still a good idea to spam Holy whenever you’re in groups of mobs and most tanks know not to mitigate with their best mitigation as soon as a pack is pulled with a White Mage on their team.
By far the nicest thing about playing White Mage is the sheer amount of healing it can pump out, especially for a single target. There are spells with bonus healing when a player is extremely low on health that allows you to simply focus on damage.
As my husband is typically our community’s main healer and when both of us need a break from focussing on harder content we will play White Mage and Warrior. Essentially we will time what abilities and skills we do and rotate between what we use based on the other’s cooldowns. So, Banes (my husband) will spam a ton of Holys to stun mobs, while I save mitigation, I’ll use a long mitigation that doesn’t heal and he will let me drop extremely low, he will give me a massive heal boost, then I will let myself drop extremely low and will use my mitigation that heals me.
I would say that this is typically what most White Mages do with Tanks, though this is only possible in midgame and with a Tank who can do this/knows about this.
I know when I initially started Tanking full-time with randoms I thought Healers were bad because they let me drop too low, but a Healer’s job is not only to heal but to also maximize damage, so be conscious of this as it is not a healer’s job to baby you. Oop, tangent, back to White Mage!
In a lot of older content that you out-gear the White Mage becomes even more of a “turn-off your brain and deal damage” kind of job as your AoE Heals over Time (HoTs) can take care of your team.
Admittedly, this is why I love playing White Mage in Alliance Raids since I can limit the amount of healing I actually need to do, focus on damage and know for a fact that no one is going to die because of my quick reaction time. It might be weird to think of a Healer who isn’t really interested in Healing, but as you tend to repeat content to farm for loot, there are some times you just want to get things done and over with and will tend to want to pick a job players are less efficient at.
Now, this isn’t to read players or breed toxicity, this is merely meant to be a statement that says “As a Healer you have the power to make content go quicker as a dead DPS is no DPS.”
At higher levels, a White Mage gains a lot more “set it and forget it” skills, for example, the Liturgy of the Bell which will heal your teammates anytime that you are hit, though you can pop it early. You also get some cool moves such as Assize which will both deal damage and heal your Team.
Using spells like these regularly (though when most optimal) will help speed up content so you can get onto the next thing. That being said, because of the amount of powerful tools a White Mage has, it tends to get pretty boring pretty quickly and I can’t think of a single Healer Main who only plays White Mage. This is especially true in Dungeons where mob packs don’t hit too hard and you can simply place AoE heals on the ground and are left to spam one or two buttons. Truthfully the biggest blessing/curse.
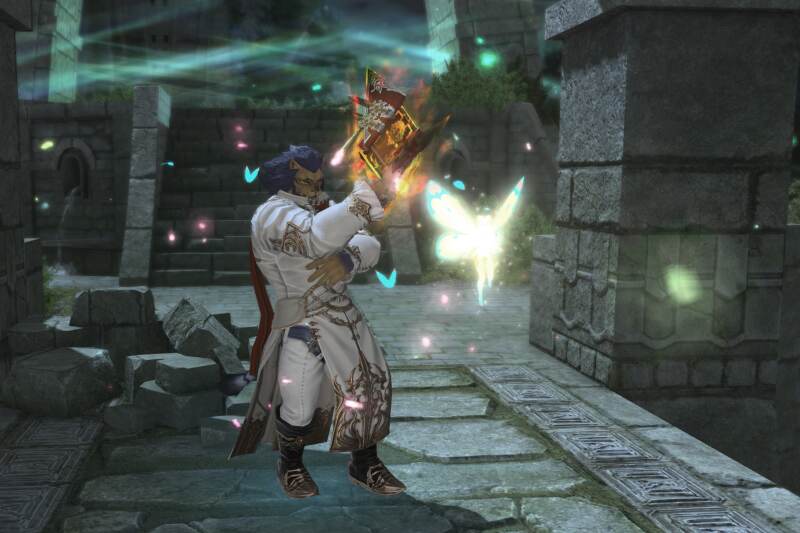
ARCANIST/SCHOLAR
Alright, so. As I said, I hate Barrier Healers so I’m personally not going to have a lot to say about the Scholar. I was honestly really happy that the Scholar was levelled up with the Summoner as even though I didn’t like the changes they brought to the Job, I still enjoyed it much more than Scholar.
Scholar is terribly easy in the Early Game as your pet Eos will do the majority of your healing for you, however, in the mid-to-late game you’re really going to need to know how fights work in order to put up shields.
Still, Eos will be your prime source of Healing, essentially requiring you to choose a player to heal over time and you’ll have a few heals that aren’t super powerful in case things go awry.
I’m going to let my husband take over at this part though as I cannot give any justice to Scholars and while I don’t like them, I recognize that they can be a very powerful healer.
Passing it off to Banesworth:
Scholar is a strong healer, but it’s a bit harder to pick up and play than something like White Mage, since you’ll be cycling through a larger number of healing cooldowns rather than being able to answer most instances of damage with a straightforward GCD heal.
Scholars summon a fairy to assist them in healing the party. This fairy automatically heals a party member every few seconds and can also be directed by the Scholar to use a number of different cooldowns which originate from the fairy’s location instead of the Scholar. This can often allow the Scholar to provide a heal, regen, mitigation, or shielding to the team even if they need to move away from the party to handle a mechanic.
Scholars always have the option to move while attacking by choosing a lower damage instant cast GCD instead of their regular GCD attack spell with a cast time. They can also increase the party’s damage by applying a debuff to the enemy that gives the team increased critical hit rates.
Every minute you’ll use an ability to gain healing resources (Aetherflow) and MP. You can spend these Aetherflow to weave single target or AoE heals or mitigation, most with their own cooldown. If you have any unused Aetherflow when it’s time to get more resources, you’ll want to dump them using a damaging ability before recharging.
Since Scholar’s fairy abilities and Aetherflow abilities almost all have cooldowns, you’ll want to use them smartly so they can do most of the required healing instead of your GCD heals, which could instead be GCD attacks helping to end the fight as soon as possible.
Scholar’s GCD heals are mostly only used if you need to shield the party before upcoming damage. Spamming GCDs usually isn’t effective at recovering the group from low HP since applying two shields back-to-back completely wastes one of them. Luckily you do have a short cooldown ability that converts your next shield spell to flat HP healing which helps a lot if you find yourself in trouble.
The difficulty of Scholar comes from effectively managing your healing resources, and this is best highlighted by one particular cooldown that dismisses the fairy for 30 seconds in exchange for a full stack of Aetherflow and boosted GCD healing. Locking yourself out of fairy skills for 30 seconds can feel daunting, so it’s important to know what’s coming up and have other tools available if necessary.
In high-end difficulty content it’s not uncommon to see damage that can kill party members even at full HP, which is why almost every group brings at least one barrier healer. Scholars can provide incredibly strong shields when needed, and are a solid choice for people who are skilled at planning ahead.
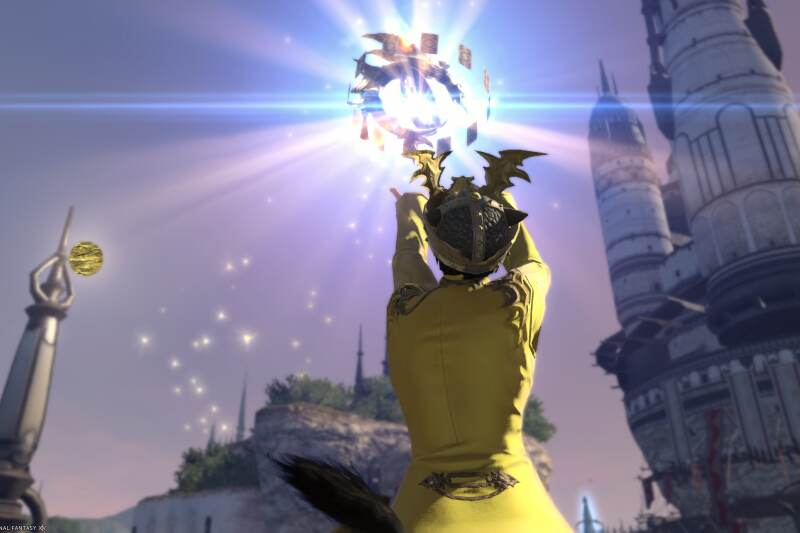
ASTROLOGIAN (AVAILABLE AT 50)
The Astrologian is a very busy Healer and quite frankly my favourite to play when I actually want to focus.
Though the Heals on Astrologian are not nearly as plain and simple as the White Mage, they are about as powerful.
The main issue with playing Astrologian is the fact that it heavily relies on RNG and quite frankly it can feel a bit awful to play when the RNG gods are not in your favour, though this tends to be for more self-defeating purposes rather than letting your team down.
You see, the Astrologian has cards you pull that can buff allies, one being for melee and one being for ranged. It really sucks when you pull cards that are for roles that you do not have on your team or cards that you already have on teammates. Though there is the option to re-draw a card hoping for one that you actually need, this is not always a possibility.
Admittedly this isn’t the worst thing that can happen and will typically only happen when you are using the duty finder as when you create a static or use a party finder, you tend to make sure all the players fill unique roles.
Now, unfortunately, the RNG doesn’t stop here as there is also a spell you can use that can either Heal or Deal Damage. I have admittedly never needed that skill to Heal and always want it to land on damage, though of course, this is not a possibility.
You see the Astrologian has a pretty impeccable healing kit, including AoE regens, heals and even placeable heals that will deal damage. There are a ton of buttons you’re going to be using on cooldown and you’re not only going to have to pay attention to when you can maximize damage, but also pay attention to how you’re going to maximize the damage of your team.
Although this isn’t a post that claims one job is better than the other, I have to say that for me the Astro feels more powerful because not only am I playing a powerful Healer, but I’m also helping provide my team with damage and support to clear content faster.
So, as Banes is reading this article he swiftly reminded me of how unique the Astrologian is with the fact that it has a bunch of delayed heals you can pre-emptively set. Admittedly, I rarely ever think about these so I forgot they exist, but this comes in extremely handy if you want to set down a heal right before a big damage moment to utilize the time to set up other skills.
In that way, Astrologians are somewhat like Barrier Healers, but you don’t actually need to use these in that way. You can always force the heal to take place for the majority of these spells, which is typically what I do.
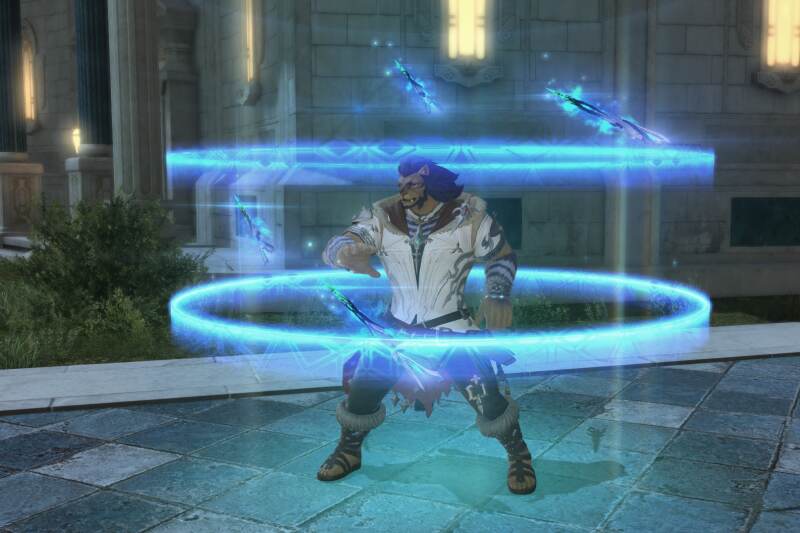
SAGE (AVAILABLE AT 70)
It’s somewhat funny how much I hate the Sage, because it’s extremely powerful as a Healer. When Sage was released the first thing I thought was “am I finally going to enjoy Barrier Healing?” The answer was no.
Although most of the Healer jobs have skills that help empower their heals, my experience with the Sage is that you’re constantly focussing on this to effectively shield your team.
At first, I was healing with Sage in Dungeons and Bozja, but after a while, I simply resorted to healing Fates to level because I didn’t feel like I could support the team as well as they deserved.
Some very cool things to note about the Sage is that it has some really dope AoE that has no cast time and you get a skill called Kardia that you can place on a single teammate in order to heal them as you attack.
Kardia can help sustain a lot of the healing that the Main Tank needs for a mob’s auto attacks, however, you will have to be hyper-vigilant about raid-wide or team-wide damage since your shields will most often need to be empowered to properly protect the team from getting too low. Again this is a personal issue for me when it comes to Barrier Healers and maybe one day when I’m not spending every day in the Diadem or crafting in the Over World I’ll give myself the time to really dive into Barrier Healing.
Passing it off to Banesworth:
Much like Scholar’s fairy, Sage also has passive single target healing, though you have a bit more control over it. You apply Kardia to a target, and every time you land an attack on an enemy your ally will receive a small heal. You’ll most of the time have this applied to your tank, but you always have the option of moving it around the party if there’s a tankswap or if someone in particular needs a bit more healing during a mechanic.
Sage is also very mobile compared to other healers. It’s the only healer with a dash ability, which lets you zoom to your choice of party member or enemy on a 45 second cooldown. It’s really fun and can be useful for resolving mechanics if you find yourself caught out of position.
It’s also the only healer with on-demand instant cast GCD shields, allowing you to shield the tank while running with the trash pull, or to prepare the group for upcoming damage while also moving yourself to safety. Finally, it has limited access to instant cast GCD attacks so you can continue attacking (and healing the tank) while forced to move.
Similarly to Scholar, Sage relies on planning and pacing its large number of OGCD cooldowns. Every time a mechanic is coming, you should look at your toolkit of OGCDs and see what you can use.
Standard raidwide damage coming up? You have cooldowns to mitigate, apply regen, or use a flat heal, so pick one or a combo depending on the situation.
Bleed, poison, or some other multi-hit attack? Sage has a couple of cooldowns that apply multi-layered shields that reapply themselves as each layer is broken.
Back-to-back heavy hitting mechanics? Holos heals the party, applies a shield, and also mitigates incoming damage, making it a very strong ability.
Sage’s arsenal of powerful cooldowns truly shine when you fit them to the fight’s mechanics, and will reward people who understand all the tools at their disposal.
As far as healing the party back up from low health Sage does have cooldowns to help with that, including regens, a big burst heal, and a 50% buff to its next GCD heal.
When those tools aren’t available its weaker GCD heals may sometimes feel like they struggle to recover a bad situation, especially if you’re used to playing White Mage. That’s why it’s best to use your tools proactively and wisely to avoid those desperate times in the first place!
If barrier healers feel intimidating, Sage has an easier learning curve than Scholar and is less punishing if you make a mistake, so I absolutely recommend it for newer healers.
MELEE DPS
Melee DPS is probably the most scary job to start off with as you’re really not going to have much of an escape route when a boss gets angry and decides to put an AoE under his booty.
For years I told myself that I would never play Melee DPS unless it was a Tank because everyone told me how difficult it was and said I wouldn’t be skilled enough to do it, but the changes in Endwalker completely flipped that script.
While the changes weren’t too extreme, the biggest difference is how big an enemy’s hitbox has become, giving you ample amount of room to keep attacking them while avoiding damage.
You see, if I had started playing Melee full-time in a previous expansion, I would be the Melee DPS who freaks out when he gets an AoE marker on himself and runs to the other side of the battlefield to protect his teammates, ultimately reducing my damage.
Some Melee Jobs are much easier than others, though admittedly they are still the “hardest” DPS job to master when it comes to any content.
A big portion of Melee’s damage is something called Positionals. Essentially some of your attacks will state where you can hit the boss in order to maximize your damage. Typically this is the rear (being the little open hole behind the boss). Melee jobs also have a Flank attack, which is the side where the arrows are on a boss. You can land these positionals from within the boss’s circle, however, this can be harder to guarantee depending on how big the hitbox is. There are no front positionals.
Now, not every mob has positionals and that is extremely important to keep in mind. You may notice that in content such as Bozja or Palace of the Dead or realistically any Deep Dungeon, a mob’s hitbox is a full circle instead of one with a hole. These also appear in some Raids and Alliance Raids where the boss does not have access to its back or teams are split up on all sides of a boss.
Depending on the content you’re completing you may want to use these mobs to practice your positionals, especially if you are new to melee jobs, however, this is not necessary as all of your attacks will land as if they are correct positionals and you can just focus on dodging AoEs.
Shockingly, Melee has a great deal of utility and has been my favourite type of job to pick up not only because of the massive damage that you deal, but because I feel like I have much more on my kit that can carry me through content.
For example, all Melee jobs have a Stun and each has an ability that lets you heal based on the damage you deal. The latter is phenomenal for keeping yourself up during massive mob pulls where you want to stay in to burst down the mobs with your AoEs. Now, it is always best practice to move while mobs are dealing AoE, however, if you are comfortable with your team or you know your healer there are great ways to stay in AoEs with this ability up to heal yourself while attacking rapidly.
This recovery skill is not the best on single-target damage, however, it is still there so you can heal yourself a bit if you’ve taken some damage as this will help a healer focus on dealing damage rather than healing you.
Finally, all DPS jobs have a skill called True North that will allow them to ignore their positionals, essentially allowing them to land all of their attacks as positionals even if they are not in the correct position. This should be used in emergencies as there are some bosses that will not allow you to place yourself correctly to land these skills. I would not rely on this skill as it has charges and has a relatively long cooldown, however, when you get used to whatever job you are playing you can start using it to maximize damage, especially if you know a fight really well.
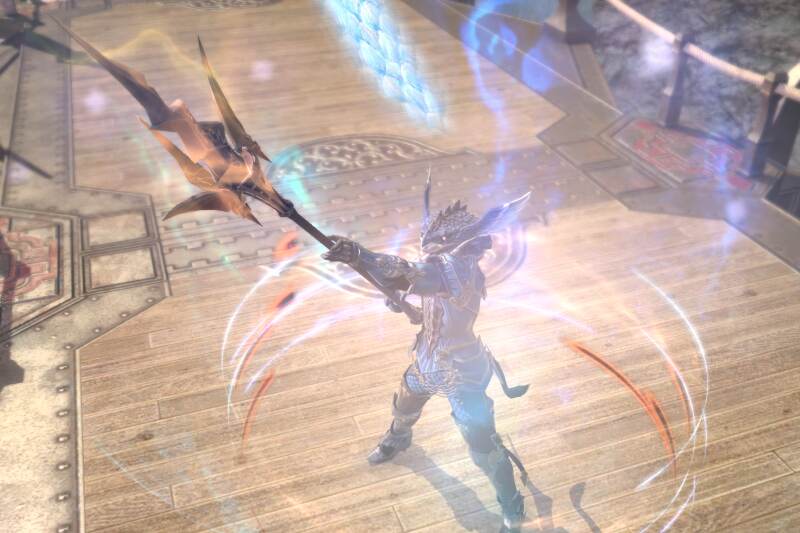
LANCER/DRAGOON
I have to admit, I kept going in and out of liking the Lancer/Dragoon. I have finally come to the realization that I actually hate the Dragoon.
For me, there are a few things that grind my gears when it comes to this job though the amount of people that love Dragoon is immense. So let me get to what playing Dragoon is like.
Dragoon is really nice because it deals pretty decent damage and helps empower your team. It is considered an essential part of a lot of Raiding content as many Savage raiders prefer high damage, but cannot ignore the importance of teamwide buffs. That being said, the Dragoon is the least greedy Melee DPS and even when you haven’t fully mastered it you can still help your team push out damage without being the soul reason.
Now by no means does this mean you can just sit back and relax while playing the Dragoon because this is the furthest thing from the truth. In my experience, the Dragoon is by far the most strict job I have ever played and this is for two reasons.
You have one of the longest rotations in the game which splits into two tracks that lead into each other. Admittedly, this is the easiest part of Dragoon as there is no real complexity to this portion of the rotation. The true complexity comes with the fact that you must weave your off global cooldowns through your rotation and the bad news is… it’s extremely strict. When you fumble, it’s not forgiving and you lose a good amount of your personal damage.
If you read a guide and are accustomed to the skills you use and when though, this becomes somewhat second nature, the issue is… you’ll also need to know the fights well enough to know when you need to break your rotation for the next phase. Admittedly, this is pretty common for all DPS jobs, but the recovery on Dragoon is much more challenging than other jobs.
The other issue I find with the Dragoon is the fact that the attacks you use to get into a battle are actually part of your damage-dealing rotation, meaning you don’t want to save them in case you need to get back in after an AoE. Now this is a personal inconvenience and one that very few players will actually have a problem with, but I’m obviously going to share what I like and dislike with every job.
Admittedly, you get a couple charges of your jump-in abilities in the later levels so you can technically always save one for an emergency and while this doesn’t really reduce the damage you deal you will have to take this into consideration while you complete the rest of your rotation. If you really enjoy the Dragoon but experience the same frustration as me with this, I strongly recommend making this a priority to learn.
Finally, the Dragoon is one of the slowest jobs to play when it comes to Global Cooldowns (GCDs). Again, this is simply because you are meant to weave Off Global Cooldowns (OGCDs) in between your regular GCDs.
While I completely understand this premise, I do not enjoy it. Being someone who is hyperactive I need a job that is fast-paced to enjoy it I enjoy moving my fingers so fast that they hurt, further extending my dislike of Dragoon. That being said, when it comes to timing all of your attacks to maximize damage, it’s not about choosing the right attack to use and when, it’s about following the already laid out rotation and executing it perfectly every time, leaving me unstimulated when playing it. For clarity, this isn’t a point to state that the Dragoon is not about skill it’s about mastering the rigidity of the job and recognizing you may have to “greed” sometimes in order to keep your cooldowns synced.
This is not always a possibility or recommended and while there is an ongoing community joke that Dragoons are floor tanks, with the updates to the job there is really very little excuse to end up being a floor tank. Greeding will take a decent amount of skill and knowledge when it comes to fighting a boss so I would recommend that you only do this when you are more comfortable with content and the job. This will also have to do with the attack that you are potentially going to miss as not all attacks are weighed equally.
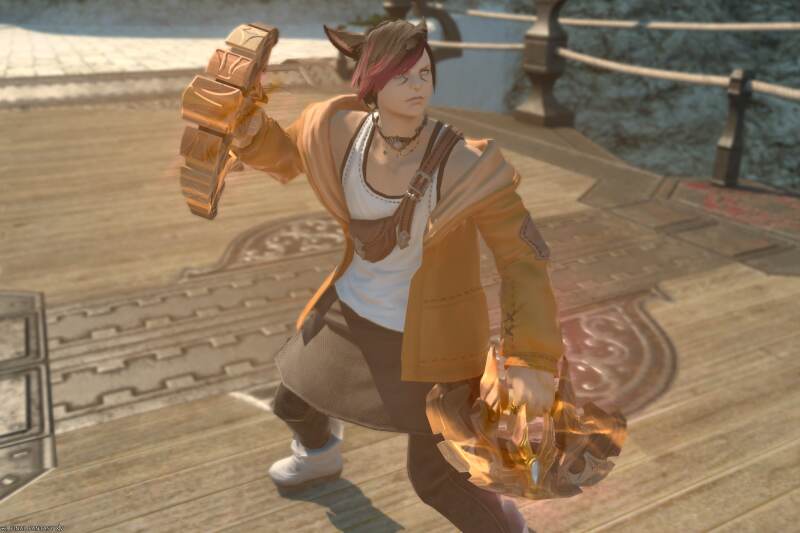
PUGILIST/MONK
By far the most interesting rotation in the game to me is the Pugilist/Monk. The Monk may seem like a ridiculously simple job when you first look at it, but it actually requires a great deal of attentiveness.
This is for two reasons. Firstly, the Monk has a series of buffs that it gives itself which will either empower a single attack it uses, or it will empower all of the attacks it does for a short period of time. It is going to be your priority to keep these buffs up while minimalizing the amount of time there is left on the timer before reapplying the buff.
Admittedly when I first learned about this in practice I told myself there was no way in hell I was actually going to maximize my efforts in doing this successfully. I told myself it would be good enough if I just rotated between the two portions of my stances and at least I was doing more damage since I was a Melee Job. Well, I proved myself wrong.
I ended up loving the Monk so much that I started practicing my rotation on any Boss Fate I saw to the point where my uptime of both types of buffs has become quite impressive.
Monk is one of those Jobs that feels like a game within a game and is tremendously enjoyable for me and on top of that, it’s also a less greedy DPS job as it has damage buffs for the team, as well as an ability that will raise the amount of healing everyone on your team, will get, being quite helpful when massive raid-wide damage is done to teammates.
There are a couple of downsides to the Monk in my brain, though they aren’t enough to get me to stop playing it. The first is that the Monk is a pure Melee Job, meaning that all of your attacks will have to be done at close range. Unlike all other Melee Jobs that have something to throw in desperate times, your only option is to build up one of your two gauges. At first, this really frustrated me because it felt like too much downtime for a pew-pew game, but now it actually feels like a short break to figure out my next step.
You see one of the most fun things about the Monk is that one of your gauges requires you to do either 3 of the same stances or 3 different stances in order to maximize your damage. You’re going to have to figure out which you want to do first based on what your buffs are at the moment. If you do two of the same step twice in a row, you’ve just lost a massive amount of damage. However, you do have other skills that you can use in order to do one of the stances immediately in order to get yourself back on track. This is by far the most helpful when you have just gone through a phase shift. That being said, it’s not as complicated as it sounds because the third part of this gauge will allow you to do either of the steps again in order to complete it. I cannot explain the amount of dopamine I get from this portion of the rotation.
Monk is also one of the Melee jobs you can greed the most on as you get charges of a dash that either lets you dash to a mob or a team member. At first, you only have one charge, but by max level, you have 3. Typically I will use one dash to a teammate after I have greeded a boss and then I’ll use the second dash to get back into the boss as soon as it is ready to be attacked.
As for the number of buttons you press, technically there aren’t that many. You have 9 main buttons to choose from. 6 you rotate between for your single target attacks and 3 you only use for AoEs. The other buttons you basically hit off cooldown and use them the way intended. The complexity of this job definitely lies in the way you keep your buffs up and ensure that you do not replace your buff before it is about to expire.
Monk is definitely less punishing than most other Jobs and it offers a good amount of recovery.
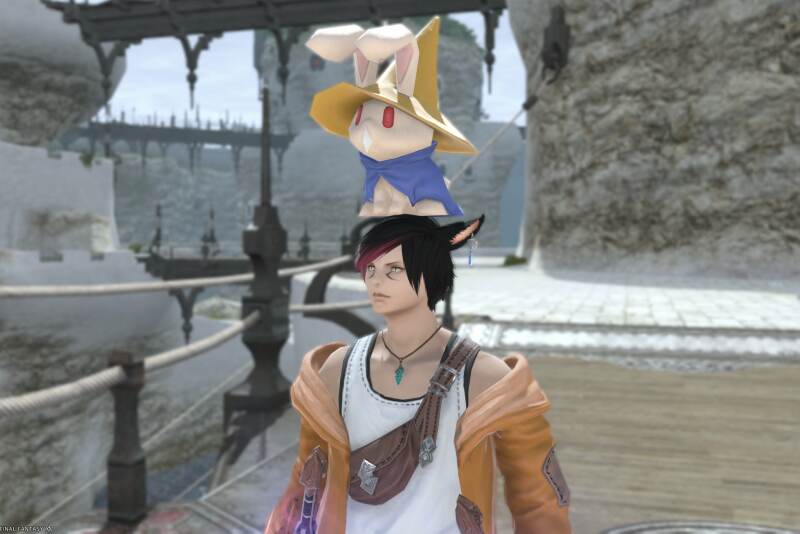
ROGUE/NINJA
The Ninja is by far the hardest job to play when it comes to Melee DPS and will either deal the highest damage on your team or the lowest. Ninjas need very quick time reaction and will need to ensure that they are hitting the right buttons or else they will deal literally 0 damage.
Although your main combo is a 1-2-3 or a 1-2-4 if you need to refill your gauge, your main source of damage comes from successfully hitting Mudras in the intended order to use the ability that is desired. The issue with this is that players will often second guess that they have hit a Mudra, due to button spamming and will essentially hit the same one twice or use another attack in between, forcing the Mudra to “Shame Bunny.”
If players have messed up this part of the rotation, they are forced to summon the bunny that sits on their head as a sign that they have messed up and have dealt no damage in that portion of the rotation.
The main loss of damage for the Ninja comes from misaligning your buffs as even more than the Dragoon the Ninja’s rotation is extremely strict. One misstep and you’ve blown a full two minutes of damage, not to mention the number of small missteps you can make in between.
Unlike many of the other Melee DPS jobs where you are simply dealing more damage for being Melee, this is not true for Ninja.
I have seen many Ninjas be at the very bottom of the aggro bar and while this is not the most ideal way to measure damage, it is a good starting point.
There are a number of challenges to Ninja and it can become very easy to be overwhelmed. Let’s talk about the timing first:
Your goal is to get your two mob debuffs up at the same time, one is on a two-minute timer, and the other is on a minute timer. These are quite easy to align, but then you have to get an off-global off while guaranteeing that you get three of your Mudra attacks off before the shorter debuff comes off. Oh, but you thought you were done, because you also have a gauge that is ticking down that raises your attack speed not to mention that one of those debuffs you put on… well it was tied to one of your Mudra combos. Oh! But you have an ability that lets you use Mudras for free…did you press it at the right time?
Oh shoot! You also forgot to press that button that lets you do three of your spells without doing anything… but oh shit you moved and now that move was wasted. Many things can go very wrong with Ninja and you will need to practice a lot in order to master it.
Listen, this isn’t to discourage players from playing Ninja or taking a Ninja into a Dungeon or Raid when you haven’t optimized on it, it’s more to let you know that if you’re going to pick up Ninja solely because it deals the most damage you can actually churn out more damage on other jobs even if you play them less than average.
I will never main the Ninja, nor would I ever use it as my side job and that’s for the reason that I have something I call “anxiety clicking.” Essentially as a human when I get anxious I sometimes lose control of my motor function. While sometimes that results in me freezing and not pressing anything, choosing to run sometimes it actually results in my fingers twitching and accidentally pressing something.
If you’ve seen me stream on Twitch, you’ve seen it happen countless times, especially in cutscenes that heighten my anxiety. Typically this is a harmless tick that results in me skipping dialogue in a cutscene by mistake, but sometimes when it comes to playing Ninja it will happen in the middle of a Mudra pressing. That being said, sometimes I also second guess that I’ve pressed a Mudra already and will force myself to Bunny or think that I’ve used the ability from the Mudra and will hit the next step of my Combo, also resulting me to Bunny. Though these things don’t happen all too often, they do happen and so I would prefer to play a job that is more forgiving to things like this than the Ninja.
I would, however, play Ninja in extremely low-stakes situations such as unsynced content. I would say I am an about average Ninja, but I am a very good/more than average Machinist, Samurai, Monk and Red Mage, so I know for a fact I can churn more damage out on those jobs than the Ninja. This is a personal choice and I do not expect other players to feel the same way, nor do I think they should. Realistically, at the end of the day if you enjoy a Job you should play it!
As a final note, there is no real way of saving yourself once you’ve messed up your rotation no matter what you do, you will lose DPS so this is going to be one of the jobs where you bite your tongue and keep trucking along. As an absolutely final note the Mudra combos you can do include a weak single-target attack, a strong single-target attack, an AoE damage over time, an AoE burst damage and a mid-strength single-target attack that gives you the chance to use the abilities you gain when hidden. Which you use depends on what you are fighting and where you are in your rotation though there is no “choice” in this, the answers are always the same.
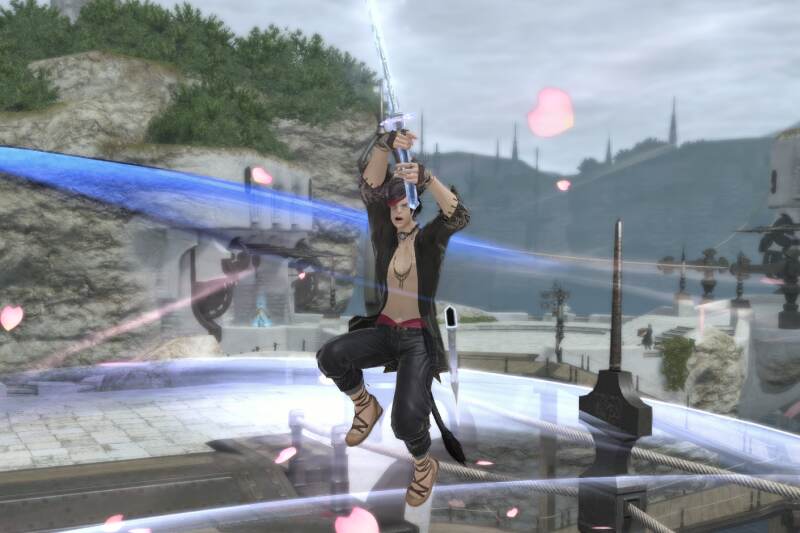
SAMURAI (AVAILABLE AT 50)
The Samurai is my main Melee DPS job as it’s probably the most forgiving and straightforward. It does not require too much attention from me in order to successfully deal high damage and quite frankly I really enjoy the rotation that it has.
The Samurai requires you to collect different amounts of seals depending on the move you want to do. One seal is for a single target DoT, two seals are for an AoE and 3 Seals are for a massive single-target hit.
To get these Seals you’ll be completing a standard rotation that requires positionals and while in the past you had to land the positionals in order to gain the Seals, this is no longer true.
Still, I would strongly recommend that you land the positionals for optimal damage, or use True North when you cannot.
The really nice thing about Samurai is that you also have a gauge that allows you to deal extra damage while you’re doing your regular rotation. There are three types of attacks you can do with this, an AoE which has a very short cooldown, which is the primary attack you’ll keep spamming with your gauge. The other attacks are a single target massive damage spender that shares a timer with an AoE that shoots in a straight line. The one you choose obviously depends on what mobs you are currently up against
If you thought you were done with the Samurai, you’re wrong because you have a spender after you 3 rotations of your Seals and you also get to duplicate the last attack you did with your Seals once every minute, leading to a crazy uptick in damage.
The Samurai is one of the least punishing Melee jobs you can play and quite frankly you do not need to optimize your rotation to deal some massive damage. For example, there is an ability you can use that removes the seals you have and gives you a gauge instead and this can be used to ensure that everything fits together in a nicely packed rotation, however, many Samurais have reported to not needing to use this when completing Savage content. While I’m not sitting here to claim that it is not a DPS loss to ignore this ability, due to the other utilities in the Samurai, this is the smallest loss of DPS comparatively.
Of course, I encourage you to maximize your potential and learn to use this portion of the rotation, but it’s to let you know that it’s mostly going to be icing rather than the utmost importance. Due to the fact that the variant of the rotation lies on a lower dealing damage portion of the rotation, I strongly feel like the Samurai is one of the better introductions to Melee jobs and quite frankly is one of the main reasons I play Samurai so much because I typically play it when I’m exhausted from a day of work.
The Samurai has some interesting ins and outs. Essentially you will spend a small amount of your gauge in order to either dash in or dash out. While you would think that this can lead to a loss of DPS, it actually can help add DPS as you have the ability to throw damage at the boss which will help build your gauge. Now, these three skills are not meant to be used to maximize your damage as much as they are meant for an escape plan and a plan back in, so don’t plan on putting them into your rotation. That being said, you also have a decently long cooldown on these skills, so you’re only going to want to use them when they are necessary. So far whenever I’ve used them only to avoid unavoidable AoE damage they have always been off cooldown when I need them.
REAPER (AVAILABLE AT 70)
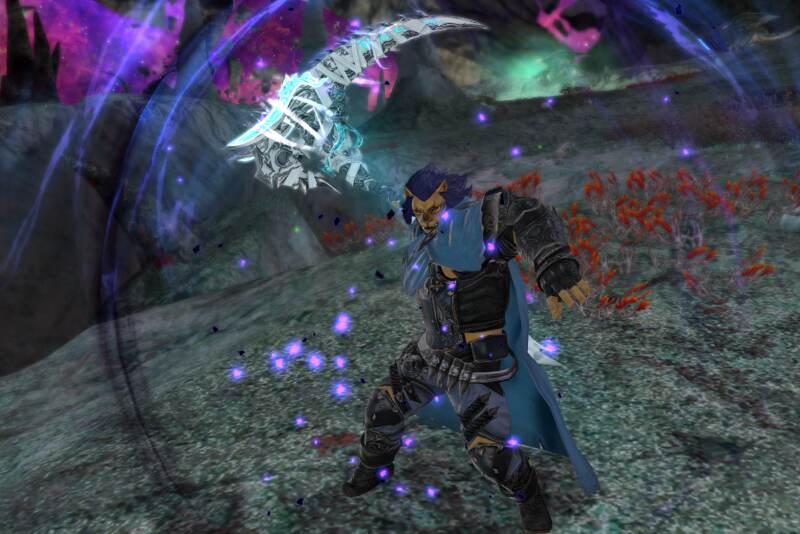
I remember really enjoying the Reaper, but the last time I played it was two years ago. Reaper was the reason that I started playing Melee jobs regularly because it was easy enough to understand and the combat with it was terribly fun, but since I haven’t had a chance to have a refresher yet I’m going to be passing it off to Banesworth:
The Reaper is a flashy melee DPS whose rotation revolves around building and spending two gauges to enter an Enshrouded state, during which time your GCD becomes faster and you unlock several hard-hitting attacks. It’s somewhat like Ninja which has a very heavy burst window and an otherwise simple combo phase, but Reaper isn’t quite as extreme and doesn’t require as many button presses.
You go through your weaponskill combo to build the first gauge, then you spend it on stronger weaponskills to build your second gauge. These spender attacks have positionals, but what’s nice about Reaper is that you have more flexibility on when to use them, giving you more control and allowing you more time to get into place for the bonus positional damage.
Once that second gauge is built you can enter your Enshroud and deal a lot of damage very quickly. It can be a bit jarring to switch to a faster GCD speed mid-combat, but it shouldn’t take long to get used to and you’ll settle into the rhythm.
While it’s not technically a damage over time ability, Reaper does have a similar mechanic called Death’s Design, where it places a debuff on the target that lets the Reaper deal 10% more damage to it. This is extremely important and should be kept up as much as possible.
Reaper has one of the most fun gap-closers among the melee jobs in my opinion. You can open a gate and teleport 15y either forward or backward. You have the option in the next 10 seconds to teleport back to your gate, making this excellent for disengaging from melee range to avoid damage and then immediately heading back in when it’s safe.
For such a brooding-looking job, Reaper is actually a bit of a team player! It has a personal defensive cooldown that shields itself for a small amount of HP, and when that shield is broken it triggers a small regen on the Reaper and nearby party members. It also has a party damage buff that unlocks a hard-hitting weaponskill that does more damage the more teammates were buffed.
I find the visuals and sound effects of Reaper also help make it feel very engaging and impactful, so if you’re looking for a fun melee DPS I would say give Reaper a try. It may take some time to initially wrap your head around the two gauge system and how your skills are connected, but once it clicks it’s not too difficult a job to play.
PHYSICAL RANGED DPS
Physical Ranged DPS is probably the easiest Job category to play in the game, though it’s all about how you look at it. The reason it can be considered the easiest job type to play is that you have no cast times, meaning that you can avoid almost all damage (unless it’s raid-wide) and you can simply focus on your rotation.
Now, depending on what job it is you’re playing, you’re going to find them more challenging or less challenging than the last. Admittedly, all three Physical Ranged DPS plays extremely differently and there is truly a Hard, Medium and an Easy. In my opinion, all three are quite fun jobs to play, though some are much more overwhelming than others.
As for Utility, each Physical Ranged DPS has an interrupt that you can use if your Tank is not doing their job or if you are in the Overworld fighting an Elite mob that is casting an interruptable attack and well… that’s kind of it! The rest of the perks lie within each of the jobs and are not shared amongst all of them.
ARCHER/BARD
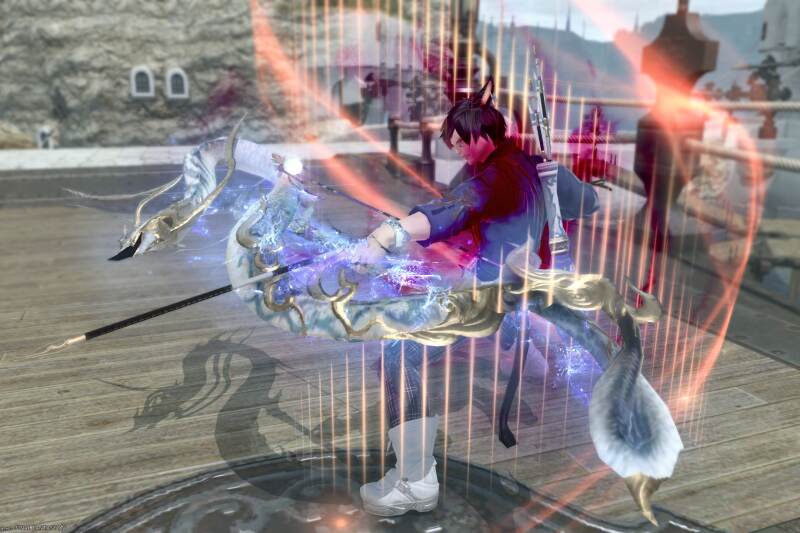
I was an Archer/Bard for the longest time when I started playing the game and though I really enjoyed it the later levels of this job simply became way too overwhelming for me.
The Bard has a ton to keep track of and while straightforward, I’m one of those people who gets upset or sad when I don’t do everything correctly.
You see, the Bard doesn’t deal a whole lot of damage as it is and the main reason you would want to play it is to boost your whole team and what little damage you do deal is essentially only in procs.
The Bard has 3 songs you need to rotate between, each lasts 45 seconds and as soon as one ends you’re going to want to play the next as by the time the third song is sung, the first one is off cooldown.
While two of the songs require you to do nothing while they are playing, one of the songs has an attack that has the chance to gain up to 3 charges in order to deal an attack with maximum damage. Though, when you get to the 5-second marker you’re going to have to make the choice to either shoot out low-power attacks or risk being stuck in a recast or missing it entirely by mistake.
Each song will empower the team, being the main purpose of using the songs, though while the songs are up you will also need to utilize another buff called Battle Voicce, which is when you need to ensure you use two of your personal buffs. One that provides you with more damage and the other which allows you to shoot three shots in one hit. You also need to try to spend as many of your off Global Cooldowns during this time, which charge faster based on whether you land a crit hit or not. Luckily for you though, your main song Mage’s Ballad will also reduce the cooldown of these attacks so this is the best time to personally optimize.
Now, when you think you’re done with the Bard you also have two single-target DoTs that you must keep up at all times. Admittedly these are pretty easy to take care of as you also have a button that reapplies any DoTs you currently have active, however, if you ever let one fall this comes at a loss of DPS as the attacks that you use to place these DoTs are much weaker than your regular attack. For me, this is where a lot of my frustration came in when I was first getting used to Bard.
The thing is, Bard is actually extremely simple to play if you build up the muscle memory. It’s a decently strict rotation with the only outlying attacks being anything that procs. Admittedly, it’s because of this that I don’t like playing Bard as I tend to switch between Jobs regularly to fill in gaps in whatever party I am in. So, having the Bard be my “fill” job is really not optimal as if my rotation isn’t tight, I’m not even dealing substantial enough damage to make up for it. It’s weird to say, but if you’re going to be a Bard, I would strongly recommend playing it as your main or simply getting very used to keeping track of the many things you need to in order to ensure that if you do take time off, you’re still hyper-vigilant of keeping everything up.
This is a complete cop-out to say, but even if you just have your songs up at all times you’re doing more for your team than if you’re hyper-focusing the damage, so get this part of your rotation sorted first before focussing your damage. This is especially true when you have Melee DPS on your team.
Otherwise, the only other thing you need to know is that your songs will build up a final gauge that provides your team with a buff. This is super easy to keep track of, but this is also why it’s ridiculously important that you make sure you play all your songs whenever you can as this portion can lead to a massive loss for your whole team.
Your primary focus as the Bard is to support your team as much as possible and damage comes as a second.
That being said, something I did not expect at all from the Bard was the ability to Cleanse certain status effects similar to Esuna. Admittedly, I very rarely see players use this, similar to the fact that I don’t see many players use debuffs like Addle, but if you are a player who likes to hyper-optimize or notice that your Healer is not really paying attention, then you have the ability to help out in tough situations.
MACHINIST (AVAILABLE AT 50)
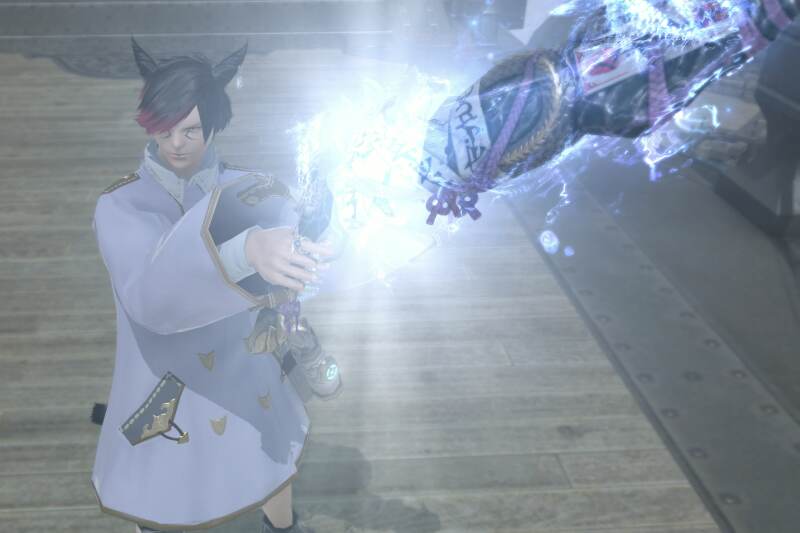
The Machinist is by far one of my favourite jobs to play because of the ample amount of damage that it deals and the simplicity to its rotation. I think you would be shocked to hear me say this, given what I said about the Dragoon, but I love how rigid this rotation is because it’s both massive DPS and since you are a ranged job you won’t have to worry about being unable to dodge AoEs or being too far away from the boss to attack.
The Machinist is extremely greedy and its main purpose is to deal damage, providing extremely low utility to other players. The only team player aspect of the Machinist is that it can provide your team with a shield and can debuff the boss.
I won’t lie, I love that this is the case though as the other current ranged DPS jobs are all supports, so to have something that deals big damage in the category really balances it out.
In my humble opinion, everyone should have a Machinist level up because it makes Over World content incredibly easy. The amount of burst damage you have on the job makes it incredibly easy to take down A-Ranks and blitz through FATEs.
I recently switched from doing all of my overworld content on Red Mage to Machinist and I don’t think I’m going to look back ever. I was under the false belief that since I had a decent heal on my kit and could deal decently quick damage on the Red Mage it would make things like solo FATE farming easy, but I quickly realized that even when I don’t have the highest gear on Machinist my survivability is much higher even without a Heal.
Of course, I do all of my solo content with a maxed-out Chocobo Companion, but I have rarely have to even put it on Healing stance and can simply leave it on Free Stance.
Now when it comes to actual content, you have a pretty decent amount of variety in what you have to do.
The Machinist has a two-part rotation, the first is empowering massive damage dealing off-global cooldowns while filling in the missing parts with your 1-2-3 combo and summoning your mecha whenever it is ready. This mecha will deal damage for you without you needing to take care of it. This also leads into the second part of your Combo where you place a Bomb and use one of your gauges to unlock an extremely rapid-paced 3-button spam fest. This portion of the combo has a much faster GCD so expect your fingers to hurt if you don’t have the keybinds on optimal buttons
Without going into the rotation too much, you know you’ve messed up your rotation if your OGCDs are ever off cooldown during this part of the rotation. With that being said, when you’re playing Machinist this is extremely important as you genuinely are dealing much less damage than you could be and while yes you are dealing more damage than most other jobs, since you are a greedy DPS you’re going to be expected to try to maximize this damage as much as possible.
Don’t let this scare you though, in my opinion, the Machinist rotation and optimization is much simpler than all other rigid jobs and a lot of this has to do with the lack of positionals and the ability to attack while running. You also have the tools to ensure that you’re always timing things correctly so when you have your rotation down you can force your gauges and ensure that you’re maximizing your potential.
My only complaint about the Machinist is the AoE damage you deal. Essentially there are five things you can do. The first is literally spam a button to build up your normal gauge, turn on that gauge when filled and then spam a single AoE button over and over. One of the OGCDs that you use for hard-hitting single-target damage shares the same cooldown as an AoE DoT. Another GCD is a straight-line AoE even though it deals damage similar to the single target ones while used on one target.
The final thing you can do is use a Flame Thrower. While in theory, I love this attack, there are some downfalls to it. Essentially you are forced to stand still during this attack as if you move it will cancel the attack and it is relatively long. Now, this issue with this comes into play when mobs start dealing AoE damage. You’re going to have to make the decision whether or not it is wise to eat the AoE attacks.
While in some cases Healers are well aware of this part of a Machinists rotation, there are others who are not or some who simply think the Machinist’s responsibility to stop their attack and find safety. Admittedly, the latter is somewhat true. You are definitely responsible of ensuring that you don’t just die for the sake of dying, however, since this attack deals a really good amount of damage over time you’re going to want to make sure you use both DoTs at the same time to potentially Blitz the mob pack before they have a chance to AoE.
This is much more manageable with a White Mage that has a stun, however, no matter what happens, I recommend you use your shield at all times.
Going back to the spammable AoE, you’ll be able to run around during this phase and you’ll want to spam your off Global attacks to maximize damage (the ones that don’t share the cooldown with your spammable).
Otherwise, get ready for some Big-D damage and truthfully even if you don’t perfect your rotation in Over World content, you’re going to see a significant boost in damage.
DANCER (AVAILABLE AT 60)
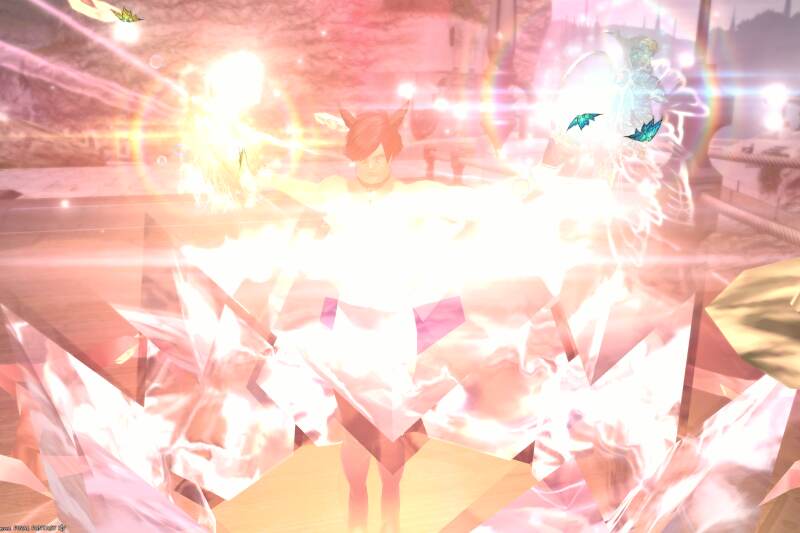
The Dancer is one of the most fun jobs I’ve played and is the job I would always take into Savage, as long as there is already a Red Mage.
When it comes to Savage progression it is extremely important that you have a few teamplayer Jobs on your team as you’re going to be expecting a few wipes per run and having something like a res, heal, shield or damage buff is going to be very helpful.
In my opinion, the damage buff is especially helpful as it will help make sure that if a few players are down, or even if one player is down, the others will be dealing a good amount of damage in the meantime. Not only that, but if you have an extremely good player on your team while the others are average you can significantly boost them to help ensure you get to the next portion of the raid.
Dancer probably has the most team spirit in the game as it can provide the following:
A damage boost to a single member of your party who is your “dance partner.” The two skills which boost the Dance Partner are part of your regular rotation so they should pretty much always have them.
A Shield that protects your whole team.
A party-wide damage up that comes every 2 minutes.
A series of regens you can place on your team that increases in power depending on how long you charge it (though you can quickly flash it in less dire situations to simply help out).
A decent heal for you and your dance partner.
As a trade-off for all the utility you get for Dancer, you have undeniably low damage. It makes things like single-player questing really annoying and it makes doing 4-man content feel longer.
This isn’t to discourage you from taking a Dancer into a dungeon as you mostly lack single-target high damage, but you do let out some mean AoE damage.
You’re extremely bursty when you’re a Dancer, as your dances have some really impressive damage, however, all your other attacks are pretty sub-par. With that being said, to make up for this you save all the charges you get for when you have your critical damage buff up in order to make up for the lower damage.
Now, this doesn’t completely make up for the less damage as you will still be the lowest in damage of all other jobs, minus healers, but you have to take into account the heaps of damage you give your team by buffing them, especially if your Dance Partner is a greedy melee DPS.
Even a team-player Melee is better than the other jobs though as both the damage and uptime tends to be consistent, but the rankings tend to be this:
Melee DPS
Black Mage
Physical DPS
Casters
The Dancer is by far the easiest job to play as it simply has the least options and basically has two attacks in both its single target and AoE rotations. You just spam until your Dances are off cooldown, use your gauge spender anytime you are at around 75. Save your charges unless you have 4 stored, and spam-spam-spam when you have your critical hit up.
You also have an ability that guarantees procs that you want to line up with the Critical Hit and use once during the phase in between. Otherwise, you are golden.
Dances take a while to complete, so just be aware of that. If you hit the wrong button during a dance, nothing bad happens other than you delay the buff and damage, but this is extremely insignificant due to the increased speed of your GCDs during this phase.
By far, the Dancer is the most forgiving job in the game and the utmost importance is to keep your Dances up and aligned as well as the buff for Critical Hit, otherwise even if you spam your buttons whenever they are procced, the amount of damage you lose is nothing to cry over as it is just a chance that it will cause critical damage
While it is decently rapid paced it’s not overwhelming and you have a lot of mobility compared to other Jobs as by level 90 you have 3 dashes to use at your leisure. Quite frankly this is why I chose Dancer as my Savage job as my alt is on a North American server and due to ping it can be a bit more difficult to avoid AoEs.
The dashes make this a lot more bearable and quite frankly it’s probably the best choice when you’re in my situation.
I wouldn’t go so far as to say everyone should have a Dancer as realistically it’s nice to have one in certain circumstances. Instead, I would say Dancer is for you if you like being a support player, like a simple rotation and you’re expecting to do a lot of content with other players, specifically 8-man content.
You may want to level up a second job if you main Dancer admittedly, though this is primarily for the ability to complete solo content faster. If you don’t mind it taking a while or you simply don’t do much solo content, then it’s not a priority at all.
MAGICAL RANGED DPS
Magical Ranged DPS is quite a fun type of Job to play and typically has some great utility mixed with some middle-of-the-ground consistent damage.
Depending on the caster that you’re playing you’re going to have things like a raise for fallen players, buffs for your team or you’re just gonna deal a crap tonne of damage.
The obvious issue with Casters is the fact that you have cast times and if you cancel them by moving you will lose out on a decent amount of damage. Due to this, the uptime of a caster tends to be less than the uptime of any other job, though the more you understand your Job and the more you practice fights, the higher the chance you’ll be closer to 100% uptime.
A big portion of learning how to be a good caster is learning when you can move during your cast in order to avoid cancelling the cast. Oddly enough, this is not something that is upfront told to you, but there is a small window nearing the end of your cast when you can move and not interrupt your cast, which we often call a slide, and no matter what caster you play you’re going to want to play around with this timing.
This will ensure that you are doing the most damage you can while not taking damage.
Casters range in difficulty I would go as far as to say that of all the jobs there’s the most stark difference between them.
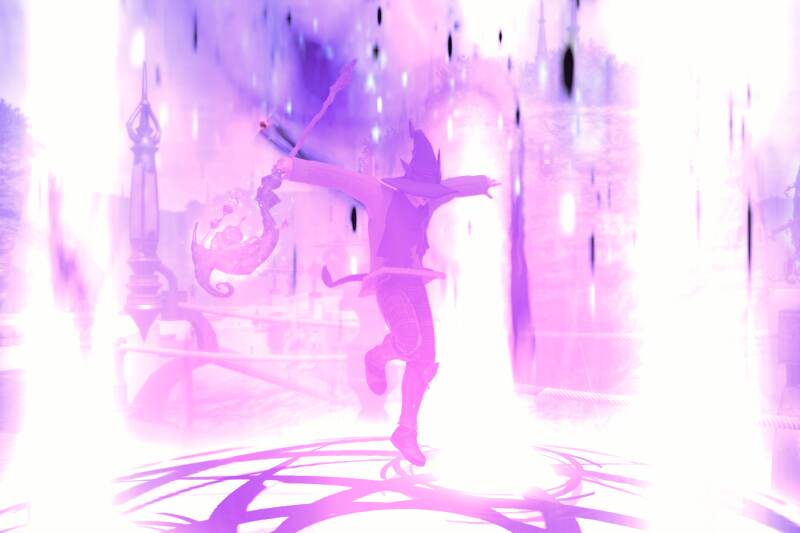
THAUMATURGE/BLACK MAGE
The Thaumaturge/Black Mage is by far the hardest caster to master and is considered one of the hardest jobs in the game. It has extremely long cast times and a very high skill ceiling.
Though the rotation for the Black Mage is extremely simple, essentially using Fire and Ice spells to counteract each other, the issue comes with ensuring that when you cast you aren’t going to have to cancel midway through in order to avoid an AoE.
Essentially the Black Mage is a two-part rotation, though it utilizes more than 2 skills. You utilize all of your Fire Spells to deplete yourself of all your mana and then you gain all of your mana back by using ice spells. While this might seem simple, the reality is you have different versions of each spell that you want to use in order to shorten your cast times and empower the next group of attacks.
It is extremely clear when you are not maximizing your damage potential as a Black Mage as if you have done your rotation correctly you will end up with 0 mana and if you are doing it incorrectly you will have a bit of your mana left over once you’ve finished your fire phase.
The fire phase is the most daunting as it involves a longer cast time than the ice phase and it typically leaves players questioning if they should just stick to using ice attacks for prolonged periods of time to avoid getting hit while casting.
The sad thing is, a Black Mage who only casts ice can actually out-damage a Black Mage that deals both ice and fire, though this isn’t to encourage players to stick to ice damage as much as it’s to speak to how high the skill of learning to maximize the potential of each is.
Similar to the Ninja, the Black Mage has the most skill gap for Jobs, making skilled players land either in the middle to top of damage and the new or average players land at the bottom. It will take a great deal of practice, but much like Ninja and Machinist, your only job is damage so your goal is to maximize it.
Black Mage has changed quite a bit since Endwalker and has a lot more mobility than it used to and though the basics of Black Mage have not changed, it has definitely become a bit more accessible than it used to be.
You luckily have some abilities on your kit that will help you be less frustrated with the job such as the ability to cast 3 spells in a row, the ability to place Lei Lines that increase your spell speed and the ability to teleport to a player every 3-seconds with a longer cooldown on an ability that takes you back to your Lei Lines.
Typically Black Mage players will practice fights on another caster and then will switch onto Black Mage when they are farming it or have become comfortable with the fight. This is not a necessity, though it does help quite a bit especially when a fight has a lot of AoEdamage that you need to learn to avoid. Black Mage players will usually take this time to learn where are spots they can stand to guarantee they will not need to move later as while they have a no-cast spell, you’re going to want to avoid using it as much as possible as it deals relatively low damage compared to all of your other spells.
Otherwise, other things to know about your kit is that you are the only caster an actual DoT that you need to keep up at all times. This is called Thunder. There is one that is an AoE and the other is a single-target.
When played correctly the Black Mage can sit just as high as a Melee job, being the only caster to be able to do so.
I personally would recommend that players stay away from starting as a Black Mage if they are new to the game or have never played a caster before. When you start getting used to sliding while casting, this might be the opportunity for you to pick up Black Mage full-time.
Black Mage isn’t the most fun job to play when you’re completing solo content in the overworld, however, with the help of a Chocobo Companion, you should be fine. The main reason for this is the obvious interruptions of your long cast times. If you have your Chocobo et to tank, you tend to be okay with being interrupted, though this somewhat falls off once you start dealing higher amounts of damage, requiring you to really utilize your kit to ensure you’re dealing decent damage.
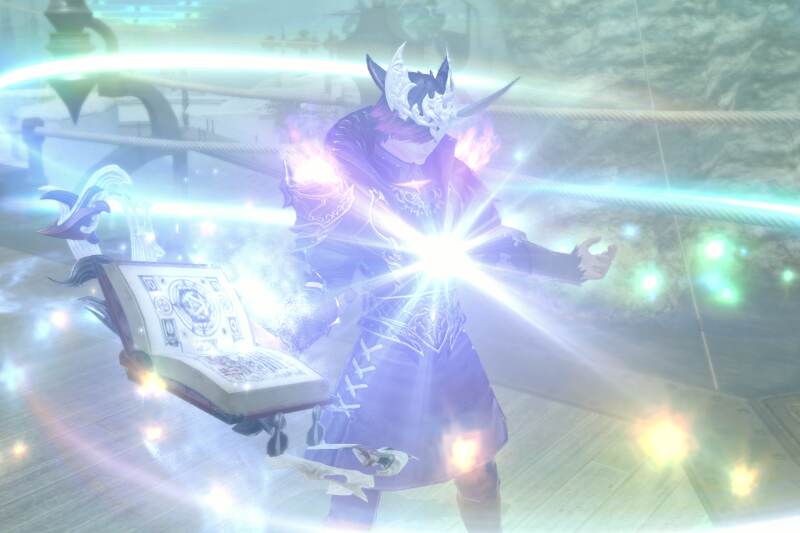
ARCANIST/SUMMONER
The Summoner has gone through an immense amount of change since I first started playing FFXIV and while it is still a pretty powerful job it has become hyper-simplistic and straightforward, leading me to not want to play it anymore. While the Summoner has a good deal of utility, players would choose to play Summoner in the past in order to have a bit of a challenge while still being able to support the team with things like a raise.
At this point, the Summoner is more in line with Dancer, though without any procs and more rigidity.
There isn’t really much option to the Summoner, you essentially switch between two parts of your rotation, summoning Primals and weaving in your OGCDs when possible.
Truthfully, I think the change was important coming from a place where it was one of the busiest jobs for very little support and damage, however, if you liked old variations of the job such as Stormblood where the job was busy but dealt a decent amount of damage and Shadowbringers where the job was tremendously busy for very little pay-off unless you were particularly good at the job, then I completely understand why you don’t like the rework. That being said, if you only tried Summoner since the rework, you understand how nice it is to have one on your team because of the great amount of support it gives the team now.
You see, as much as I think that a Summoner is an important and useful job to have on a team the rotation just doesn’t do it for me. If I want to go Support I would much rather play Dancer because it’s quicker paced and there is more variety in the way you execute your rotation. That also being said, I would much rather play a job with no cast time even though my admitted main job is the Red Mage.
Now, for the perks of the Summoner. You have extremely few cast times these days and many of your most powerful attacks are instant cast. This makes it so much less frustrating to play for newer casters and will allow you a tremendous amount of mobility to avoid any AoEs thrown at you.
Each of your Summons has very different roles to play. One deals massive amounts of damage, another has the ability to deal damage over time, two can heal your teammates and you also have a skill that will increase the damage your team deals.
There are a few outlying things to note about the Summoner and these are that one of your phases includes decently long cast times and also includes a dash in that you must time if you want to actually use and you have a few procs that you cannot force that allow for an instant cast for a higher damage spell.
These become extremely second nature and truthfully I cannot see many or any players struggle to learn the most efficient rotation for Summoner. In my opinion, I would put Summoner under the Dancer for ease to learn as Dancer is going to require a bit more lining up of skills while Summoner is very clear cut.
There are two reasons I believe everyone should have a Summoner even if they do not choose to use it as a main job. Due to the sheer simplicity of the job it is a great option to have in your back pocket when you want to do atypical content, for example right now for the Moogle Tomestone event, most players are spamming P1N with 7 DPS and 1 Tank and a single Summoner does enough healing for the whole team to carry them through this. Another reason is because it levels up with the Scholar, so you realistically only have to do half the work to have one DPS and one Healer.
Although I have already admitted that I do not like the Scholar, I would much prefer to have it just in case I end up liking it later on or simply need a healer for some random content.
As for if you are thinking about whether to play Summoner as your main job my concise perks are: it is extremely new player friendly, it does not require too many button inputs making it the friendliest job for certain disabilities and you’re realistically going to be supporting your team mo matter what content you are doing.
If you are trying to choose between the Dancer and Summoner if you’re choosing a job simply based on support the best way to think about it is if you want to support your team at your will or passively in your rotation. Admittedly, both of them will do the majority of their support during their rotation, but Dancer has a tiny bit more freedom.
I think the biggest draw to choosing Summoner over Dancer is that you will deal more damage with Summoner than Dancer, though you will boost the team more with Dancer than Summoner. Oh, I guess the other biggest draw is that you have a Raise if one of your teammates is fallen, though as a Summoner you tend to avoid using it unless your Healer is very busy and you don’t have a Red Mage on your team.
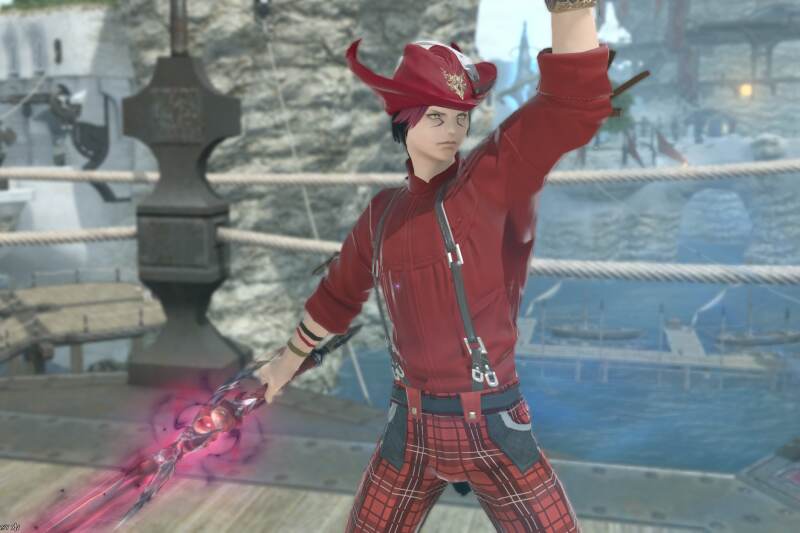
RED MAGE (AVAILABLE AT 50)
Red Mage is a terribly easy job once you get the hang of it and is by far my favourite job to do any progression content. I personally feel like the Red Mage is the most vital job to have on your team when new content is released, but I admit that there is some bias behind this statement.
The Red Mage used to be the job with the best mobility when it came to casters before the changes happened to Summoner and while it still has pretty comparable mobility the true reason a player would want to play Red Mage is because of its ressing capabilities.
Essentially, the Red Mage’s gimmick is that every time a player casts a spell they get a status called Dual Cast which allows them to make their next spell instant, no matter how long the cast time or the spell. This used to be completely broken when there were variances in how much mana each job had and due to the fact that you could actually have more mana than average a Red Mage was basically able to raise the majority of their team while still weaving in damage in between.
Now, that is no longer true as a Red Mage now typically runs out of mana within their regular rotation and absolutely needs to use Lucid Dreaming every time it is off cooldown to ensure that they have enough mana in case things go awry.
Though with that being said, with Dual Cast a Red Mage can simply use one of their damage-dealing spells, Raise and then continue dealing damage. This is especially useful when a Healer is low on mana or when both of your healers have their Swiftcast on cooldown.
Now, as for how the Red Mage plays. At first, the Red Mage is going to seem quite complicated, requiring you to focus on a secondary mana bar that consists of Black and White Mana. The goal here is to use spells that will keep these mana bars slightly out of balance, though if they are perfectly balanced this isn’t really a problem.
As soon as both of these forms of mana are above 50 you can enter your Melee Rotation which consists of a dash in, a three-hit combo a choice for black or white mana and two balanced massive damage spells, all being instant cast.
This is by far the biggest burst of the job and you will always want to make sure you have buffs up during this phase, two being from yourself and hopefully a few from your teammates.
During the Melee Phase a good Red Mage player will weave in their OGCDs including those that would typically be seen as a utility, being the dash in and dash out (though you have the alternate choice of staying in instead of dashing out.)
I strongly recommend you never use the dash out and instead simply deal the close-ranged damage. Though it’s really fun to have such a short cooldown on a dash out and admittedly it feels like it is an essential element to the vibe of Red Mage, the reality is that it’s becoming more and more common for battlefields to have walls that instakill you or battlefields you can fall off of.
I cannot tell you how many Red Mages I’ve seen try to escape an AoE with their backflip only to die to the wall or void. This might be a me problem, but I would recommend you avoid using it even if it is safe so that you don’t build up muscle memory of using it and leave that portion of Muscle Memory for your “this is absolutely inescapable and I need to do this now.”
That being said, as I mentioned before, these skills are actually used to maximize your damage and you tend to plan your cooldowns around using all four charges during your melee combo when you have buffs up. You will get very used to knowing how many charges you can use during the unbuffed portion of your rotation, especially if you have messed up your rotation and you will learn to min-max how to use Swiftcast and Acceleration (which works somewhat like Swiftcast, but guarantees a proc on either your Black or White Mana Spell).
Speaking of, the Red Mage requires a bit more attention to procs than other jobs as a great deal of your damage comes from these spells.
They have a shorter cooldown, deal more damage than Jolt (the Spell you use when you don’t have a proc) and due to the fact that all of the different spell tiers have differing amounts of mana, you’ll need to prepare which mana you try to acquire next.
You have a very decent amount of lee-way when it comes to balancing your mana, being 30, but as soon as they become out of balance it will be much more difficult to get them back in check. The issue with this is that your goal is to build yourself up to 50 or more on each side as often as possible so you can hop into your Melee rotation as often as possible as this is your main source of damage.
When your mana is too far out of balance (above 30 in between on either side), you receive much less Black or White Mana and the only way to recover from this is to simply spam the same mana over and over again. There used to be easier ways of fixing this, but that is no longer true. That being said, it tends to very rarely happen if you are paying attention and I strongly recommend you put your gauge somewhere in the middle of your screen so you can quickly look at it while avoiding AoEs.
The Red Mage’s mobility is quite uncanny as of course, you have your Dual Cast which will allow you to utilize the slide that every caster has in tandem with a spell immediately afterward, but you also have a spell that consumes very little Black and White Mana that you can spam while on the run and you can also try to align your Melee Rotation for quick paced moments as long as it doesn’t cause a massive loss of DPS.
Not to mention, you have a decent amount of OGCDs you use in both your portions of the rotation and you utilize Swiftcast for damage instead of for safety to maximize damage.
With all this being said, the Red Mage is not a phenomenal damage dealer and though it’s only a 5% difference really than Black Mage, many players will only prog with Red Mage and then will switch to a higher damage dealer. This is not a necessity, however, it is something players will do to min-max speed.
This is especially true for Red Mage as the main team utility is the raising, but otherwise, the team buffs and shield you provide your team can get from other jobs that deal more damage so if you don’t need the res, you focus on more damage. I also guess it’s worth mentioning here that while you do have a heal on your kit you would never really use it in proper content such as Dungeons or Raids unless it’s an absolute emergency and your healer is not pulling their weight, but this heal comes in mega handy for niche content such as Deep Dungeons or solo content. The heal is relatively powerful, however, it consumes quite a bit of mana and will obviously result in some DPS loss. That being said, if you ever need to raise someone while no mob is targetable you can simply heal yourself or a team member for Dual Cast and then raise, making it one of the most efficient ways to regularly raise.
I would probably recommend going from Red Mage to Machinist or Red Mage to Black Mage (if you have the Black Mage down), but it’s probably less of a priority to go to another support-style job as the only really similar one is Summoner which only has a 1% difference in damage. Now, it’s always good to remember that a job you play well will always deal more damage than a job you are new to or haven’t fought with during a particular battle. With that also being said, damage is not always the most important thing and I, for example, will always play Red Mage when completing an Alliance Raid because it always has the possibility of a wipe and if I’m not tanking a Raid Roullete I’ll often go as Red Mage as this tends to be the content where many players forget or don’t know mechanics.
Essentially if I am doing content with people I know I will go full damage and if I am completing content with strangers I will take the safest option.
As for the complexity of rotation and speed it’s like I said earlier, once you get used to the Red Mage you’ve got it, the hard thing is starting for sure.
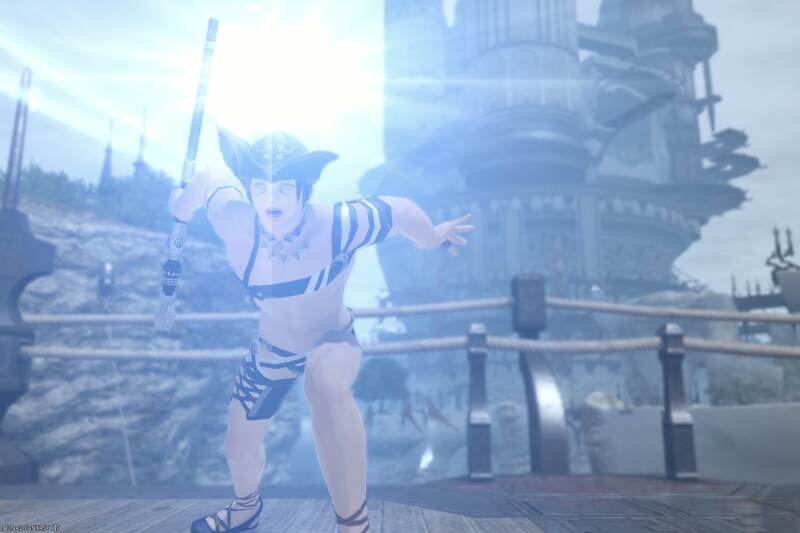
BLUE MAGE (AVAILABLE AT 50)
It’s a bit weird to be adding the Blue Mage to this list as it is a limited job and you can only do select pieces of content with it, but the amount of players who are engaging with this content are growing every day and I can’t see that stopping anytime soon.
The Blue Mage is by far the most unique job in the game as players will get to pick and choose what spells they want to use on it essentially making a rotation non-existent, with that being said a player will need to develop an eye and a mind for what spells go together and the decisions will heavily change based on what content you are completing.
You see, Blue Mages are allowed to enter all forms of content and are limited to not being allowed to join Roulettes, side zones or turn-in quests. With that being said, you can easily start a party finder for any Dungeon, Trial or Alliance Raid as a Blue Mage and quite frankly every server will have players who want to do this for their weekly logs.
The Blue Mage is one of the most powerful jobs in the game when it comes to overworld content. It has insanely high AoE damage, it has ridiculous Heals, it can raise, you can somewhat tank, and because you’re in full control of what spells you put on your hotbar you can essentially just put Buffs, DoTs, a series of OGCDs and one spell that you spam in between. Though, this is where the problem somewhat lies.
You do not get any spells simply for levelling up the Blue Mage and you sometimes find players who are at max level and only have the first spell you learn joining in on content to mooch off the rewards. As annoying as that is, the sad thing is that they are robbing themselves of the absolute best job to have in the game.
You see, the Blue Mage unlocks a great deal of side content that can both help you farm a decent amount of Gil, but more importantly Allied Seals, not to mention Poetics which are extremely useful for getting your side job’s BIS for cheap especially as there are very few efficient ways of farming this resource. I’ll do separate guides for why you’d want to farm either of these resources soon.
Otherwise, your best use for the Blue Mage is going to be for speedily getting through FATEs. While this is not going to be stupendously faster, it is significant enough especially on boss FATEs and will make tasks such as your Bicolour Gemstone Farming go smoother. Of course this will be in a less ideal area as the level for Blue Mage is typically at least 10 levels behind, but given the fact that you’ll have a BIS from a higher expansion, this will help you clear through these FATEs much faster.
I will admit, this may be most worth it if you have a group of Blue Mages with decent spells, but it still opens your options.
Levelling up a Blue Mage is terribly easy as it gains much more experience from simply killing overworld mobs. Getting it to 80 is an accomplishment you can do in a single day with very little effort, though you will need the help of a friend. I’m not going to dive too deep into this because I already wrote a guide on how to level up your Blue Mage efficiently you can read here.
Otherwise, the only other place Blue Mages excel is in Dungeons and this is simply because you can learn a spell that will freeze most trash mobs and another that will one-shot any mobs that are frozen. It makes mob packs ridiculously easy and can potentially open the capability of making Dungeons a main source of Gil. Unfortunately, this is only useful for mob packs, but there are a few Bosses that can be “Tail Screwed” which is a spell that has a chance to lower an enemy to 1 HP. This chance is extremely slim and in my opinion, isn’t worth your time spamming.
Leave a Reply