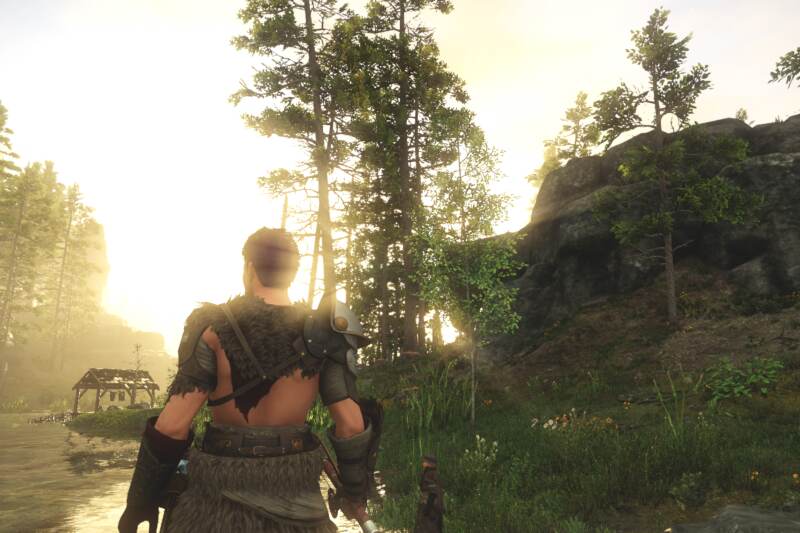
New World is filled with a great variety of content, from gathering to questing to combat, a player can sink thousands of hours into the game without a single sweat.
Though I would consider myself still relatively new to the game, being that I’ve only played for a few months, I have put in hundreds of hours into playing and researching all the elements of the game and have quickly become addicted.
Though the majority of my Twitch Community knows me for being an FFXIV enthusiast, I recently did the jump into New World because my family was playing it and I missed playing video games with them. Little did I know that I would get so into the game to the point where I was writing guides and cancelling games I was planning to play on stream to expose my community to the delight that is New World.
Now, New World, much like many other MMOs has so many paths a player can take in order to be “successful” and what one player’s “End Game” content may be will not be the same for another player.
At first, I thought my end game was simply going to be finishing the main story, completing all the dungeons and becoming the main crafter on the server, but I actually found myself getting very addicted to running Mutations.
It’s odd because when I play Final Fantasy 14, I have no interest in completing Savage Raids (which is the damage focussed “end game content” if you haven’t played FFXIV) but in New World I love clearing all of the Mutations and find myself struggling to focus on work because of how excited I am to run Mutations in the evenings.
Mutations can be quite challenging as not only will mobs deal more damage to play, but particular mobs will have new mechanics to them that will make it much more difficult for a player to survive successfully.
The following guide will take you through everything you need to know about Mutations, including tips on what Weapons you will want to use in order to clear them as swiftly as possible.
Now, the seriousness you put into Mutations is going to depend on the player as realistically Mutations aren’t the only way to get the highest level Gear in the game, however, it is the most efficient.
Let’s get to talking!
WHAT IS A MUTATION EXPEDITION?
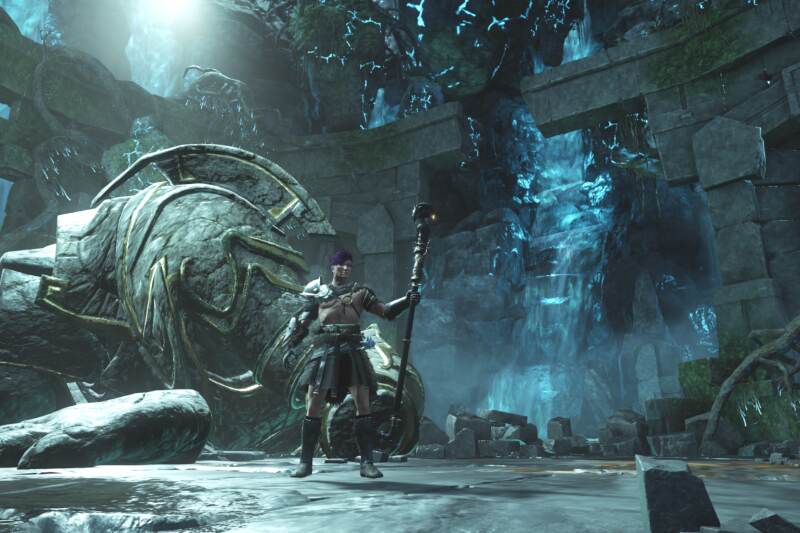
A Mutation Expedition is essentially a regular expedition (Dungeon) with modifiers that make it more difficult.
Each week there will be two random Dungeons that become Mutated and players can use these to farm special loot that is only available during the Mutation or merely have a higher chance to get Legendary Gear.
Not only are there modifiers on Mutations, but players will be speeding against the clock in order to complete the Dungeon as fast as they can while killing a set number of mobs and attempting to Harvest all of the resources available in the Dungeon. Due to the Harvesting element of Mutations, it’s going to be extremely important that you have high Gear Score Tools as well as all of your Trade Skills up to 150 (at least.) I would strongly recommend trying to get all of your Trade Skills to level 200 as this will make it much easier to track where resources are while in the Dungeon.
HOW DO I ACCESS A MUTATED EXPEDITION?
In order to access a Mutated Expedition players must first complete the normal version of the Dungeon that has Mutated. Players can access the Mutated Expedition by either going to the physical entrance of the Dungeon in question or by locating it on the map and hitting “Find Group.”
When players have entered the list for the Dungeon they will be able to select what content they want to complete including running the non-mutated version or any of the Mutations you have unlocked.
Though I will cover more specifically on how to unlock the higher level Mutations, I do want to note here that any Mutations you have unlocked in a previous week will remain unlocked from then on. So, for those of you who always want a chance at the best rewards, you will be able to by simply queuing for the highest Mutation you have reached every week.
It must also be noted that players can simply be invited into a Mutation of higher difficulty if they have not completed it. Players can also join lobbies for later Mutations that they have not completed, however, cannot create a lobby for them.
Successfully completing a higher-tier Mutation will unlock one of the previous difficulties, slowly building up your ability to open a lobby for them.
WHAT ARE THE DIFFERENT LEVELS OF MUTATIONS AND WHAT DO THEY DO FOR ME?
Levels of Mutations will essentially dictate how hard the content will be, including how many modifiers are on the mobs, how hard they hit and how much health they have.
The different Mutation levels are somewhat locked behind Gear Score as if players do not hit the recommended Gear Score they will take more damage. Luckily for players, the disparity between Gear Score between Mutation Levels aren’t that far apart, though due to the fact that Gearscore above 600 requires Umbral Shards, it might take a while to farm out.
Since this topic isn’t about Umbral Shards I won’t go far in depth with it, but I would strongly recommend that players don’t just level up random Gear to get into the Mutations they want to join. Please think about the Gear you are wearing in the Mutation as the later stages get pretty rough and while the community (at least on my server) isn’t very toxic or hovery over what Gear you use, I can say that it is very frustrating when players attempt to be carried without putting in much effort even in fairly low-level Mutations. All this being said only to say, when you have a good piece of Legendary Gear that’s either good for most content or is specific for the Dungeon, start using Umbral Shards. Otherwise don’t waste your time on Epic or lower and definitely don’t queue for a Mutation if the Gear you have has perks that do not benefit you.
I understand that the above makes me sound “elitist” or “gatekeepy” but I will cover why this is actually very important when I get to the scoring element of the article. Mutations require focus and while they become like clockwork for people after running them a few times, making mistakes will affect the whole team and playing poorly can hold your whole team down as you will need certain scores to unlock the next Mutation.
Players should note that all Mutated Expeditions can only be completed at level 60 and will only have level 66 Mobs in them, so expect the difficulty of an Elite Overworld area. This includes even Dungeons that are available to players before level 60, meaning even the level 30 ones become level 60.
The following is the information regarding Gear Score and Difficulty in the levels of Mutations:
MUTATION 1
Difficulty: Normal
Gearscore: 602
MUTATION 2
Difficulty: Normal
Gear Score: 604
MUTATION 3
Difficulty: Intermediate
Gear Score: 606
MUTATION 4
Difficulty: Intermediate
Gear Score: 608
MUTATION 5
Difficulty: Intermediate
Gear Score: 610
MUTATION 6
Difficulty: Hard
Gear Score: 613
MUTATION 7
Difficulty: Hard
Gear Score: 616
MUTATION 8
Difficulty: Hard
Gear Score: 619
MUTATION 9
Difficulty: Elite
Gear Score: 622
MUTATION 10
Difficulty: Elite
Gear Score: 625
As players can see there are four different types of Mutation Expeditions. Normal Mutation Expeditions will only have a Mutation Effect, Intermediate has a Mutation Effect and Promotion while Hard & Elite have Mutation Effects, Promotions and Curses.
WHAT ARE THE MUTATION EFFECTS, PROMOTIONS AND CURSES IN MUTATIONS?
There are a number of Mutation Effects, Promotions and Curses in Mutations and to my surprise these all change from week to week. At first, I was under the assumption that every Dungeon would always have the same effects each time they Mutated, but I’m glad that’s not the case as I’m a Fire Staff main and… well… I had three weeks in a row where Fire was 50% less effective.
As these effects change from week to week players are encouraged to have multiple types of Weapons and Gear to help ensure a successful run.
IS THERE A DAILY LIMIT ON HOW MANY MUTATIONS I CAN RUN?
Actually, there is a weekly limit on how many Mutations you can run and that is a total of 25 per week split across the two Dungeons. It doesn’t matter if you clear the Mutation successfully or what score you get, which is why it’s going to be important you are always prepared for a Mutation expedition.
If it is late in the week I would strongly recommend finishing off your Mutations at a lower level so you can guarantee a higher reward, although you will typically be at the mercy of whatever groups are available unless you are a tank. It will always be better to get a premade group set up, however, this isn’t always a possibility unless you have some real-life friends you can rely on.
HOW DOES SCORING WORK IN MUTATION EXPEDITIONS?
Mutation Expeditions are broken down by the following metrics:
Clear Time
Normal Enemies Killed
Named Enemies Killed
Harvestables acquired (it is uncertain if skinning counts towards this, though I still recommend always doing it)
Team Wipes (this will reduce the points you get)
Respawns (being resurrected by another player does not count, however, if you are killed twice too quickly you will begin losing points for your team.)
Players will also have a multiplier based on how fast they complete the Dungeon, though if they wipe as a team, this will reduce the multiplier meaning that certain tiers will no longer be accessible,
Players will want to get the following amount of points:
20,000 points for Bronze
25,000 – 49,999 points for Silver
50,000 points for Gold
WHAT ARE THE REWARDS FOR COMPLETING A MUTATION RUN SUCCESSFULLY?
If players are successful in completing a Mutation run they will receive a significant amount of Gear at the end of the run. The amount of Gear you get depends on the level of the Mutation and higher Mutations have a higher chance of dropping higher Gear Score loot.
As this is the case, most players will be hoping to run Mutation 10 repeatedly until they are content or have maxed out their Mutation limit.
Players will also receive a cache from completing a Mutated Expedition that is based on what score they get, Bronze, Silver or Gold. The cache contains Umbral Shards and Mutator Materia.
While obviously, Umbral Shards are going to be the more important resource to collect, Mutator Materia can be very useful for players who weren’t lucky enough to get certain Named Drops in Dungeons they can still craft them at Gearscore 600 or 605 depending on what the Named Drop is.
The number of Umbral Shards you will get in the caches are as follows:
MUTATION 1
Bronze: 200
Silver: 400
Gold: 600
MUTATION 2
Bronze: 400
Silver: 600
Gold: 800
MUTATION 3
Bronze: 600
Silver: 800
Gold: 1000
MUTATION 4
Bronze: 800
Silver: 1100
Gold: 1400
MUTATION 5
Bronze: 1200
Silver: 1500
Gold: 1800
MUTATION 6
Bronze: 1600
Silver: 2000
Gold: 2400
MUTATION 7
Bronze: 2000
Silver: 2600
Gold: 3000
MUTATION 8
Bronze: 2600
Silver: 3200
Gold: 3800
MUTATION 9
Bronze: 3200
Silver: 4000
Gold: 4800
MUTATION 10
Bronze: 4000
Silver: 5000
Gold: 6000
SUGGESTIONS FOR GEAR & OTHER BONUSES
As mentioned earlier, when you hit a certain level of Mutations (I would say around level 5), you will really be wanting to focus on min-maxing your Gear.
In the early stages, players can simply do this with Gems and basic combat trophies, though as a player progresses through Mutations they are going to need to switch their focus onto min-maxing the perks on their Gear for each Dungeon.
At first, players are going to want to focus on having Gear that protects them and later on when a player learns to dodge the majority of the damage, players will want to switch over to damage focussed Gear as bursting down mobs becomes more a priority for speedy runs.
The following are some things to keep in mind:
WEAPON PERKS
I would strongly recommend that players always have a perk on their Weapon that has to do with their main ability as it will provide a massive increase in damage to that ability. Admittedly, there are some really shit perks for abilities, such as the one for Flamethrower on the Fire Staff, so sometimes you’ll have to select the second most used move.
For example, my Fireball spell will deal 56% additional damage with Empowering Fireball and since I have really good cooldowns and aim reasonably well, I can deal a ton more damage in bursts.
It should be noted, you want these perks on your Weapons as they will receive a higher buff than if it was on Gear. Also note that these perks do not stack, while there are some stats that stack they are limited and I will write a larger article on this in the future as I play-test them.
A perk I think many people miss is the Attunement perks. At first, I thought it was a good idea to simply have Critical Hit and Critical Chance, and while this is still a pretty good idea, sometimes getting a buff on specific things is more useful due to less chance.
Players should look into getting a Weapon for each of the dungeons as long as the mobs are weak to them by 30%. I mean, if they are weak to them by 15% it can still be useful, but it’s not going to be as useful.
There are currently 4 types of Attunement in the game being Abyssal Attunement (Void damage), Arboreal Attunement (Nature) Flame Attunement (Fire) and Frost Attunement (Ice).
Each of these will cause attacks to deal an additional 18% weapon damage as the element in question, though it does not trigger off of persistent damage or damage over time. The cooldown is 1 second.
There is a debate on whether this perk works off of spells that deal tick damage such as Ice Storm or Flamethrower and while this is traditionally looked at as “persistent damage” in most games, it seems like the cooldown allows for these abilities to deal the extra damage on each hit.
That being said, this modifier is best on your Main Weapon as you’ll be dealing more damage with auto-attacks, but the bonus you get on your quick abilities is extremely useful.
ARMOR PERKS
Armor perks are going particular to the type of Dungeon you are trying to complete. If players are wanting to be as safe as possible they will want to grab Gear that is specific to each Dungeon.
For example, players will want 1 or 2 stats to be defensive (such as reduced damage from Corrupted enemies or Corruption Resist.)
The best Wards are the following:
Corrupted Ward
Angry Earth Ward
Lost Ward
Ancient Ward
Some Perks to keep in mind include:
Conditioning. Much like Attunement there are 4 different Conditioning that will protect you from the main elements being Flame Conditioning (Fire), Frost Conditioning (Ice), Arboreal Conditioning (Nature), and Abyssal Conditioning (Void).
While these perks are very powerful specifically for Mutations, I have to admit it gets kind of annoying to try to min-max this as it would require you to have 4 of the same Weapon for each dungeon unless you choose to regem all of your Gear every time the week changes.
I would say these perks are going to be the most end game for players as they will either want to craft essentially 16 of the same Armor.
I will cover other perks players can use in the meantime in another post as players will not want to use those perks in Mutations to optimize their time in the Overworld.
CONSUMABLES
There are two main Consumables I would strongly recommend that player focus on when playing New World and these are Potions and Foods.
There are potions for each type of circumstance in New World and while players will be familiar with Healing, Mana and Regeneration Potions players should begin looking into Coating and Warding Potions.
There is a Coating Potion for each type of mob, allowing players to deal extra damage to these specific mobs. While at first, I wasn’t using them, since the first Mutation I really grinded was The Tempest which my group kept clearing in 35 minutes up to Mutation 5 (The Tempest requires you to finish it in under an hour), we all needed coating from the moment we started Genesis grinds as you need to finish it in under 35 minutes and for some reason, we just kept clearing it in a bit longer.
Now, players can also use Warding Potions, though I personally find that they’re not the greatest. My main reason for this is that Coatings will last for 35 minutes, while Warding only lasts for 30 seconds. Admittedly, if Warding lasted for longer it would be overpowered as it greatly reduces the amount of damage you take from each type of enemy and having it for a whole dungeon or for more than the hits each one provides would nullify the difficulty of the Dungeon. I would strongly recommend having Warding in your inventory and applying it anytime you enter a large group of mobs that may jump on you.
Warding can be the factor that carries players through Mutation 10s, especially if you don’t have the best in slots yet. While I would strongly recommend that everyone has Warding Potions, I think are by far the best for healers, as they will be the ones who pull the most aggro and will require other players to peel enemies off of them.
As for food, there are a great variety of options, including one for each type of Attribute. At first, players may want to purchase or cook food that provides them with more Constitution, though later on they will want to focus on having food that raises their main damage Attribute so they can deal the most damage.
Admittedly, if you’re in a pre-made group with a Healer that understands what mechanics you tend to fail at or understands the fights well enough you may never need Constitution food, so get to crafting or purchasing that damage food.
Finally, players may want to use Gemstone Dust and Incense to reduce the amount of damage they take, Gemstone Dust being for Elemental Damage, working similarly to Warding. Incense will essentially reduce the amount of damage a player takes from all sides no matter what the Mutation modifiers or Dungeon.
WHAT ARE THE VARIOUS MUTATIONS?
The following section will cover all the different Mutation elements that take place in New World. Reminder that these will rotate weekly and different factors may show up together, raising the difficulty of the Mutation due to differences in elements.
ELEMENTAL MUTATIONS
Elemental Mutations are the factors that are the first addition to all Mutations and these are unavoidable. One will be chosen at random and commonly the later additions will have the same elemental factor as these, though this is not always the case.
ETERNAL
Eternal is the Void form of Elemental Mutation. During this players will want to avoid any weapons that deal Void Damage and will want to avoid using the Amythyst Gems.
Eternal adds the following modifiers:
Creeping: On death enemies will cast a spell granting other enemies in the area with Void Empower.
Oblivion: Enemies apply greater Leech on hit, dealing Void damage and healing enemies over time.
Void Resist: Enemies have greater Void Absorption.
Abyssal: Enemies deal a percentage of all damage as Void Damage.
Paranoid: Enemies apply building stacks of Paranoia
When Eternal is active players have a higher chance of gaining items with the following perks:
Abyssal Attunement
Abyssal Conditioning
HELLFIRE
Hellfire is my least favourite Elemental Mutation, not only because it’s horrible for those who run the Fire Staff, but also because the modifiers are just so annoying.
In general, you will want to avoid using anything with Fire Damage, like the Fire Staff and you will not want to use any Ruby Gems.
Hellfire adds the following Modifiers:
Explosive: Enemies explode upon death, dealing fire damage in a small radius.
Firey: Enemies apply Burn on hit, dealing Fire damage over time.
Fire Resist: Enemies have Fire Absorption.
Ignited: Enemies deal a percentage of all damage as Fire Damage.
Enflamed: Enemies cast a Burn Zone on attacking players, dealing Fire damage over time.
OVERGROWN
Overgrown is the Nature version of Mutations where players will deal with effects that impede their ability to heal and the chance to be rooted.
I cannot say that Overgrown is the absolute worst Mutation, though I am not a healer, so I’m not the one suffering.
During Overgrown players will want to avoid dealing Nature Damage and will not want to use Gems that provide you with this element.
Overgrown comes with the following Modifiers:
Compost: Enemies leave a zone upon death that heals other enemies in the area for 3% health per second until it expires, or they are knocked out.
Bramble: Enemies deal Nature damage upon being hit.
Nature Resist: Enemies absorb Nature Damage.
Toxic: Enemies periodically spawn poison entities that deal nature damage over time, locking on to a single player. If the circle reaches the player it will also root that target or anyone in the area. (Run ho!)
Arboreal: Enemies deal a portion of their damage as Nature Damage.
When in a dungeon with the Mutator Overgrown players will have a chance to gain an item with the following Perks:
Arboreal Attunement
Arboreal Conditioning
ICEBOUND
Icebound is the Ice version of the Mutations, unfortunately, I cannot find the breakdown for these as they’re not available online and there are no Dungeons currently that have it, but I will update this post during a week that contains it.
Obviously, players want to avoid all Ice Damage or Gems that provide you with the Ice element.
PROMOTION MUTATIONS
When players get to the second tier of Mutations they will gain the addition of Promotion Mutators. Admittedly, these don’t add as many modifiers as the Elemental Mutations, but they can be equally as deadly.
These modifiers tend to buff enemies.
Some of these are more common with specific Elemental Mutations, though there is never a 100% guarantee that you will always get the same two paired up with each other.
OPPRESSIVE
Oppressive is the FIre Promotion and tends to show up with Hellfire, though this week it’s showing up with Eternal.
Enemies will have the following buffs with Oppressive:
Mage Hunter: Enemies drain mana upon being hit.
Suppressor: Enemies cast a silent zone upon attacking players.
SAVAGE
Savage is the Nature Promotion and tends to show up with Overgrown.
WIth Savage players will have the chance to have the following buffs:
Festering: Enemies apply a stacking Disease on hit, reducing healing by a percentage per stack.
Slicer: Enemies cast slicing beans that deal Void damage when touched.
INDOMITABLE
I will write about this when it is in rotation again.
CURSE
Curses are the final step of each Mutation, only being added into the most difficult Mutations.
While Curses don’t add many modifiers, they tend to be the worst part of Mutations and “ruin everything.”
Curses always impact the player specifically and tend to be the worst for healers as it will make it much more difficult for them to keep their team up.
FRENZIED
Frenzied is the Void Curse and will provide the following Debuffs:
Unstable: When dodging, players are inflicted by Void damage over time, losing a percentage of their maximum health every second. This can stack up to 3 times and cannot be cleansed.
Overcharged: If unstable expires with 3 stacks active it will drop a 3m radius zone that lasts for 15 seconds. If players are inside of this, they will lose a large portion of their max health every second. If players enter this circle they will consume all stacks of unstable and will take a large portion of their max health as damage on top of this. This effect also cannot be cleansed.
CENSORED
Censored is the Nature version of curses and impedes the amount of damage a player can deal.
The following are the debuffs applied during Censored:
Blowback Nature: Using an ability will deplete a global affliction. When the affliction is depleted a zone is created that silences all players in the area. After the affliction expires, the zone will detonate and deal 65% of a player’s max health as nature damage to all players in the radius. This cannot be cleansed by any means.
Truncated: When silent zones are active, all players lose natural mana regen. Sanding in the Silent Zone will grant 25 mana per 0.75 seconds. This cannot be cleansed by any means.
DESICCATED
Desiccated is the Fire curse that most players complain about. Admittedly, it is very controllable if players are all on the same page and work together efficiently, but it’s one of the moments where players will probably want to be in a voice call for or using in-game voice.
The following are the debuffs that come with Desiccated:
Combustible Fire: Periodically selects the player with the lowest percent health and after a few seconds the player will cast a chain of fire that damages nearby players and AI.
Shrivelled Fire: When selecting the lowest percentage health player, all other players gain Shrivelled Weaken, requiring all players to head to the player who is selected in order to remove it.
Leave a Reply